Add a custom domain for your virtual tour
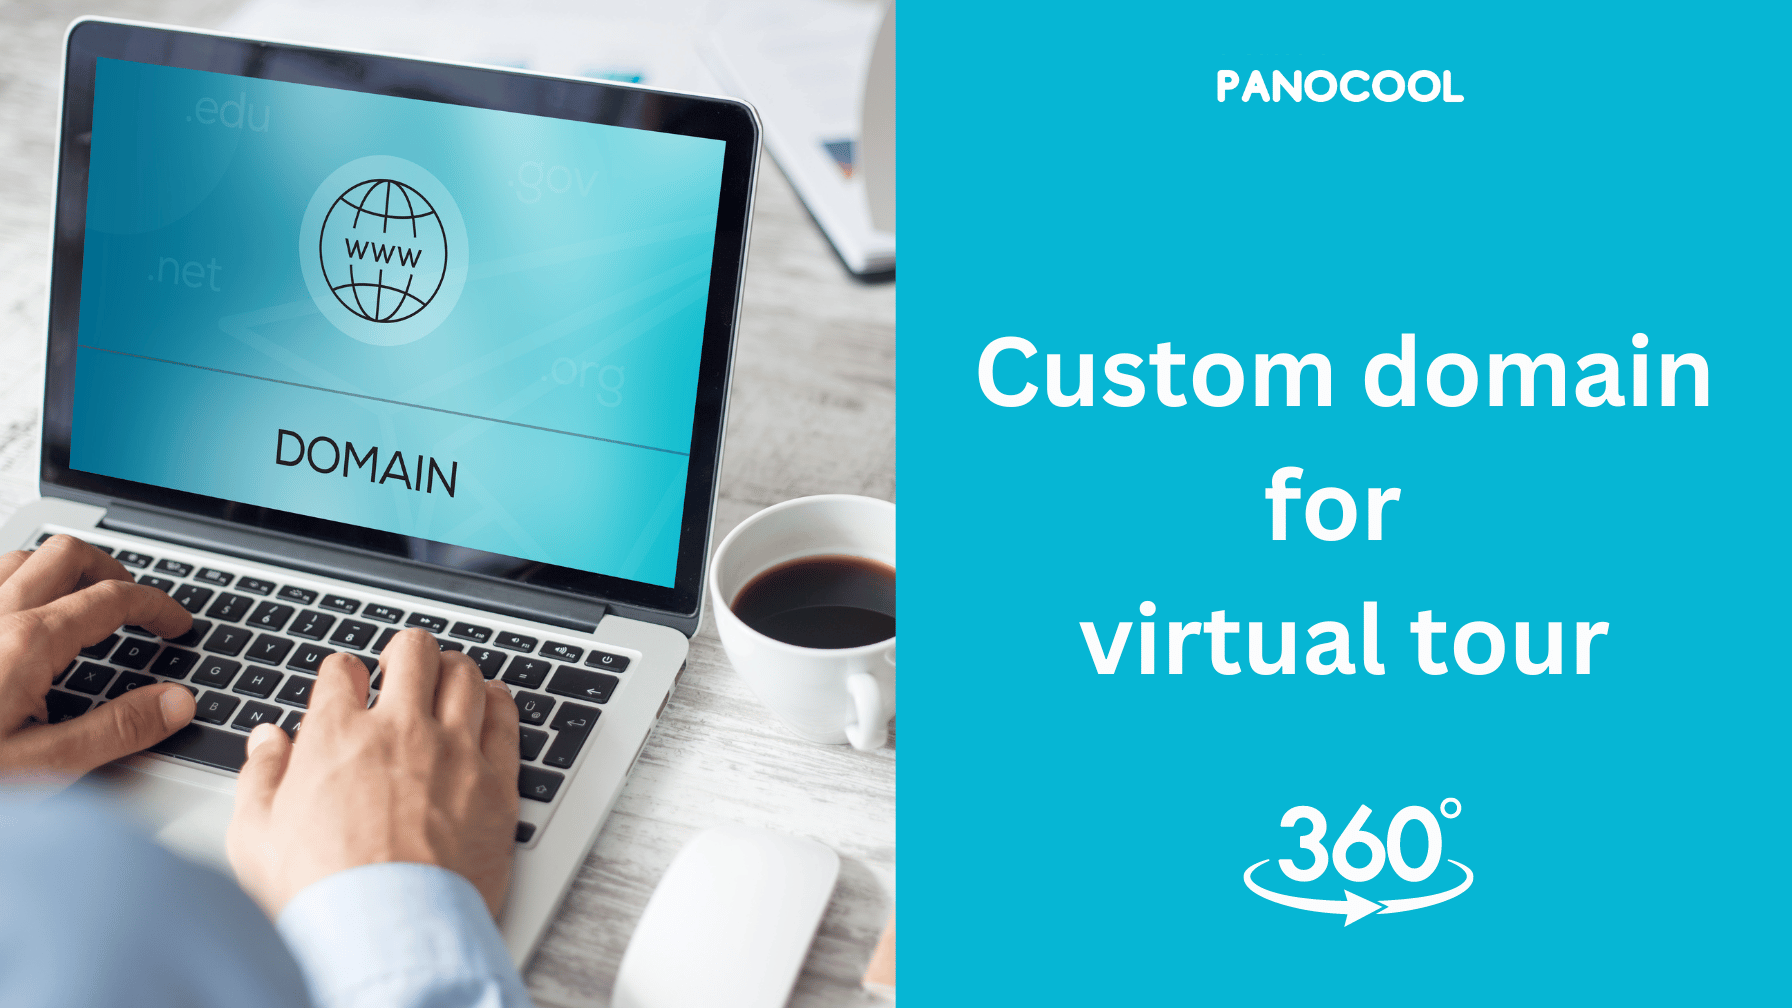
Using a custom domain with PanoCool enhances your brand, improves user experience, and boosts search visibility. It’s a smart investment for creating impressive virtual tours. This is a quick instructions of how to add your custom domain to your virtual tour on PanoCool.
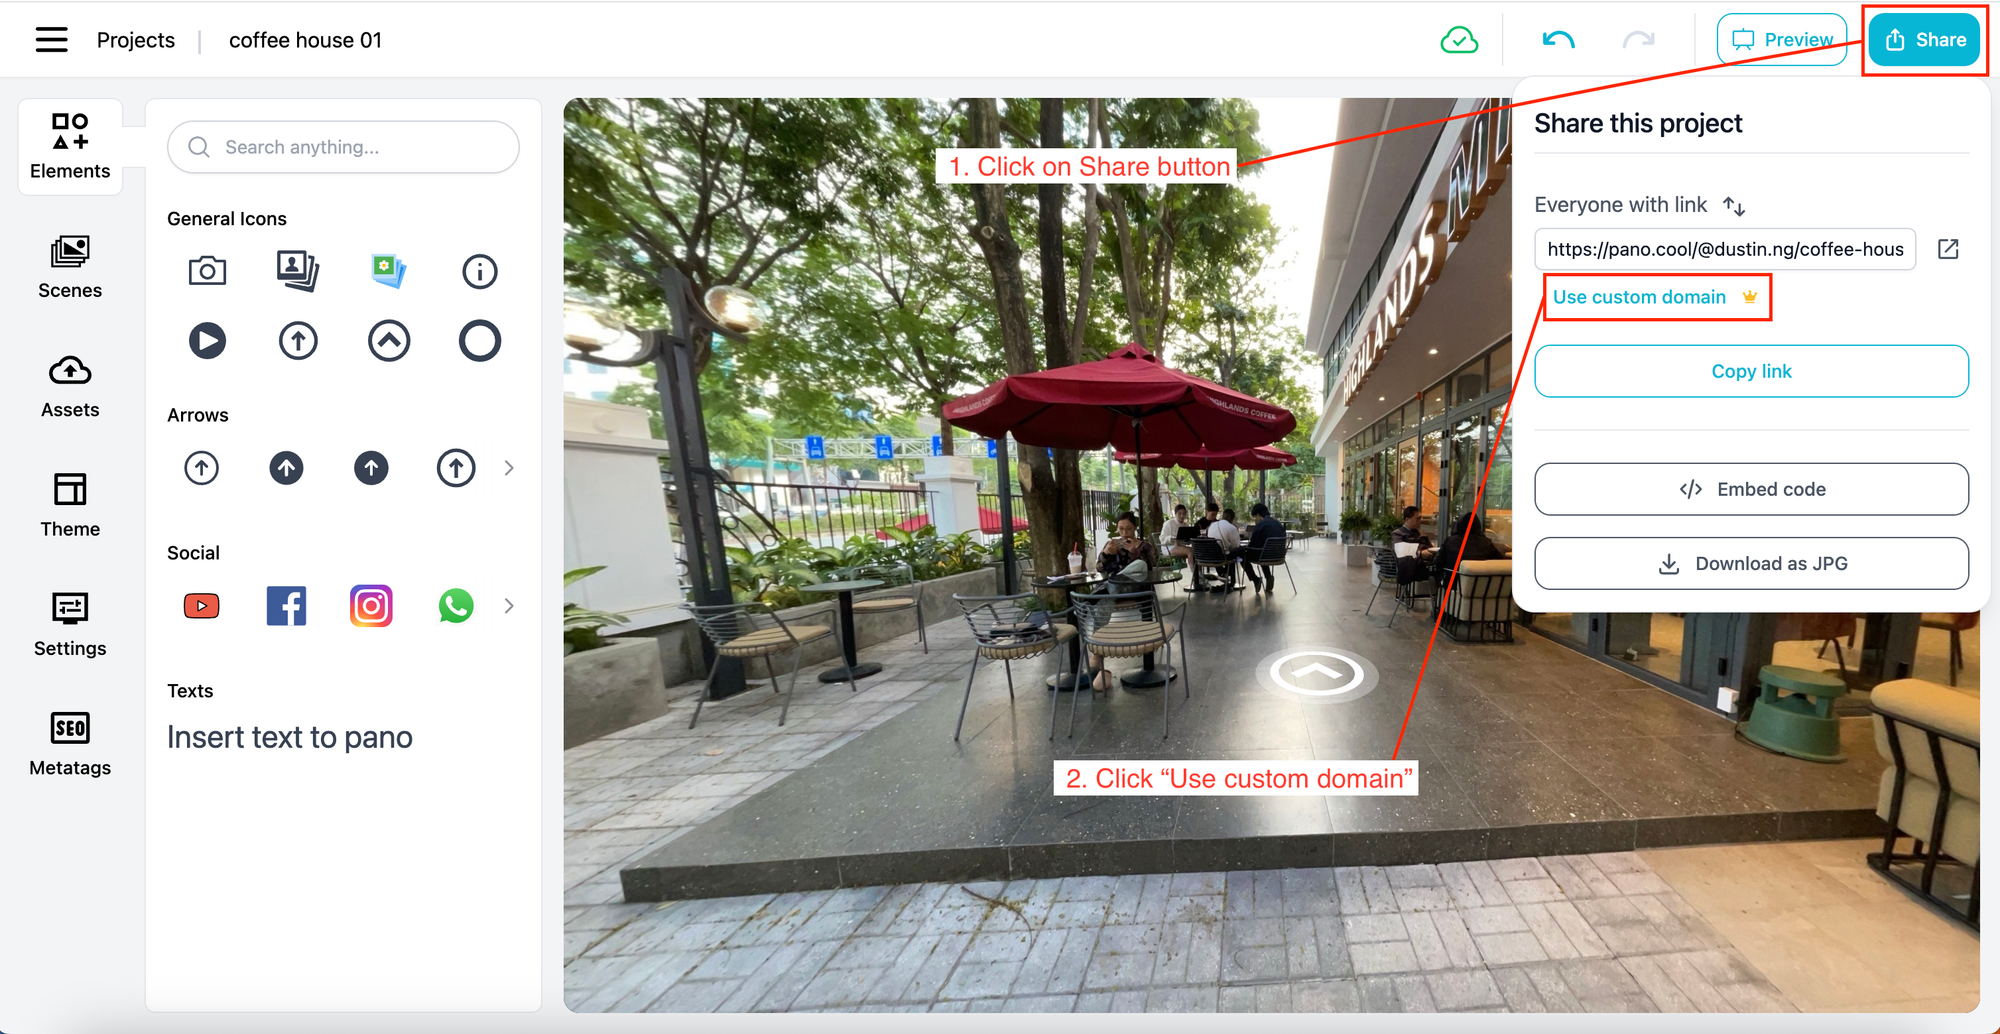
Go to your project, open editor mode, on the top right of screen, click on "Share" button.
After the Share popup is showing, click "Use custom domain".
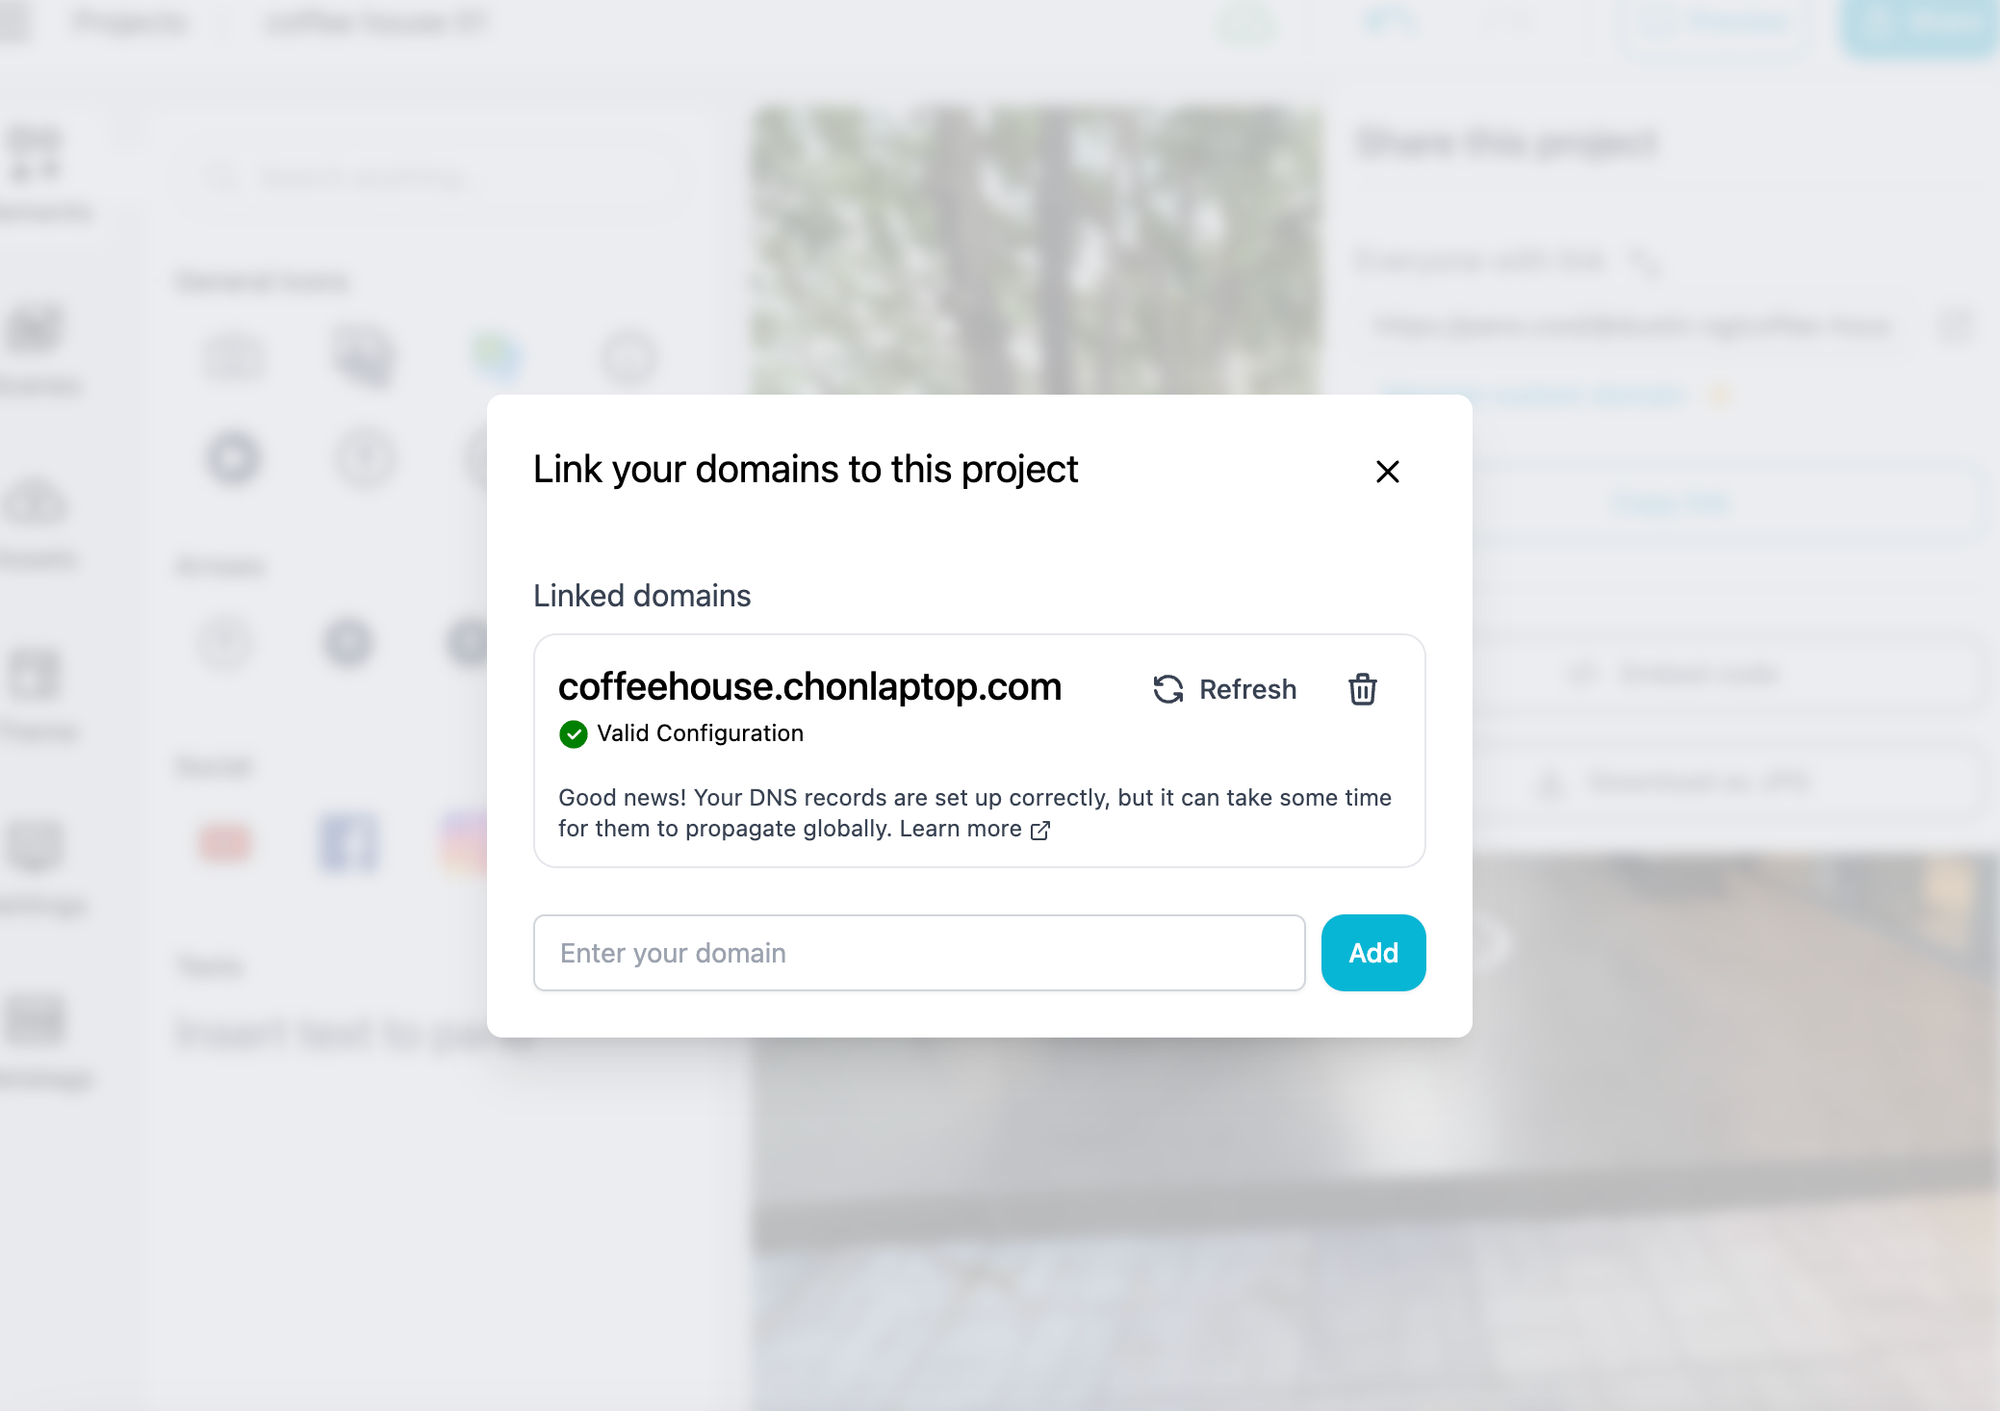
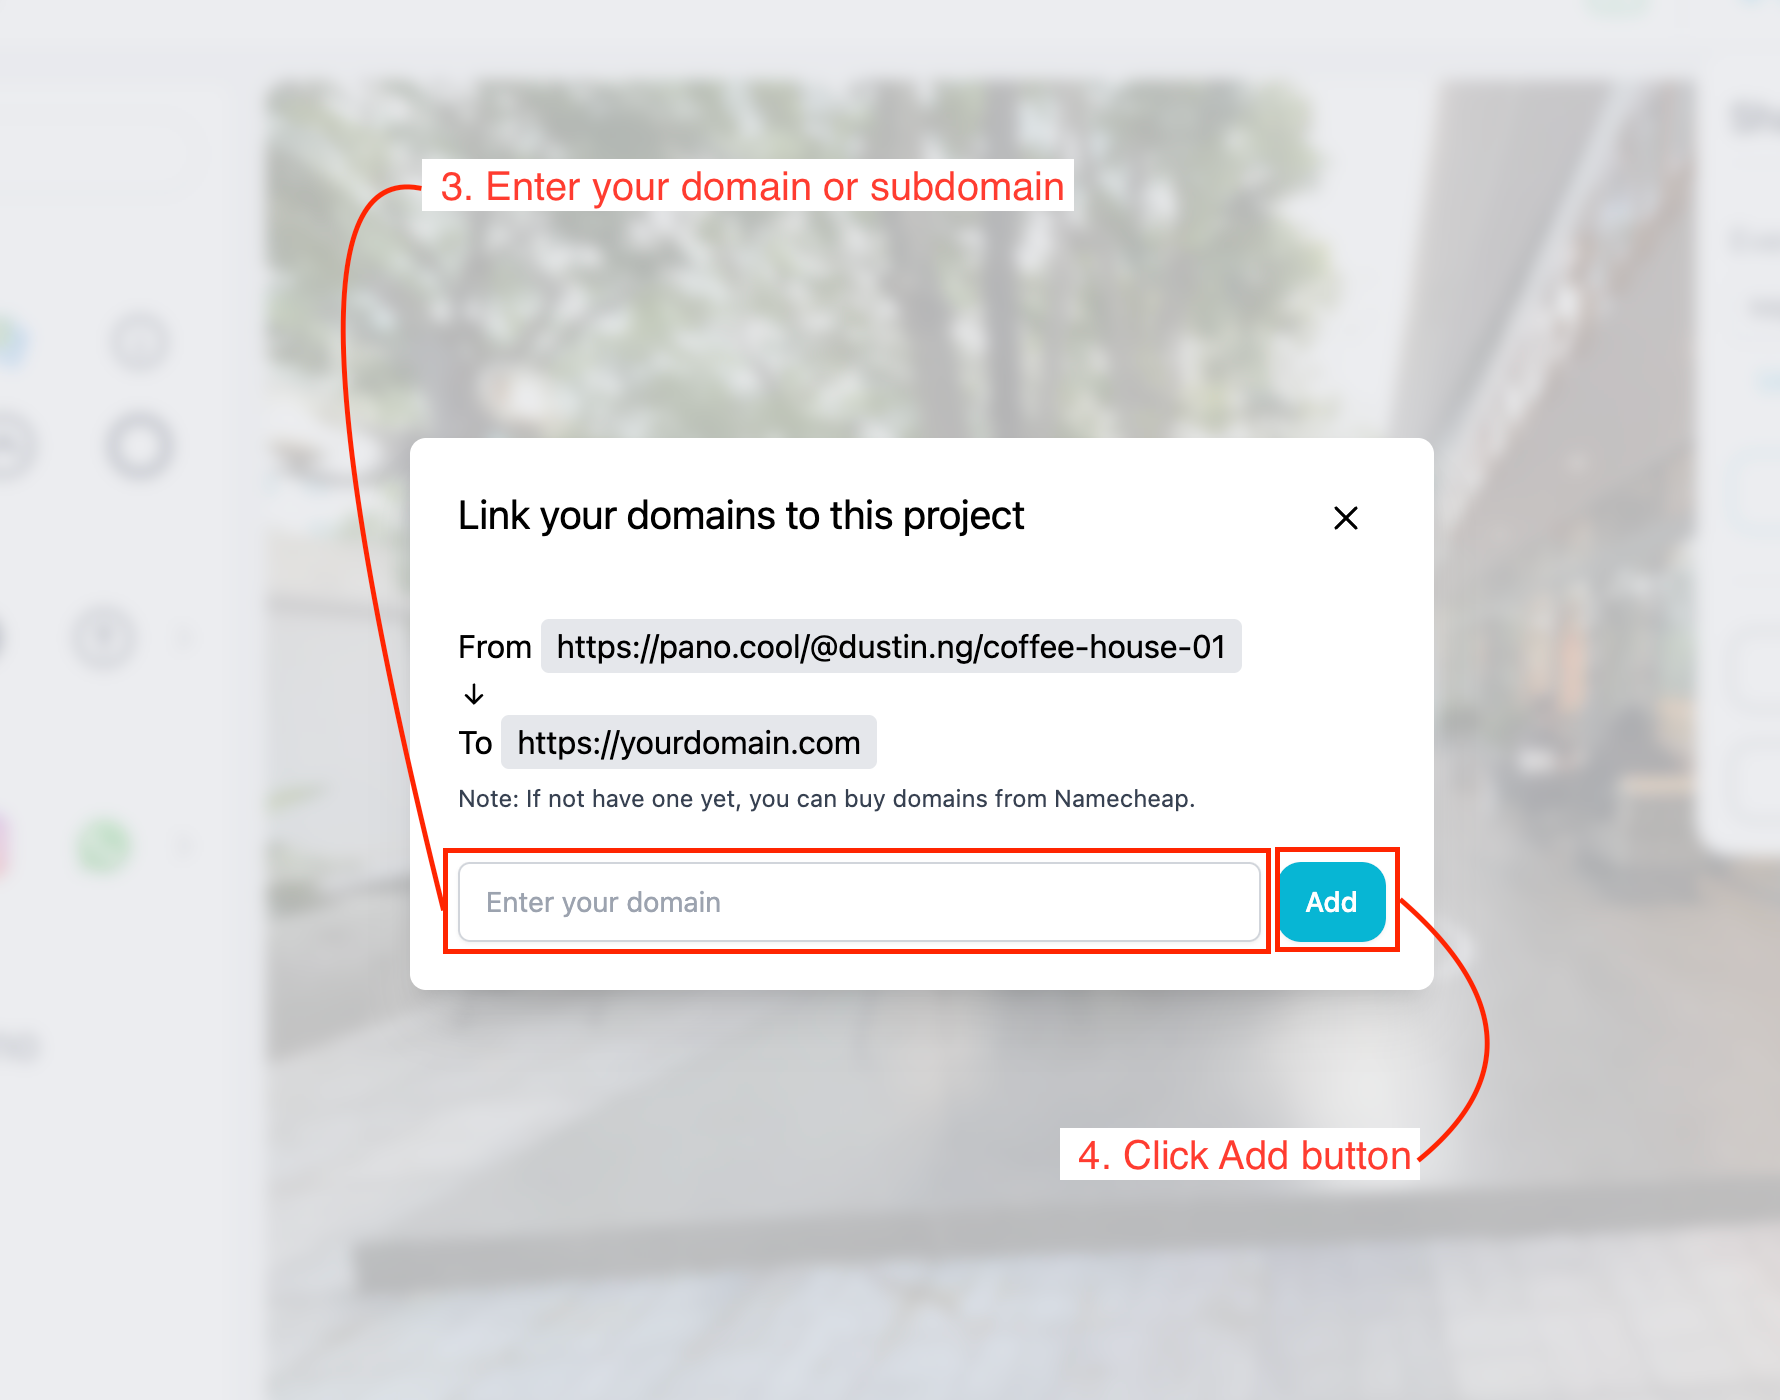
The Custom domain popup will be shown, enter your domain or subdomain and click "Add" button.
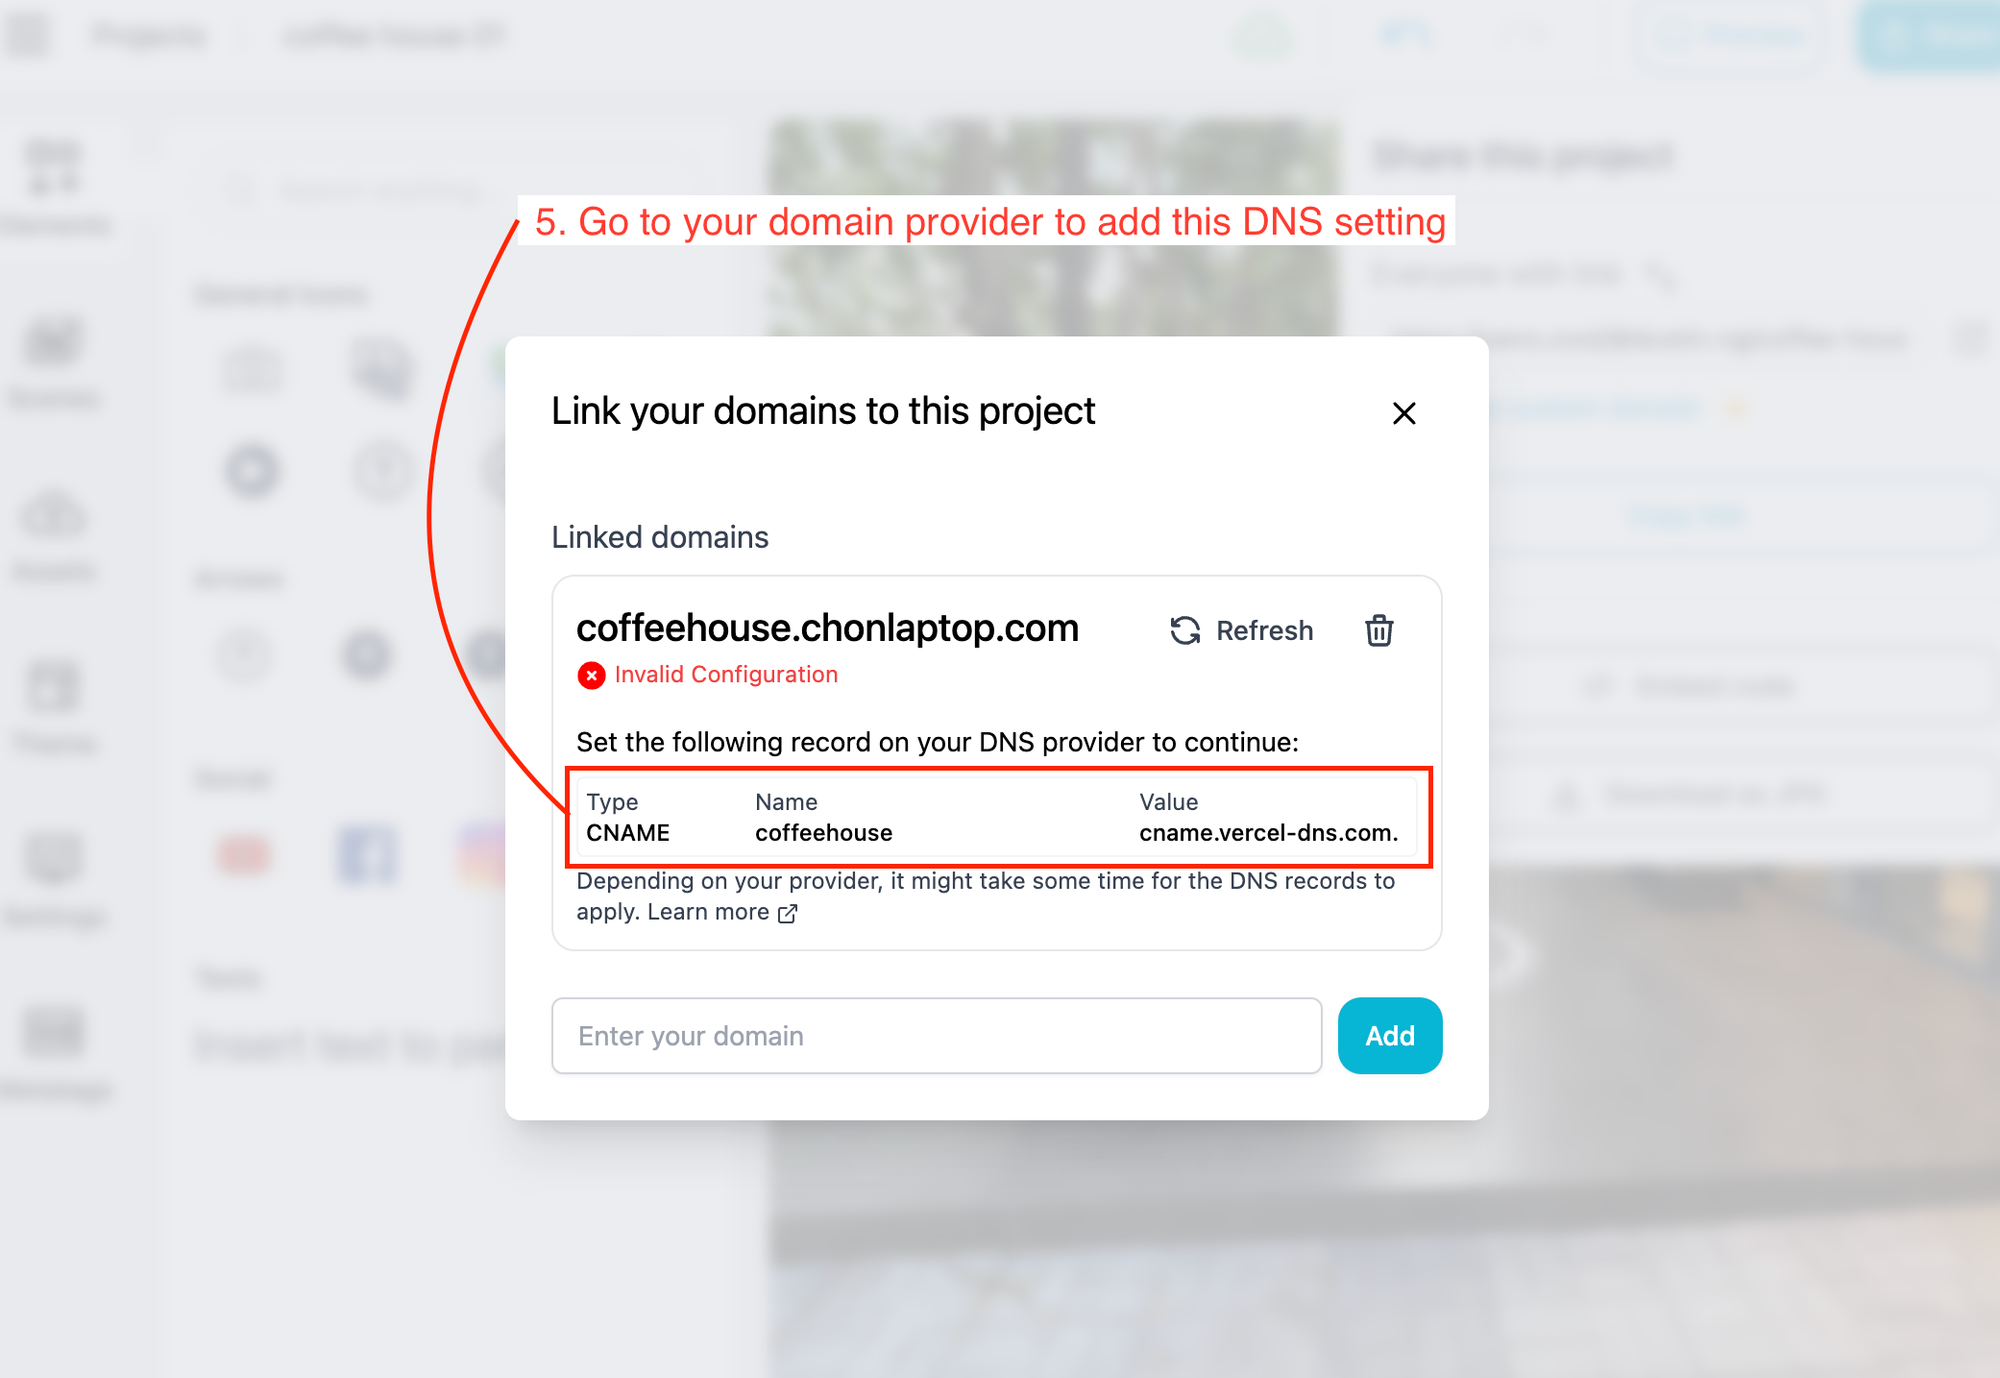
Domain added successful, but you can see the "Invalid Configuration" label, don't worry, that means this domain is not pointed yet to PanoCool.
Now, go to your DNS provider to update your domain DNS to point to PanoCool.
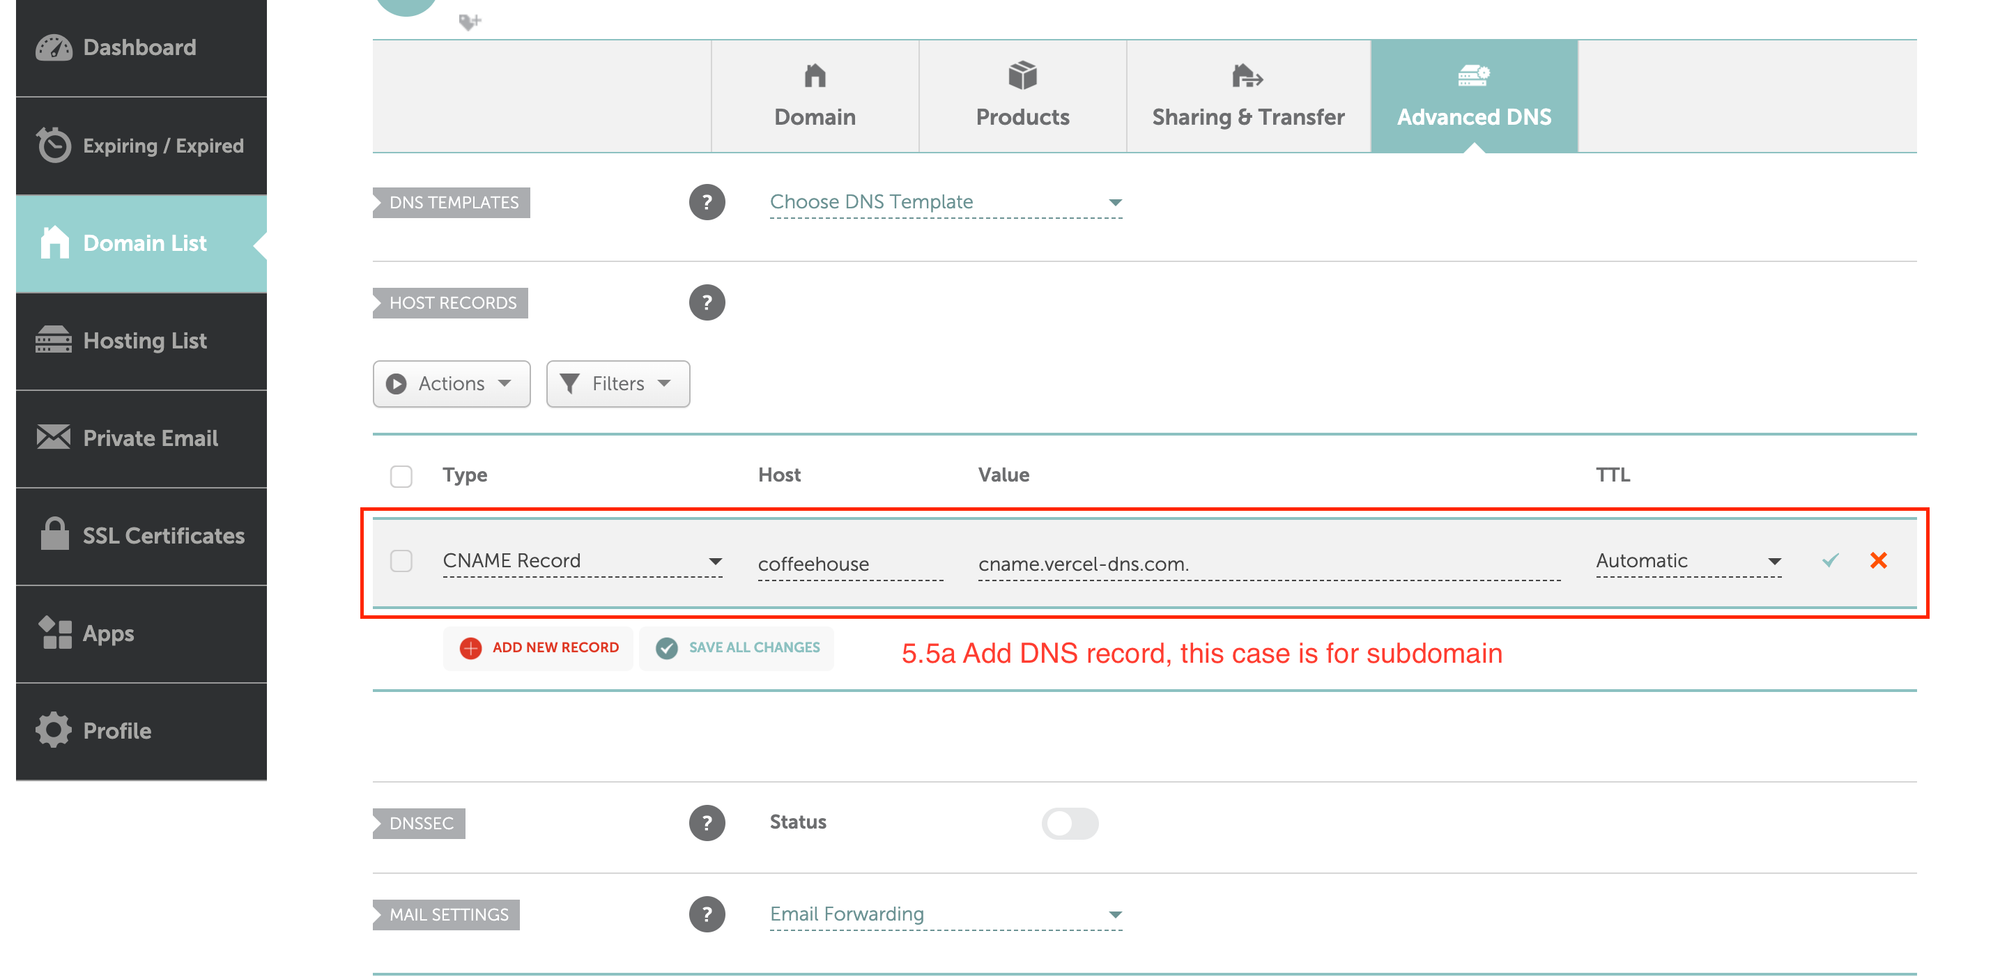
In this example, the DNS settings is:
Type: CNAME
Name: coffeehouse
Value: cname.vercel-dns.com.
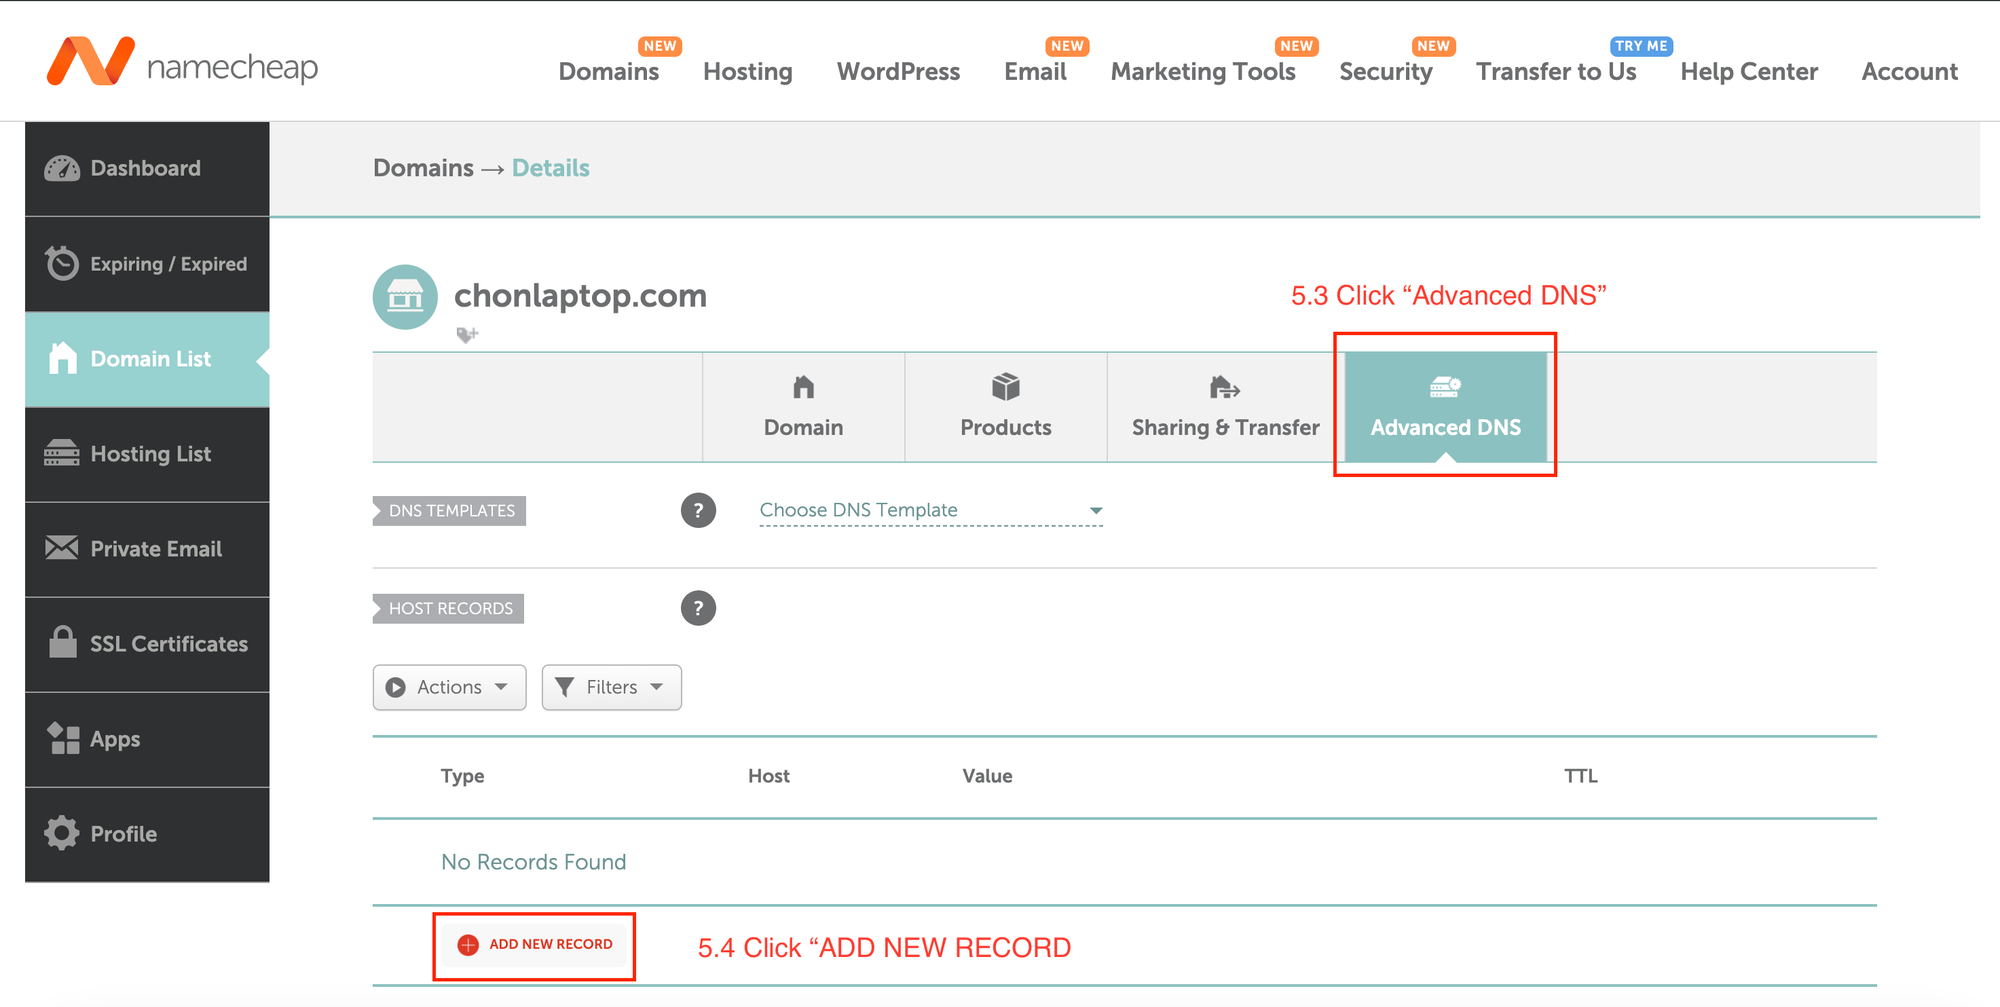
Config DNS on Namecheap
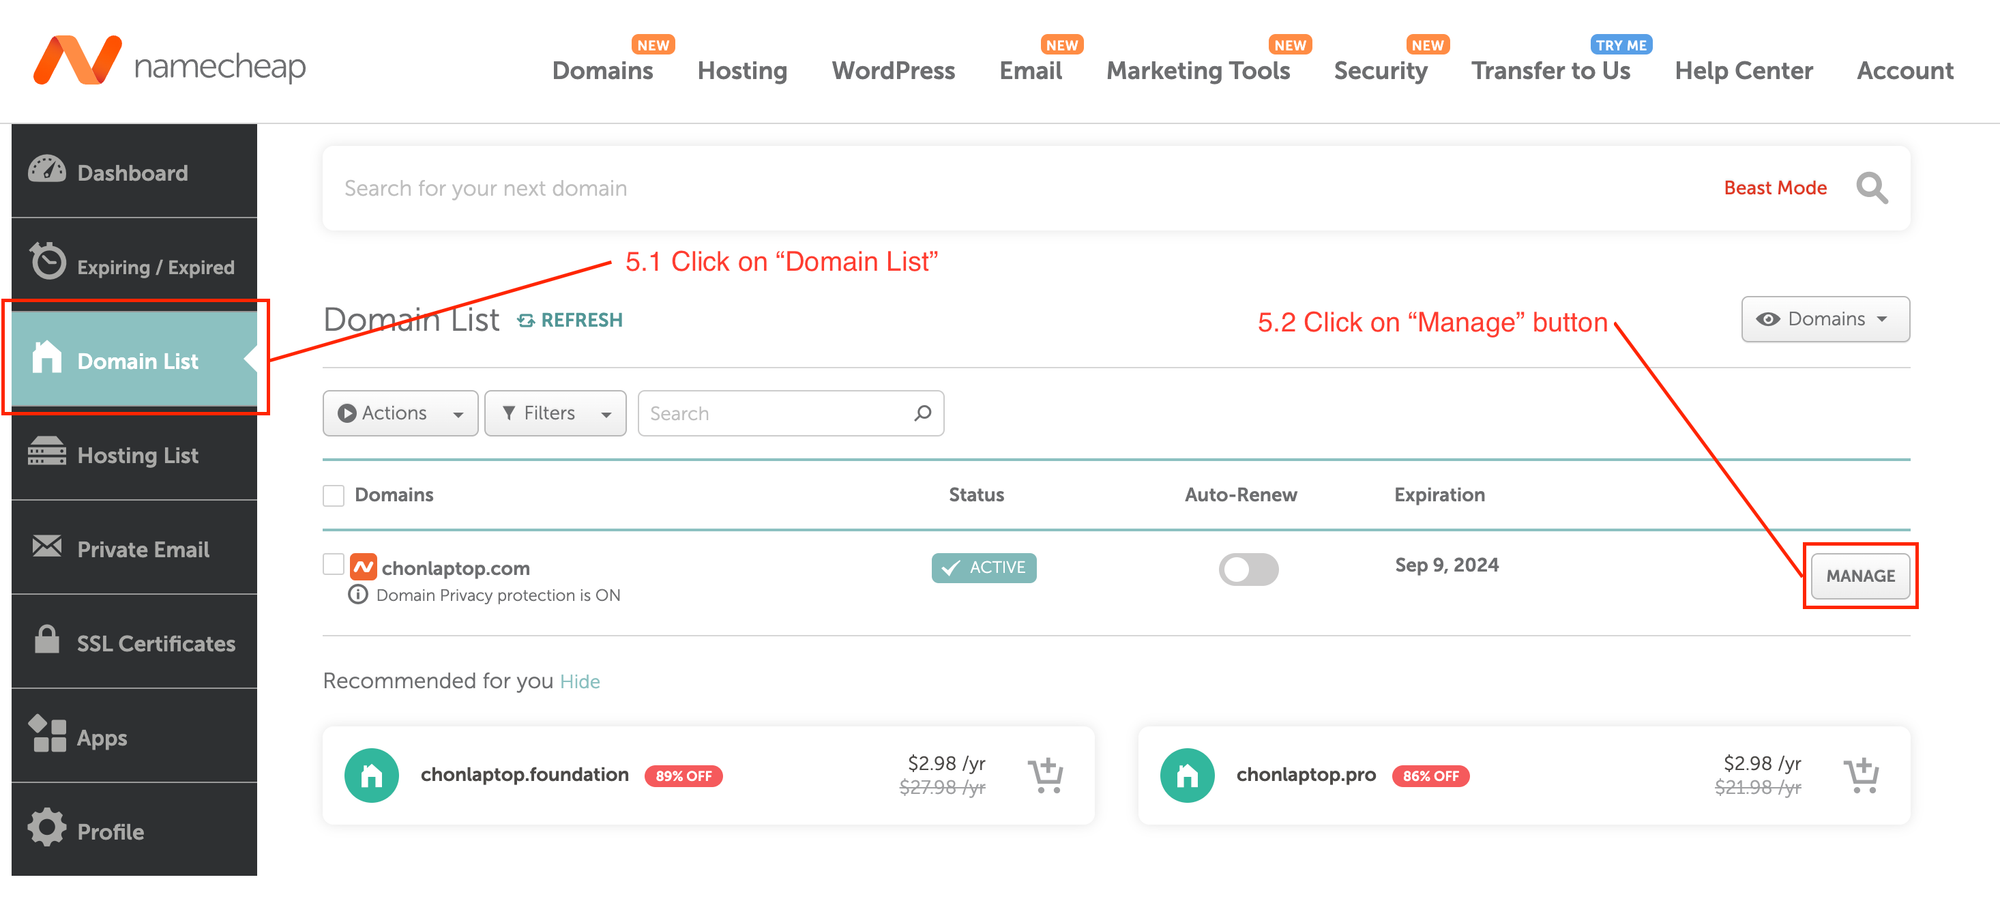
In this example, the domain "chonlaptop.com" is registered in Namecheap, so we will go to Namecheap to config the DNS.
Go to Namecheap dashboard, on the right navbar, select "Domain List", then on the domain we need to config ("chonlaptop.com" in this case), click "Manage" butotn.
After that, select "Advanced DNS" tab, and click "Add new record"
Enter DNS record
If you using primary domain, the DNS record will be different, please check the instructions in Custom Domain popup on PanoCool.
After that, click "green tick" button to save it.
Done! It may take several minutes to several hours until this DNS configuration is applied.
When it was successful applied, you can go back to PanoCool and see "Valid configuration" label.