Enhancing Your Virtual Tours with Comparisons
The Comparisons feature in PanoCool Virtual Tour Studio is a powerful tool designed to showcase transformation and environmental changes within a single space. By linking two or more scenes, you can provide your audience with an interactive "Time Travel" or "Renovation" experience.
Use Cases
This feature is perfect for several scenarios:
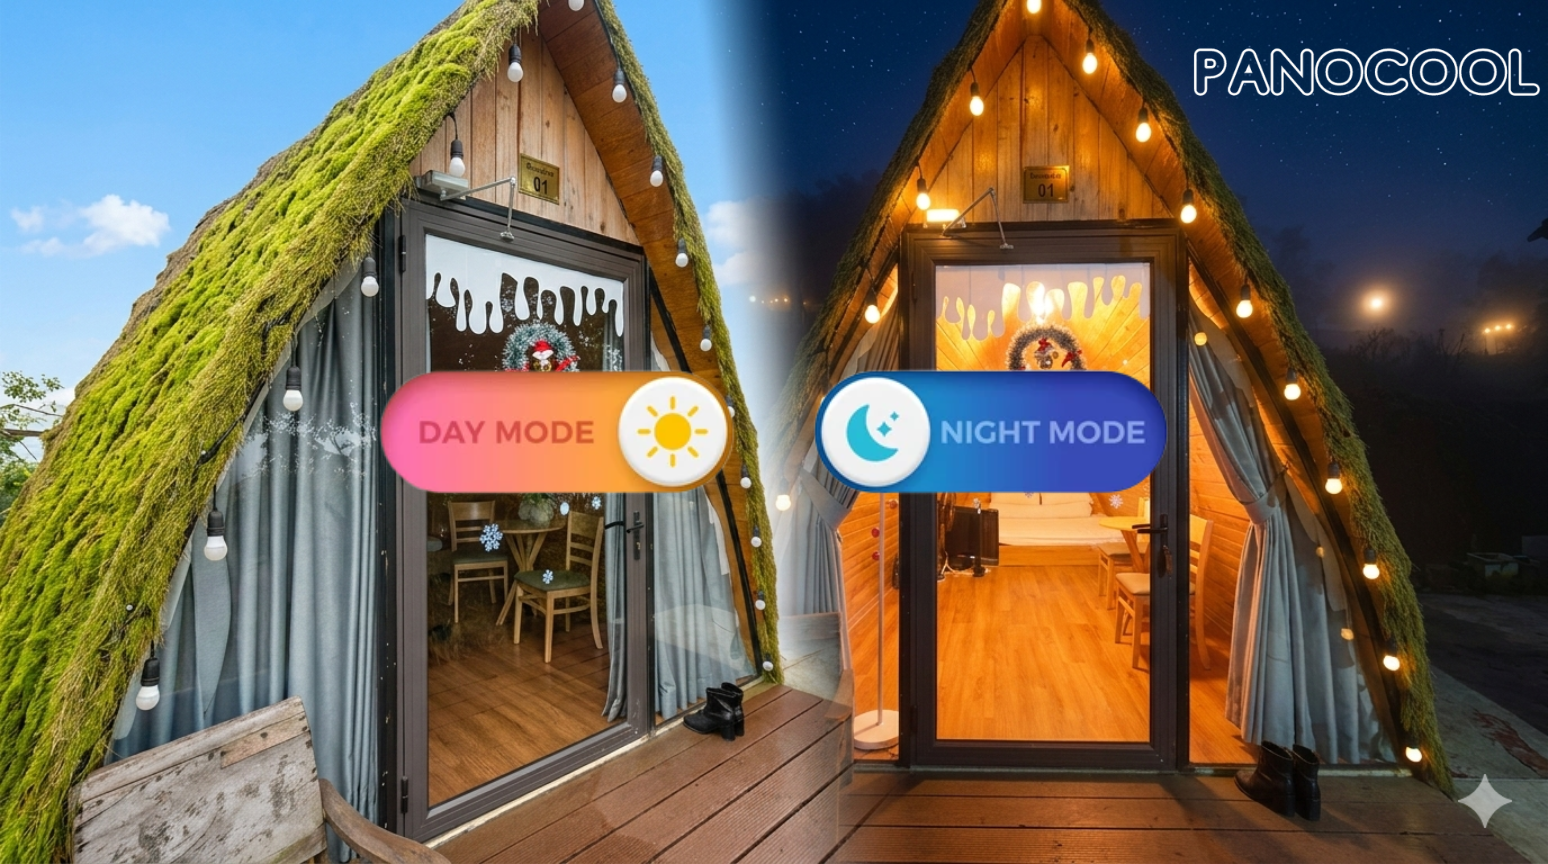
- Before / After: Show off a stunning home renovation or staging project.
- Day / Night: Demonstrate how a property's ambiance changes after sunset.
- Seasonality: Compare a landscape in full summer bloom versus a winter snowfall.
- Day to Dusk: Highlight the "Golden Hour" lighting transitions.
Step-by-Step Configuration
Follow these steps to set up a comparison effect in your tour:
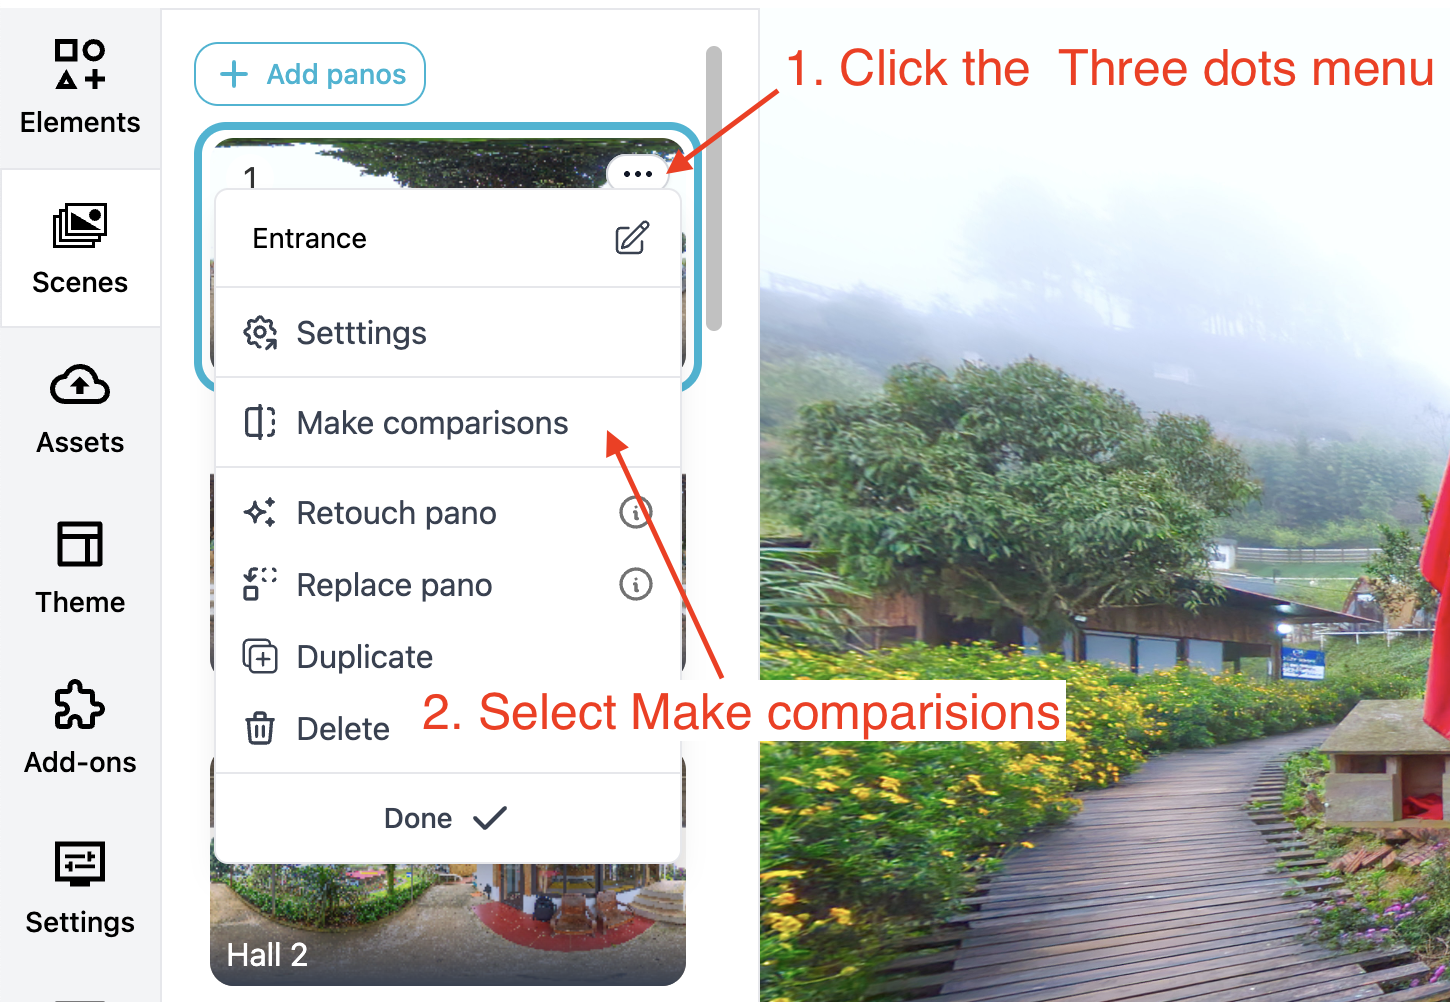
1. Initiate the Feature
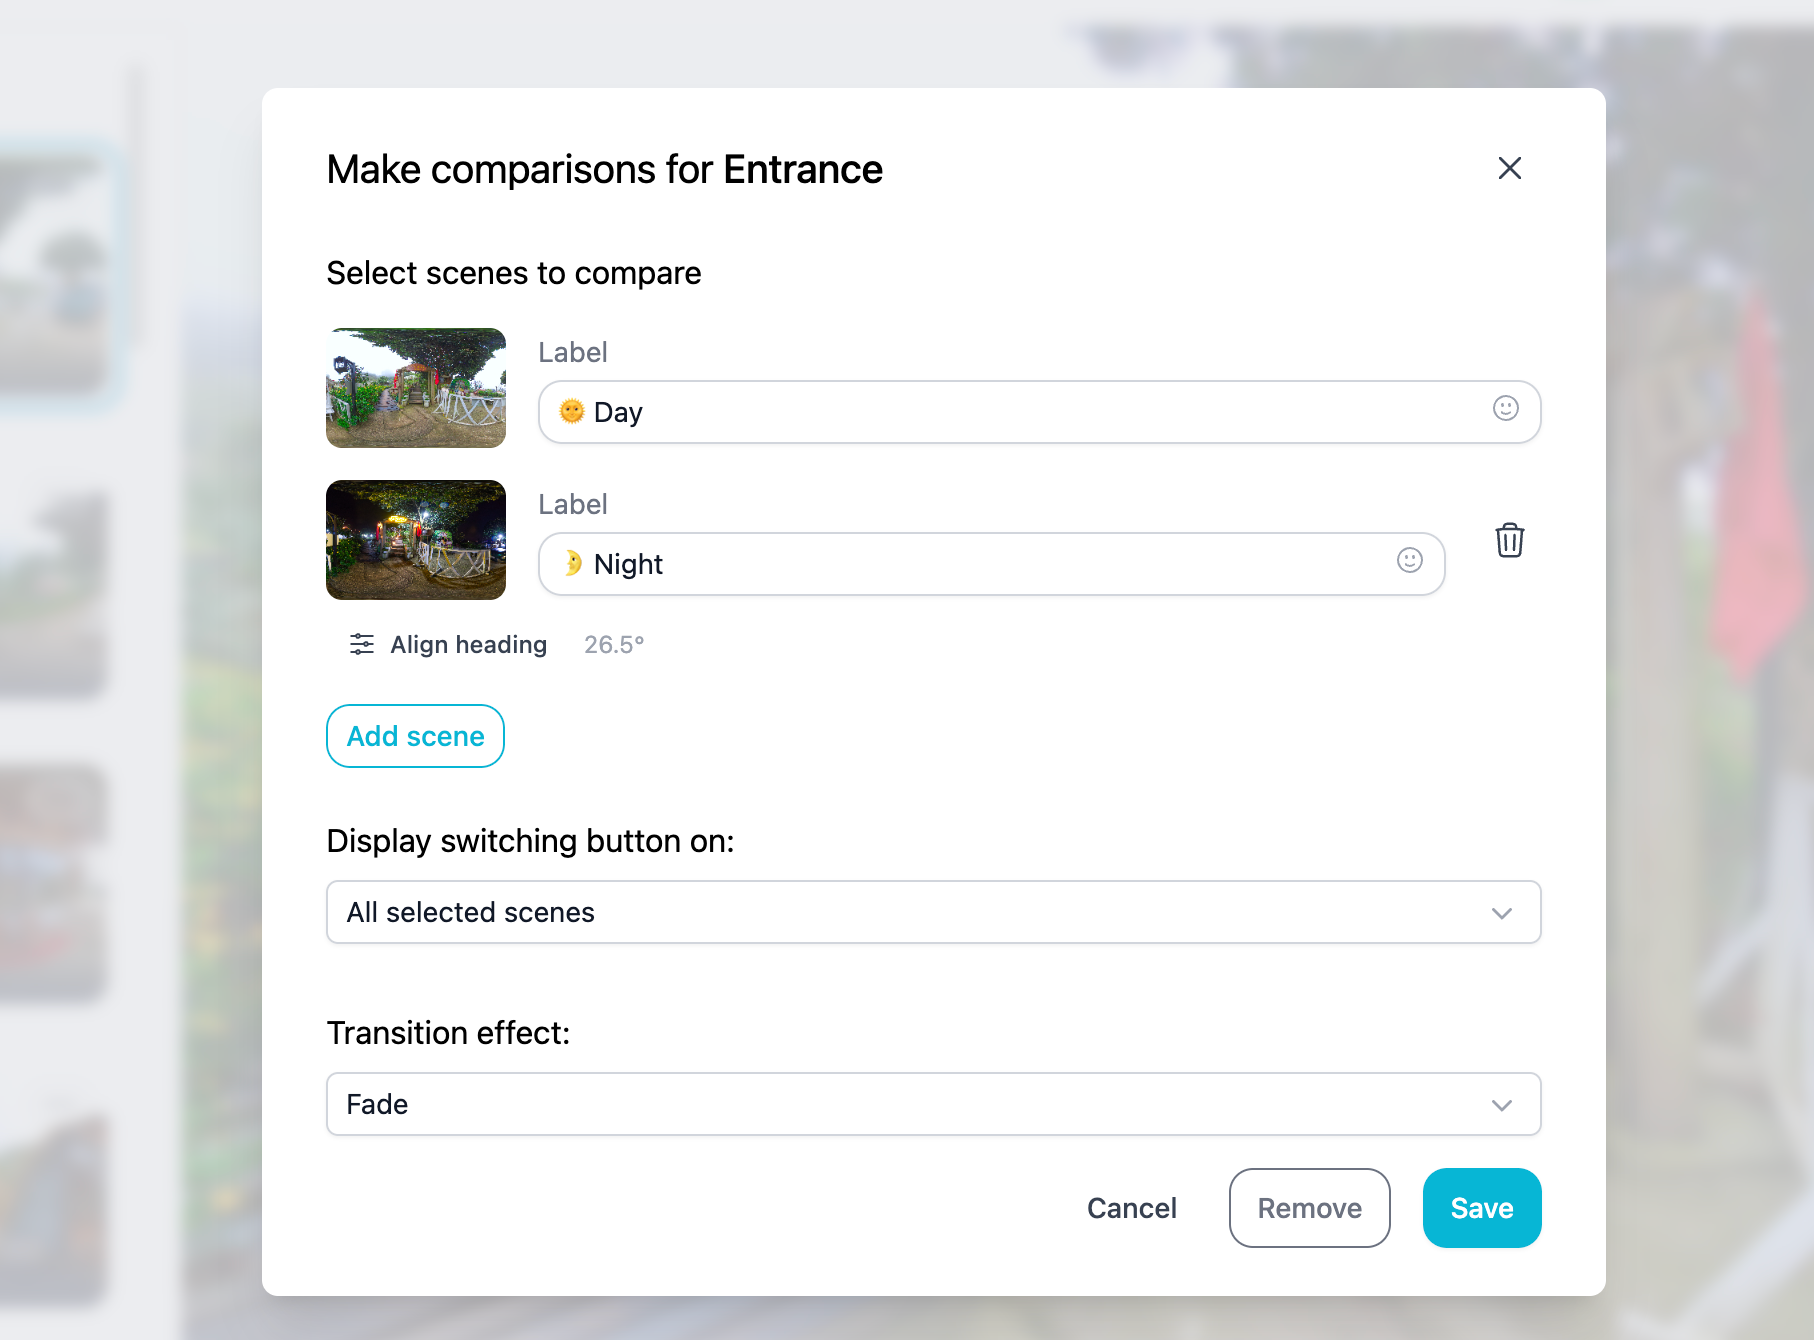
Locate the Scene List in your editor. Find the specific scene you want to use as your base, click the Three-dot icon on that scene item, and select Make Comparisons.
2. Select Comparison Scenes
A selection window will appear. Choose the other scenes from your project that you wish to compare with your current base scene. You can select up to 10 scenes to compare.
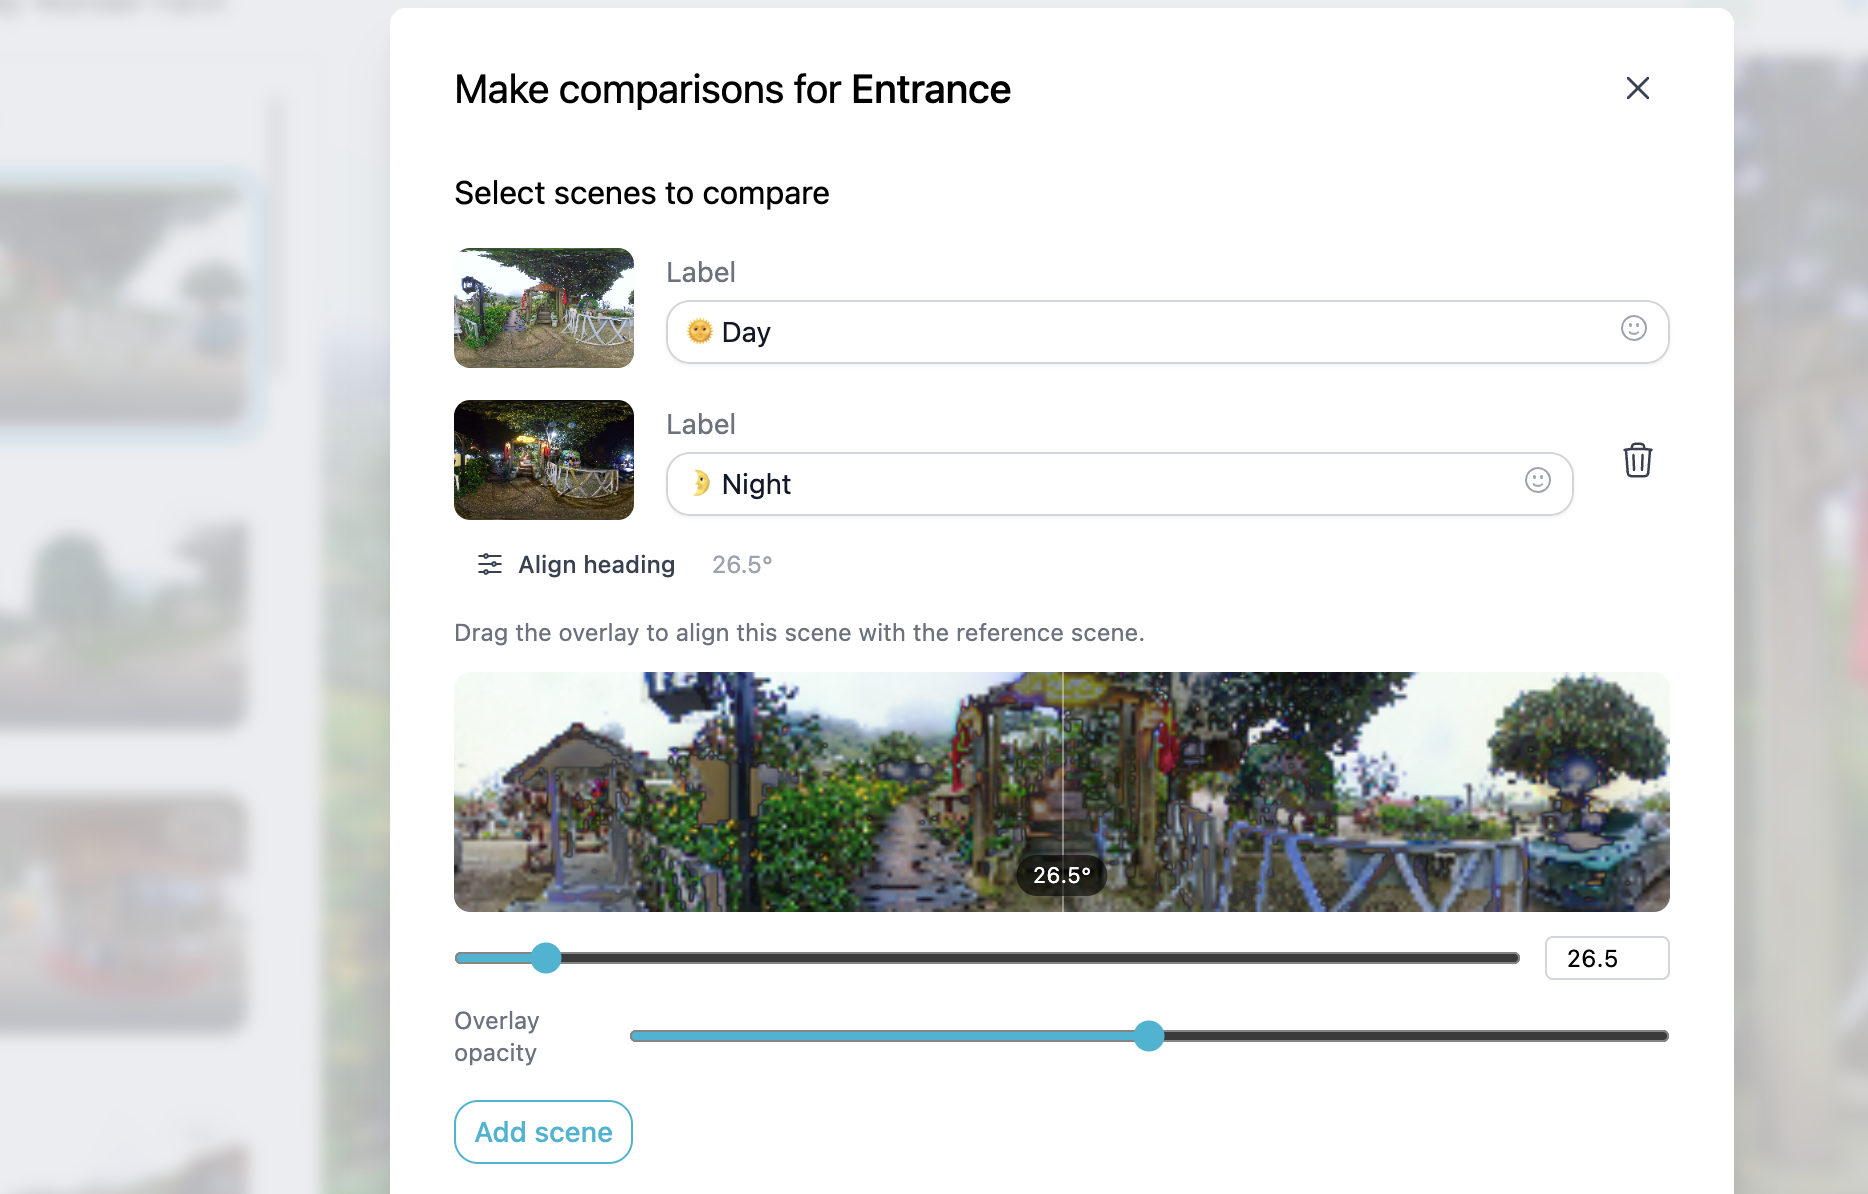
3. Align Headings (Visual Matching)
For the comparison to feel seamless, the camera orientation needs to match perfectly. If the scenes were captured at slightly different angles:
- Click Align Heading located below each scene thumbnail.
- An overlay thumbnail will appear. Drag the overlay until the features of the second scene perfectly align with the first.
- This ensures that when the user toggles the effect, the furniture or walls don't "jump" positions.
4. Choose Your Transition Style
Decide how you want the scenes to swap. PanoCool offers two distinct visual styles:
- Fade: A smooth, ethereal transition where one scene dissolves into the next. Best for Day/Night effects.
- Left to Right (Slider): A "wipe" effect that allows users to drag a divider across the screen. Ideal for Before/After renovations.
5. Set Button Visibility
Finally, determine where the switching toggle should appear:
- Current Scene Only: The button only appears on your primary base scene.
- All Scenes: The button remains visible regardless of which comparison scene the user is currently viewing, allowing them to toggle back and forth indefinitely.
Demo tour: https://pano.cool/p/01KJSFKVMMMNZFF5TK282HV2VD?s=HkzKGO