Guide: Creating 360 Walkthrough Tour from 360 Video
This guide covers the end-to-end workflow for transforming raw 360° video footage recorded with an Insta360 camera into an interactive, GPS-mapped virtual tour using Insta360 Studio and the PanoCool Mapper tool.
1. Exporting from Insta360 Studio
Before starting, ensure your footage was recorded with the GPS toggle enabled on your Insta360 camera.
- Connect your camera memory card to your computer.
- Drag and drop your .insv files into Insta360 Studio.
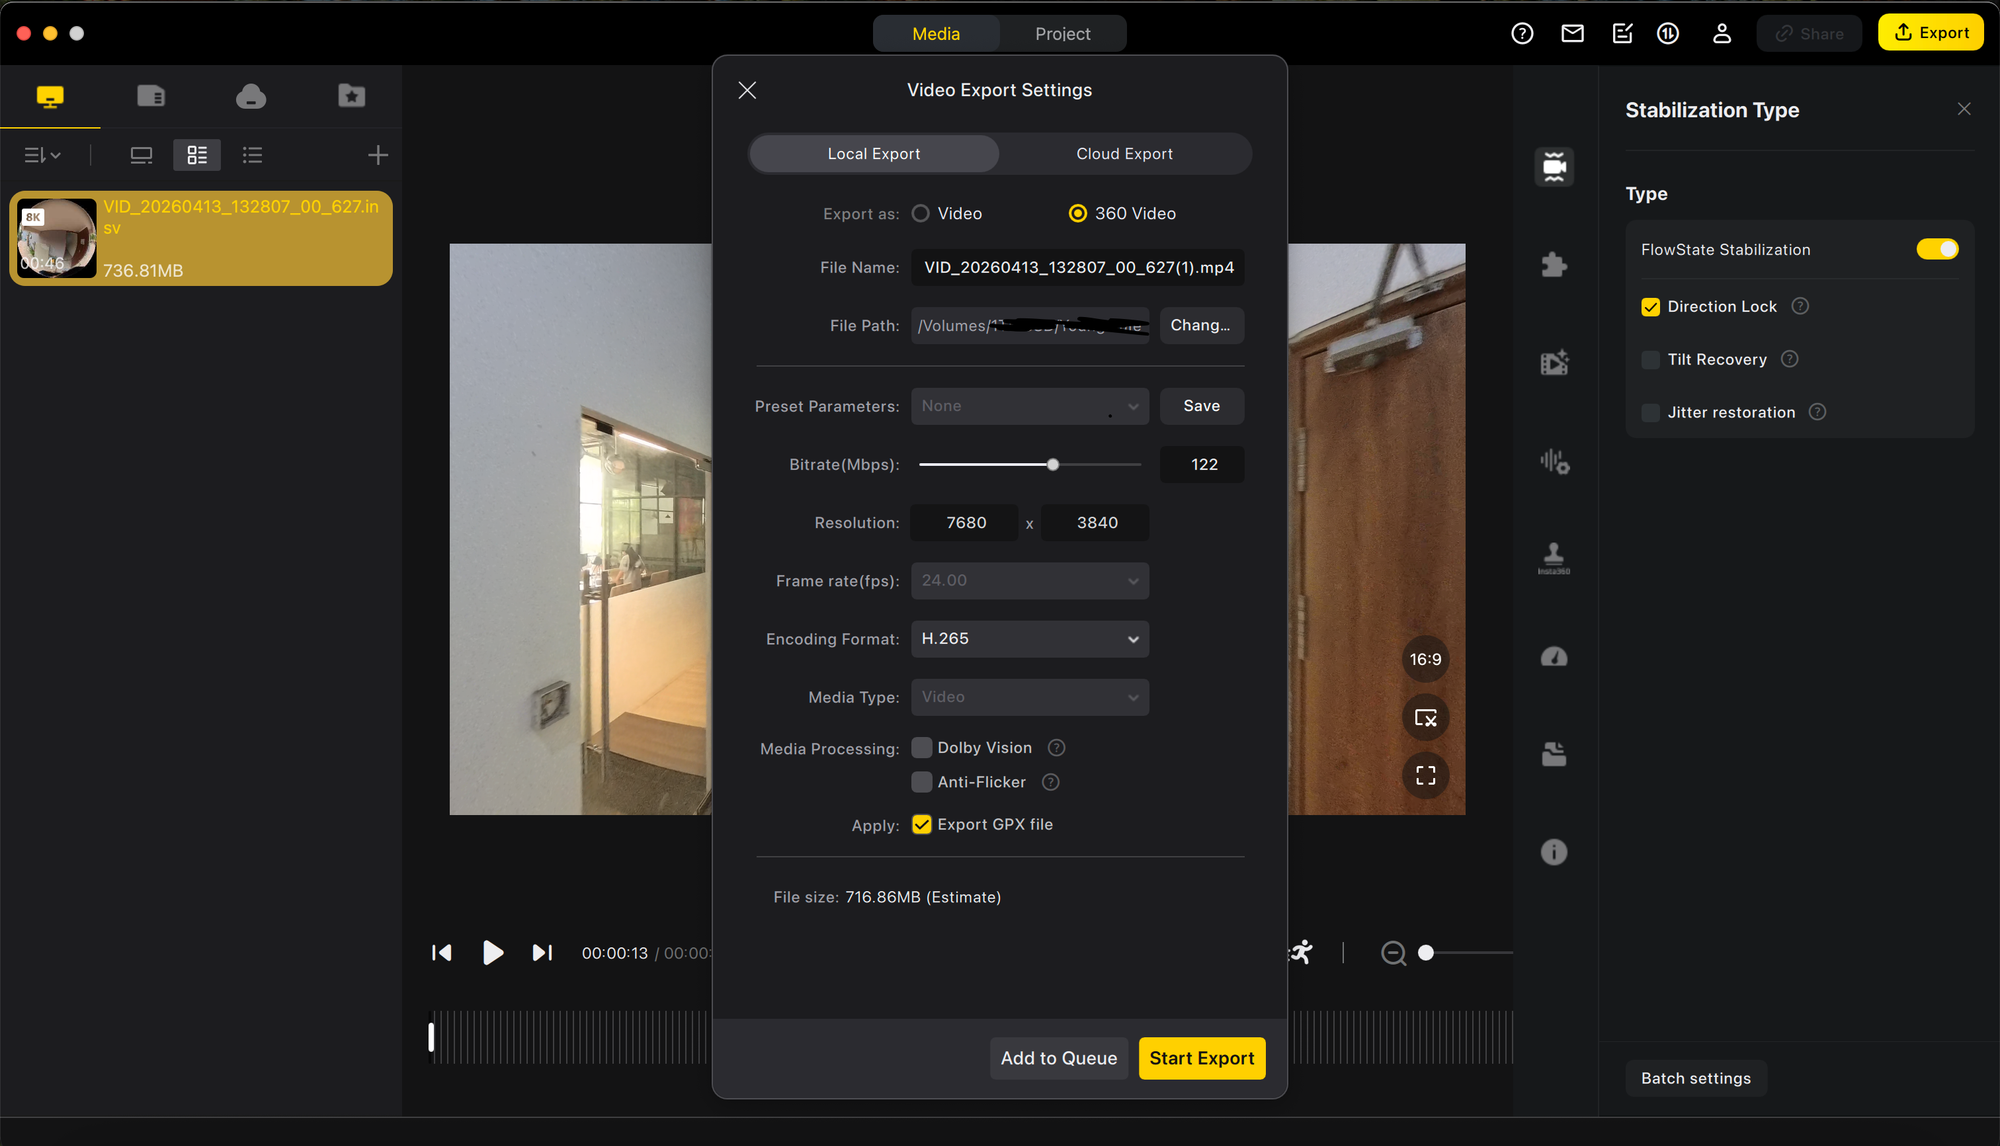
- Right-click the file in the sidebar and select "Start Export."
- Crucial Settings:
- Select the "360 Video" export option.
- Check the box labeled "Export GPX file."
- Check the box "Direction Lock"
- Complete the export to generate both your video file and its corresponding tracking data.
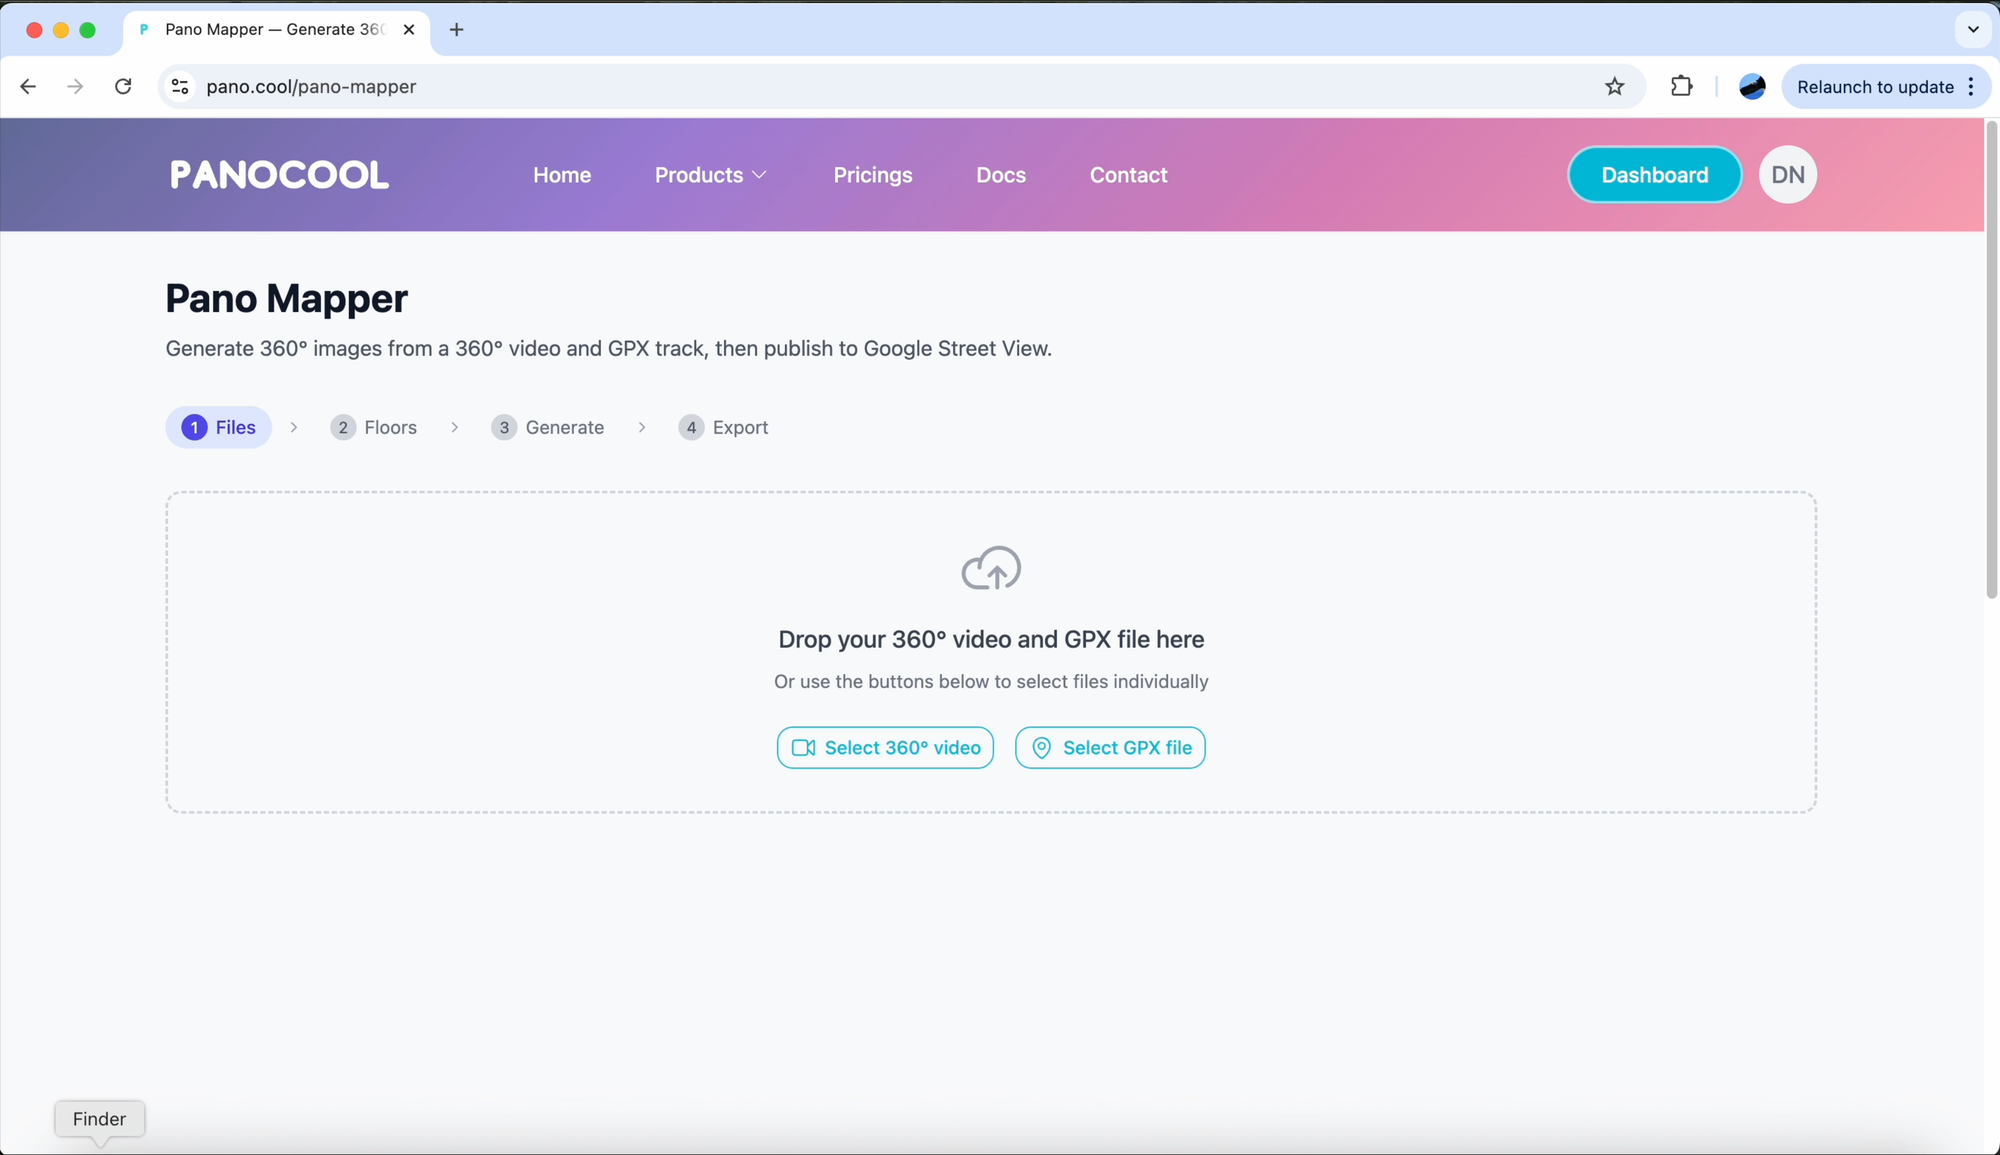
2. Processing with PanoCool Mapper
The PanoCool Mapper tool uses your GPX data to automatically place your walkthrough on a real-world map.
- Open the PanoCool Mapper tool at https://pano.cool/pano-mapper
- Drag and drop both your exported 360 video and the GPX file into the workspace.
- The tool will automatically plot your GPS route on the map interface.
- Multi-Floor Handling: If your recording covers more than one floor, define the specific time range for each level to ensure vertical accuracy.
3. Generating the Walkthrough
- Click the "Generate Images" button. The system will extract frames and align them with your GPS coordinates.
- Once processing is complete, use the Preview window to verify the flow of the walkthrough.
- If the path is correct, click "Continue to Export" and then select "Create Virtual Tour." This will transfer your project into the PanoCool Virtual Tour Studio.
4. Enhancing and Sharing
In the Virtual Tour Studio, you can finalize the immersive experience for your stakeholders.
- Annotations: Add interactive icons, text notes, or informational pop-ups to highlight specific site details.
- Cloud Sync: Wait for the "Sync Complete" notification to ensure all high-resolution data is saved to the cloud.
- Publishing: Click the "Share" button to generate a live viewing link.
Pro Tip: For construction site documentation, use the SiteSync theme within the Studio to allow team members to leave pinpoint comments directly on the map.
Learn more about Pano Mapper: https://pano.cool/products/pano-mapper