Polygon Hotspots for Virtual Tour
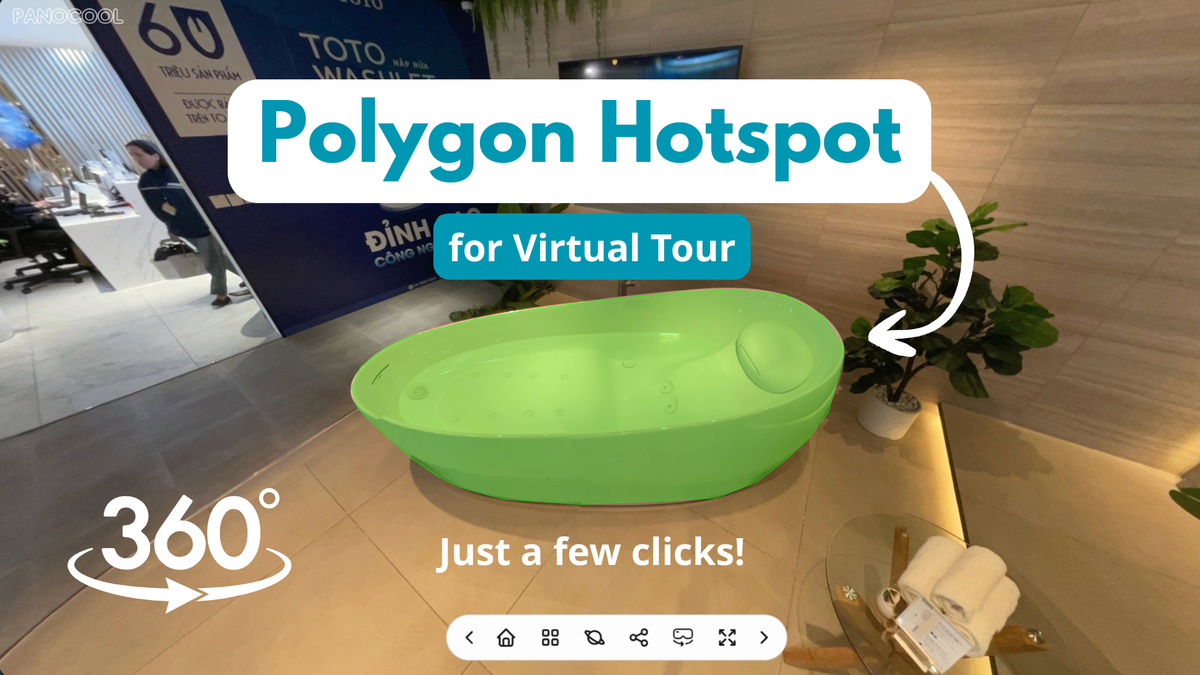
Unlike traditional circular point hotspots, polygon hotspots map perfectly to the natural perspective and lines of your 360-degree imagery. Whether you want to turn a real-estate doorway into a seamless transition path or highlight specific products inside a dynamic showroom, this feature offers unmatched flexibility. In this guide, we will break down the mechanics of creating, customizing, and deploying polygon hotspots inside the PanoCool tour builder.
The Basics: Drawing Your First Polygon
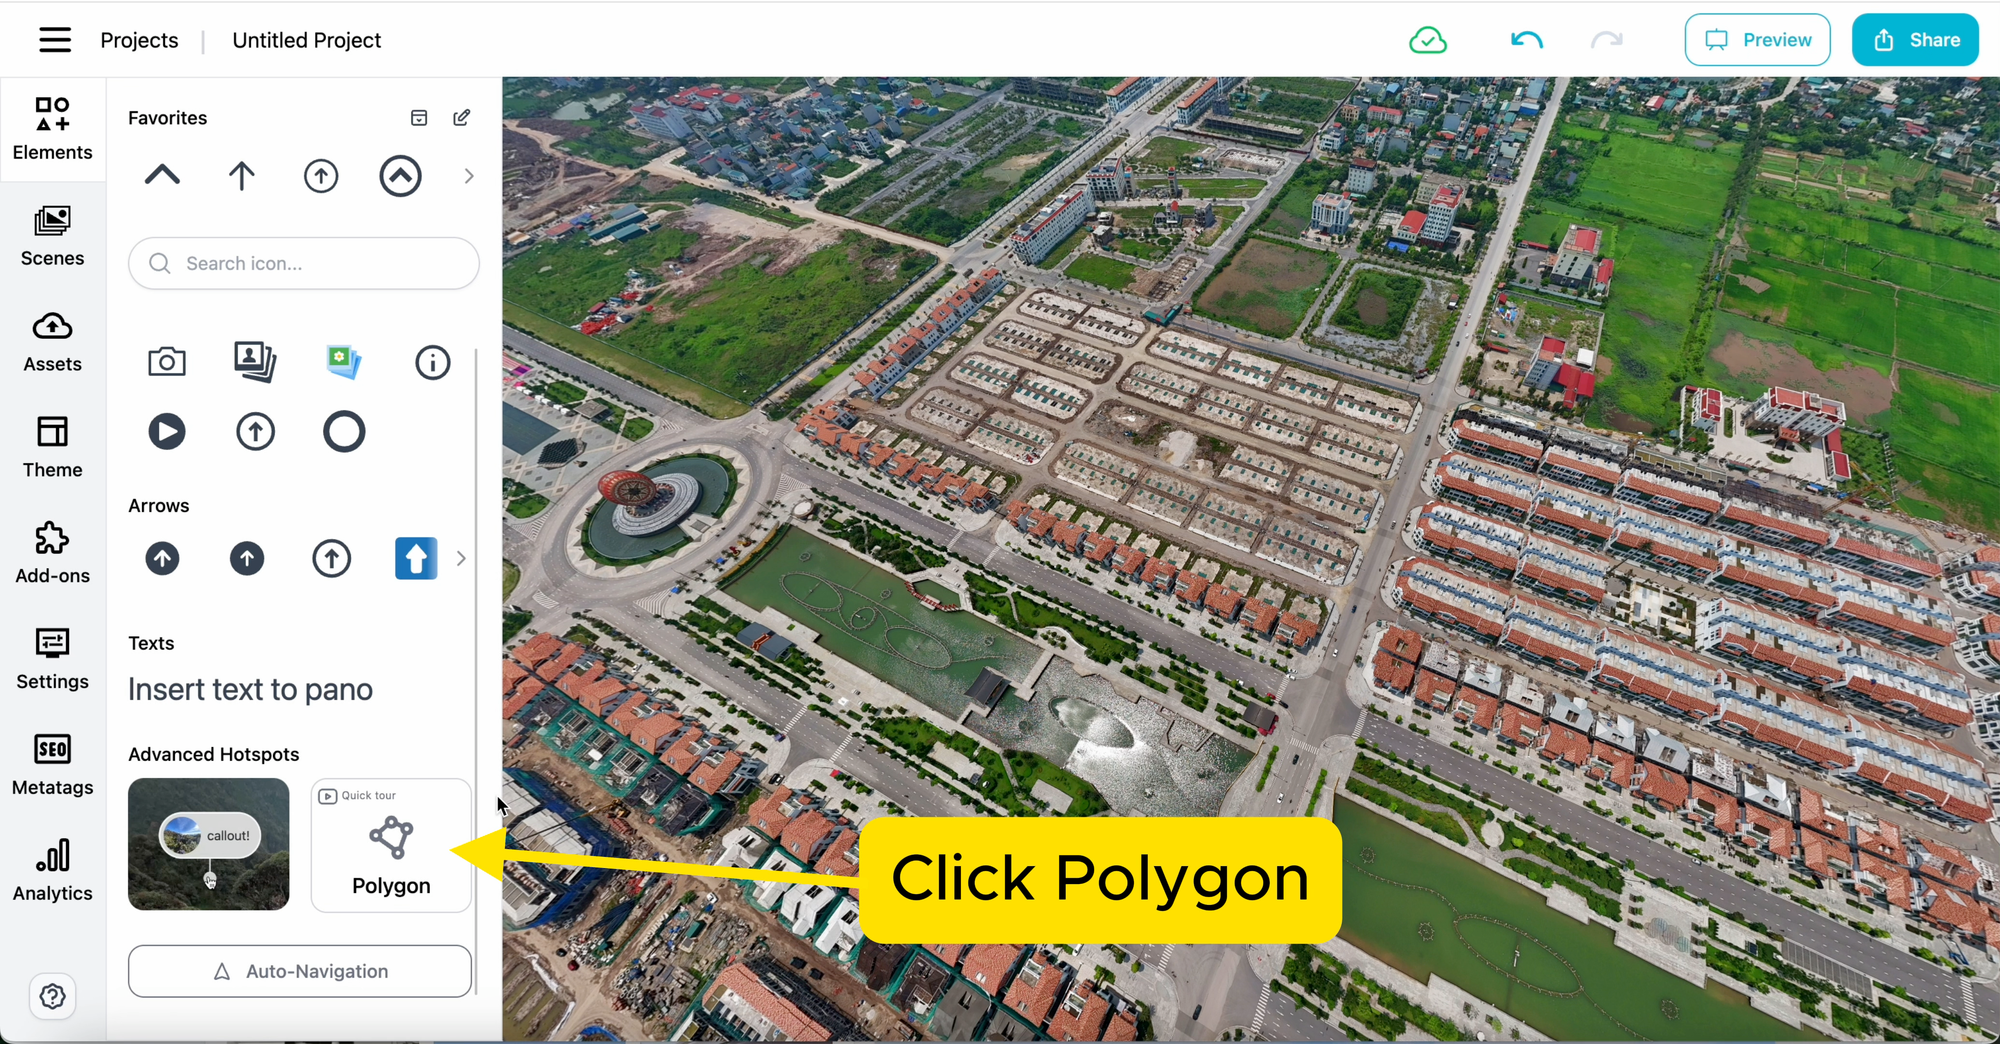
Building a custom structural hotspot in PanoCool takes only a few clicks. The intuitive geometry tool allows you to map structural silhouettes effortlessly directly on the panoramic canvas. Follow these steps to map your first area:
- Step 1: Activate the Tool In the PanoCool editor and click on the Polygon icon to initialize custom mapping mode.
- Step 2: Plot Anchor Points Hold down the Shift key on your keyboard and left-click on the preview screen to begin placing coordinate points. Continue mapping points along the perimeter of the target object or structural architectural feature.
- Step 3: Save the Hotspot Once you have plotted all necessary vertices to clearly define your shape, click the Save button located directly within the floating hotspot companion toolbar.
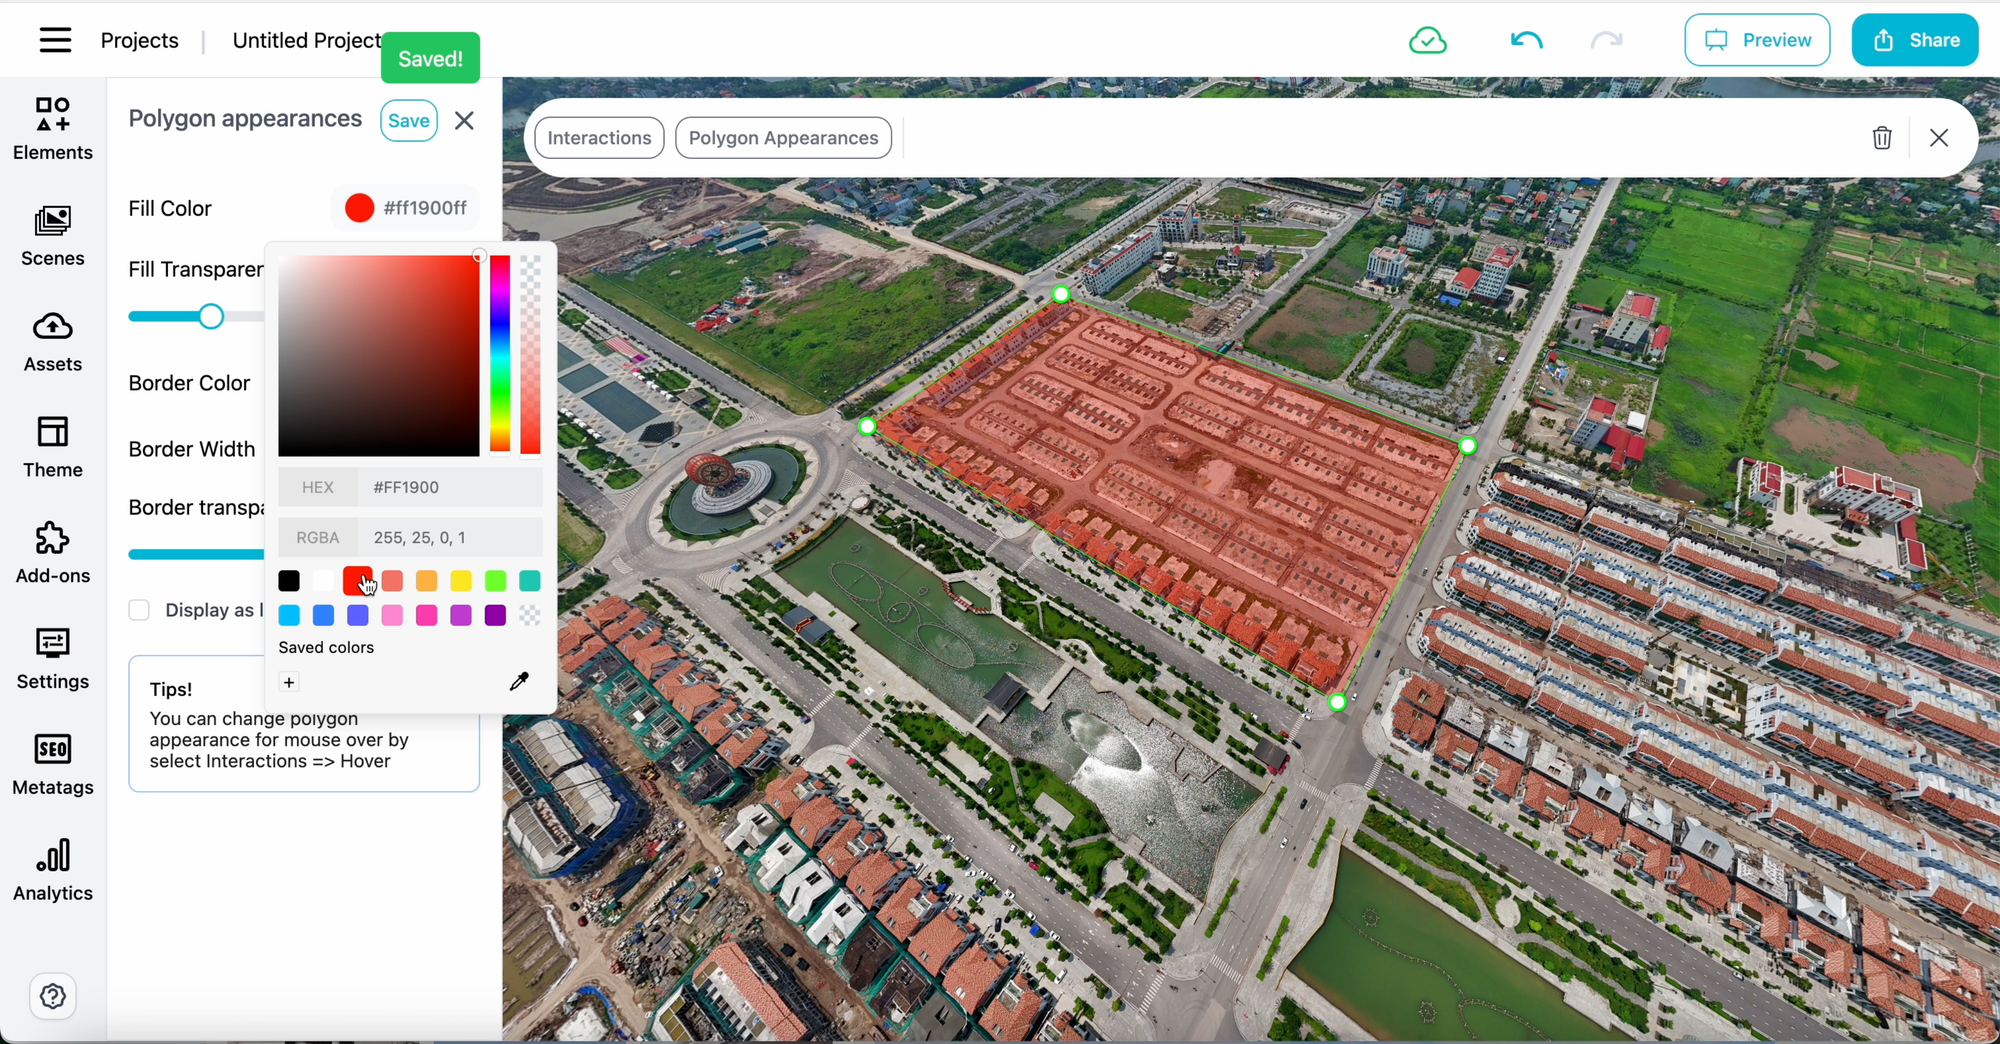
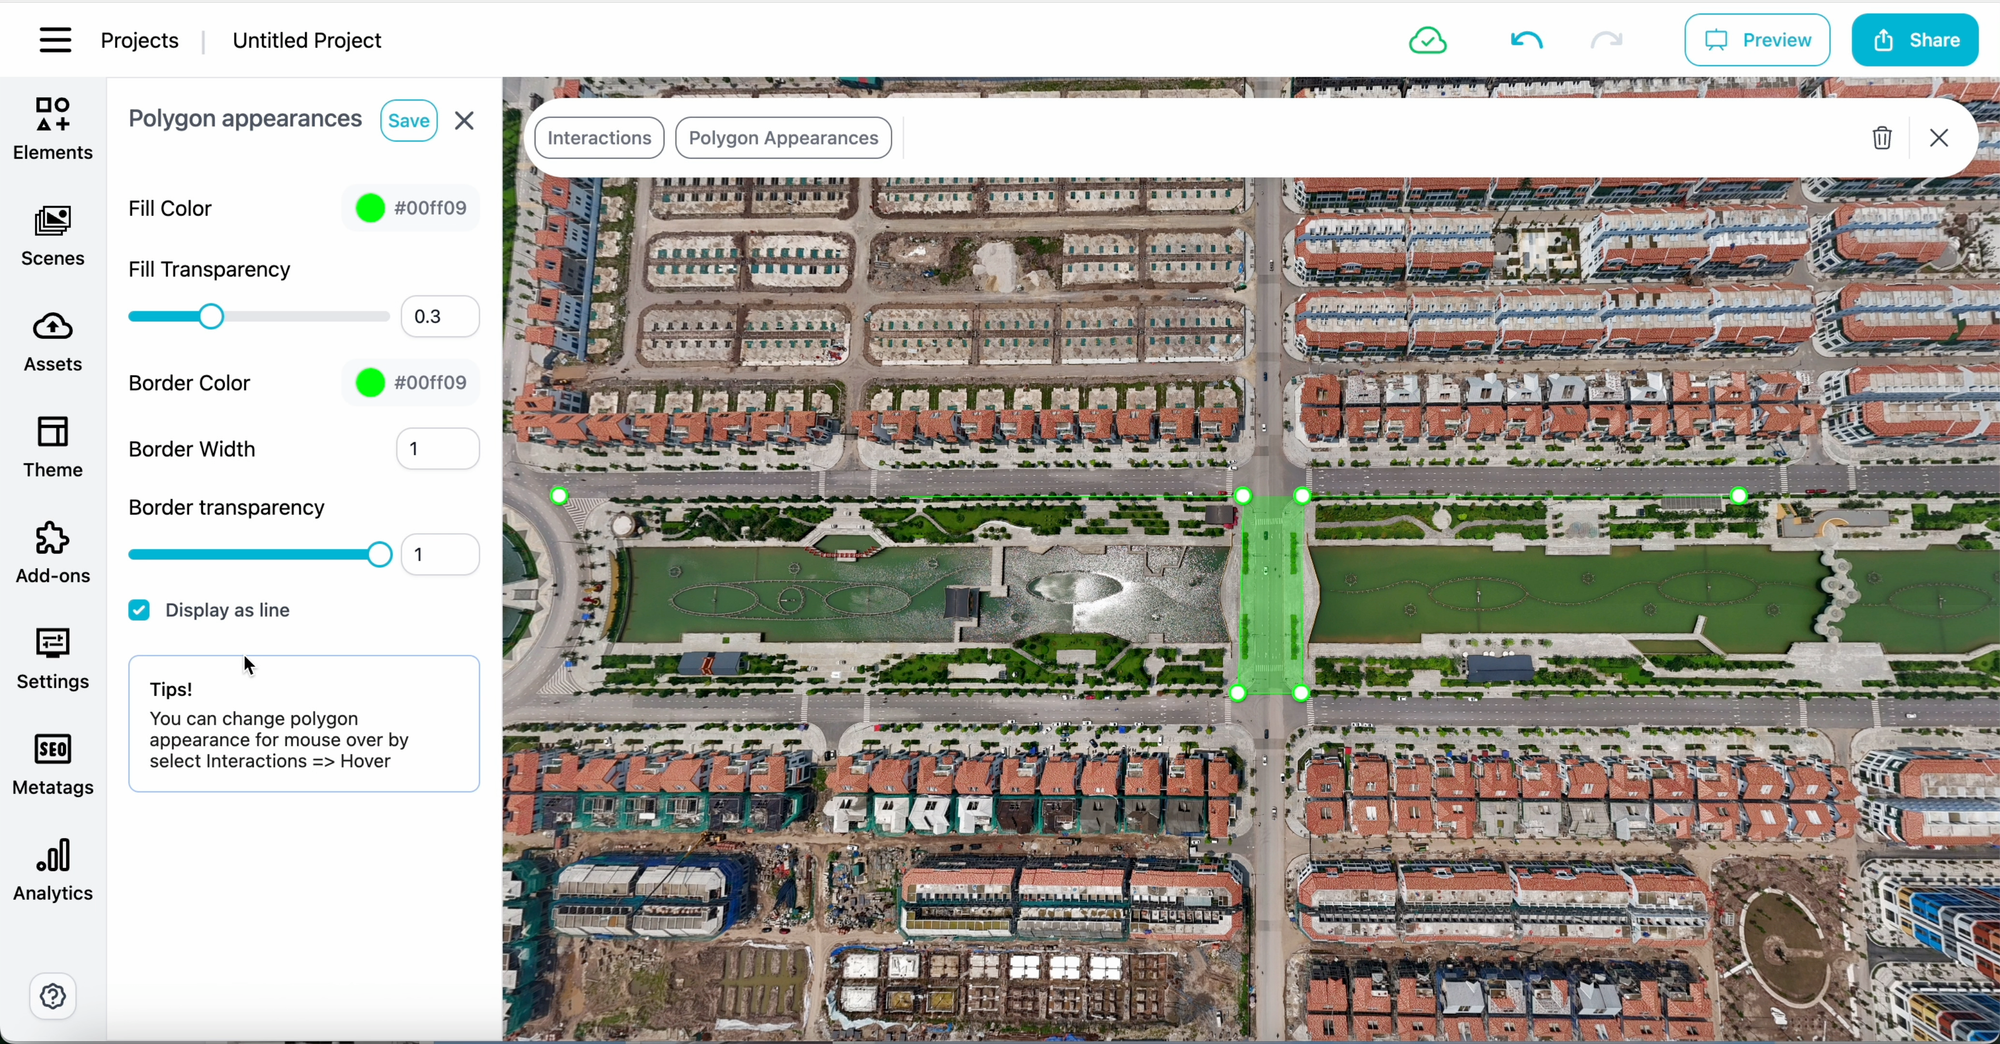
After saving, the newly generated area will render inside the editor with a translucent green fill overlay. If the initial paths require refinement, you can select the shape and drag individual node handle rings to perfectly align with your underlying 360-degree image perspective.
Styling & Customizing Appearances
A critical element of an engaging user experience is visual continuity. PanoCool provides extensive design controls over structural elements to match your brand or presentation aesthetic:
Static and Boundary Colors
By selecting your active region and opening the Polygon Appearances menu panel, you can overwrite default styling presets. Adjust fill colors, tweak border width dimensions, and configure line hex colors to either harmonize cleanly with environment surroundings or stand out as an obvious visual anchor.
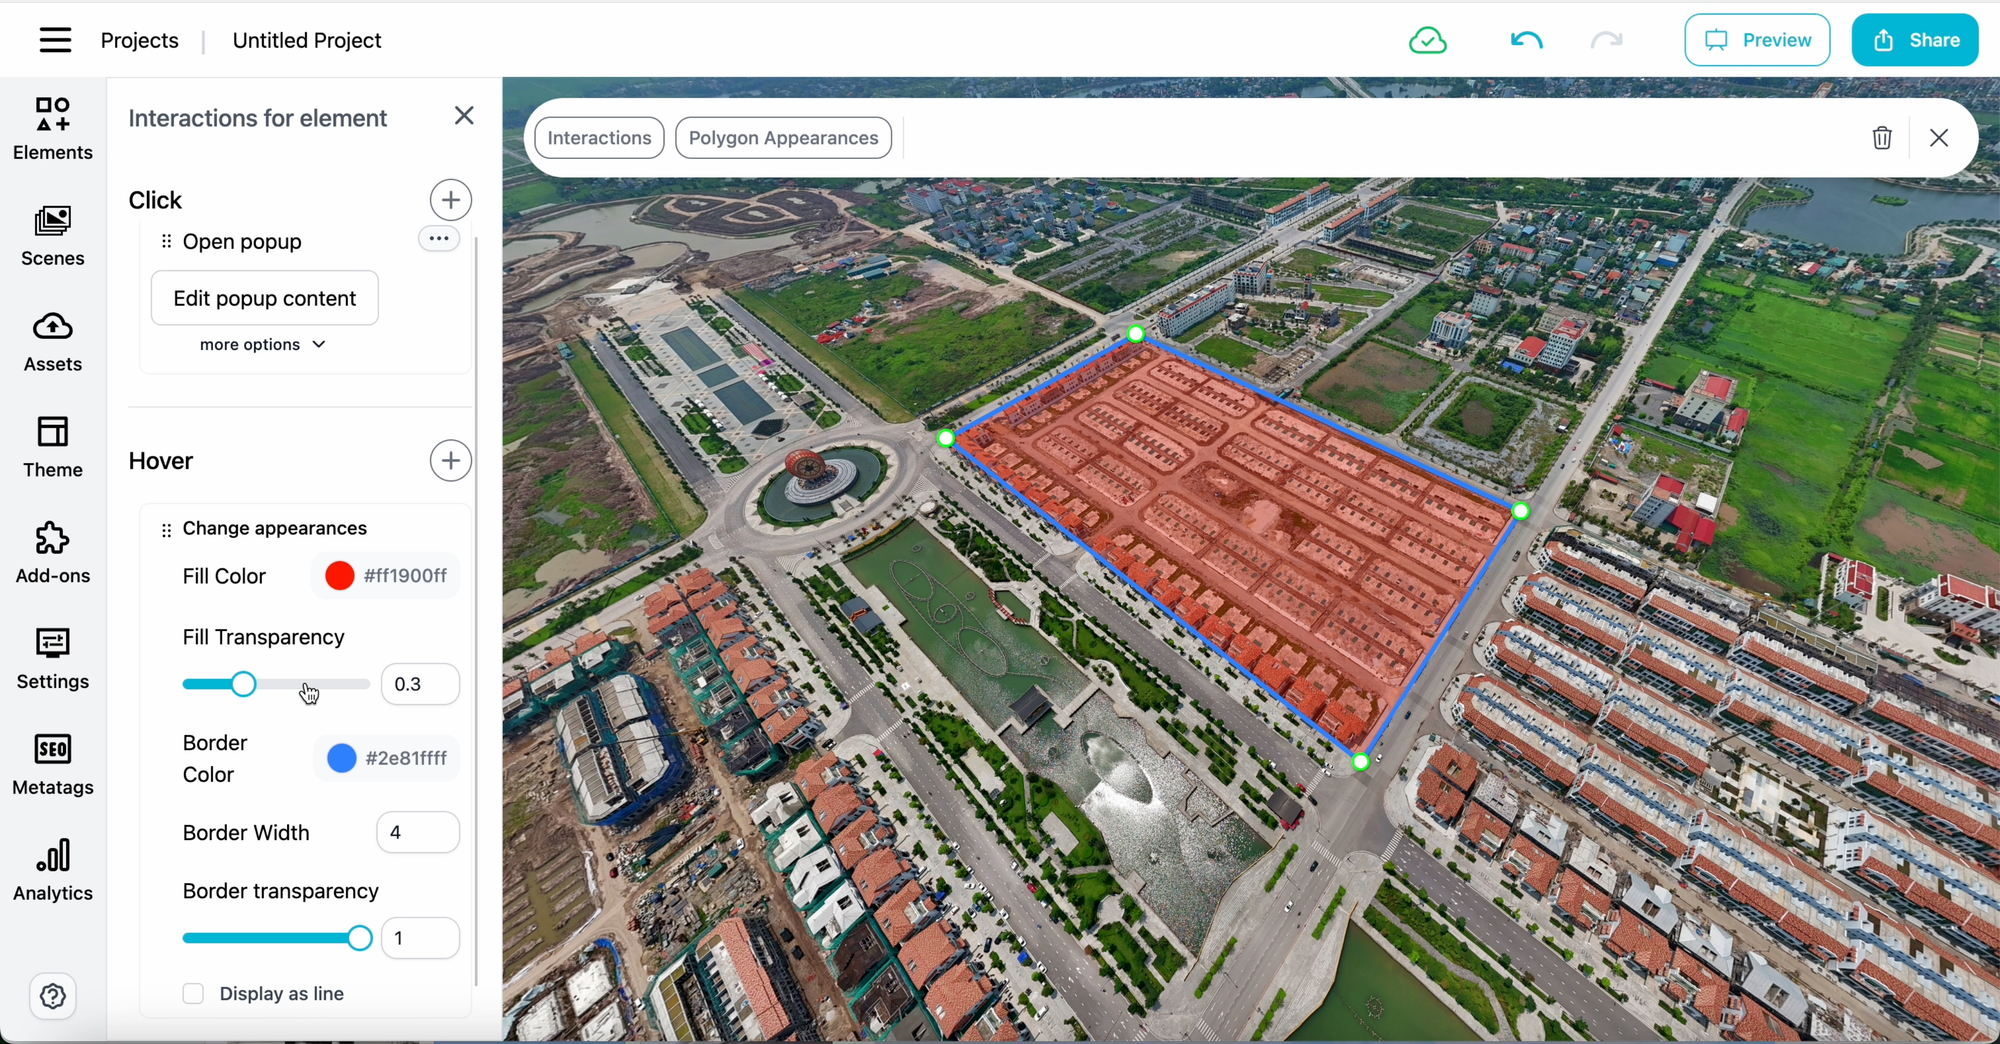
Dynamic Hover States
Providing immediate feedback when interactive regions are discovered keeps viewers engaged. Navigate to the Interactions engine panel, look for the Hover section settings, and enable Change Appearances. This allows you to define distinct color states that activate when the viewer's mouse glides over the mapped surface area.
Alternative Line Mapping
Sometimes a solid area block feels too heavy for minimalist designs. By checking the box labeled "Display as a line", you can immediately change the hotspot architecture to render strictly as a thin outline pathway instead of a shaded boundary layout, opening up additional design choices.
Connecting Interactions & Actions
Visually defining a spatial area is only half the battle—hotspots must serve an operational purpose. Select your active boundary area and click the main Interactions button in your primary tool ribbon to attach specific event triggers.
You can easily link actions such as triggering custom structural informational windows using the Open Popup command, embedding web-accessible product catalogs, playing media streams, or jumping across various scene environments.
💡 Pro Tip: Invisible Clickable Fields Want to maintain absolute immersion without visible UI graphics cluttering your photography? Set the polygon fill and border opacity properties to 0%. The hotspot remains completely active and functional to clicks, but blends completely invisibly into the underlying virtual scene.
Real-World Industry Applications
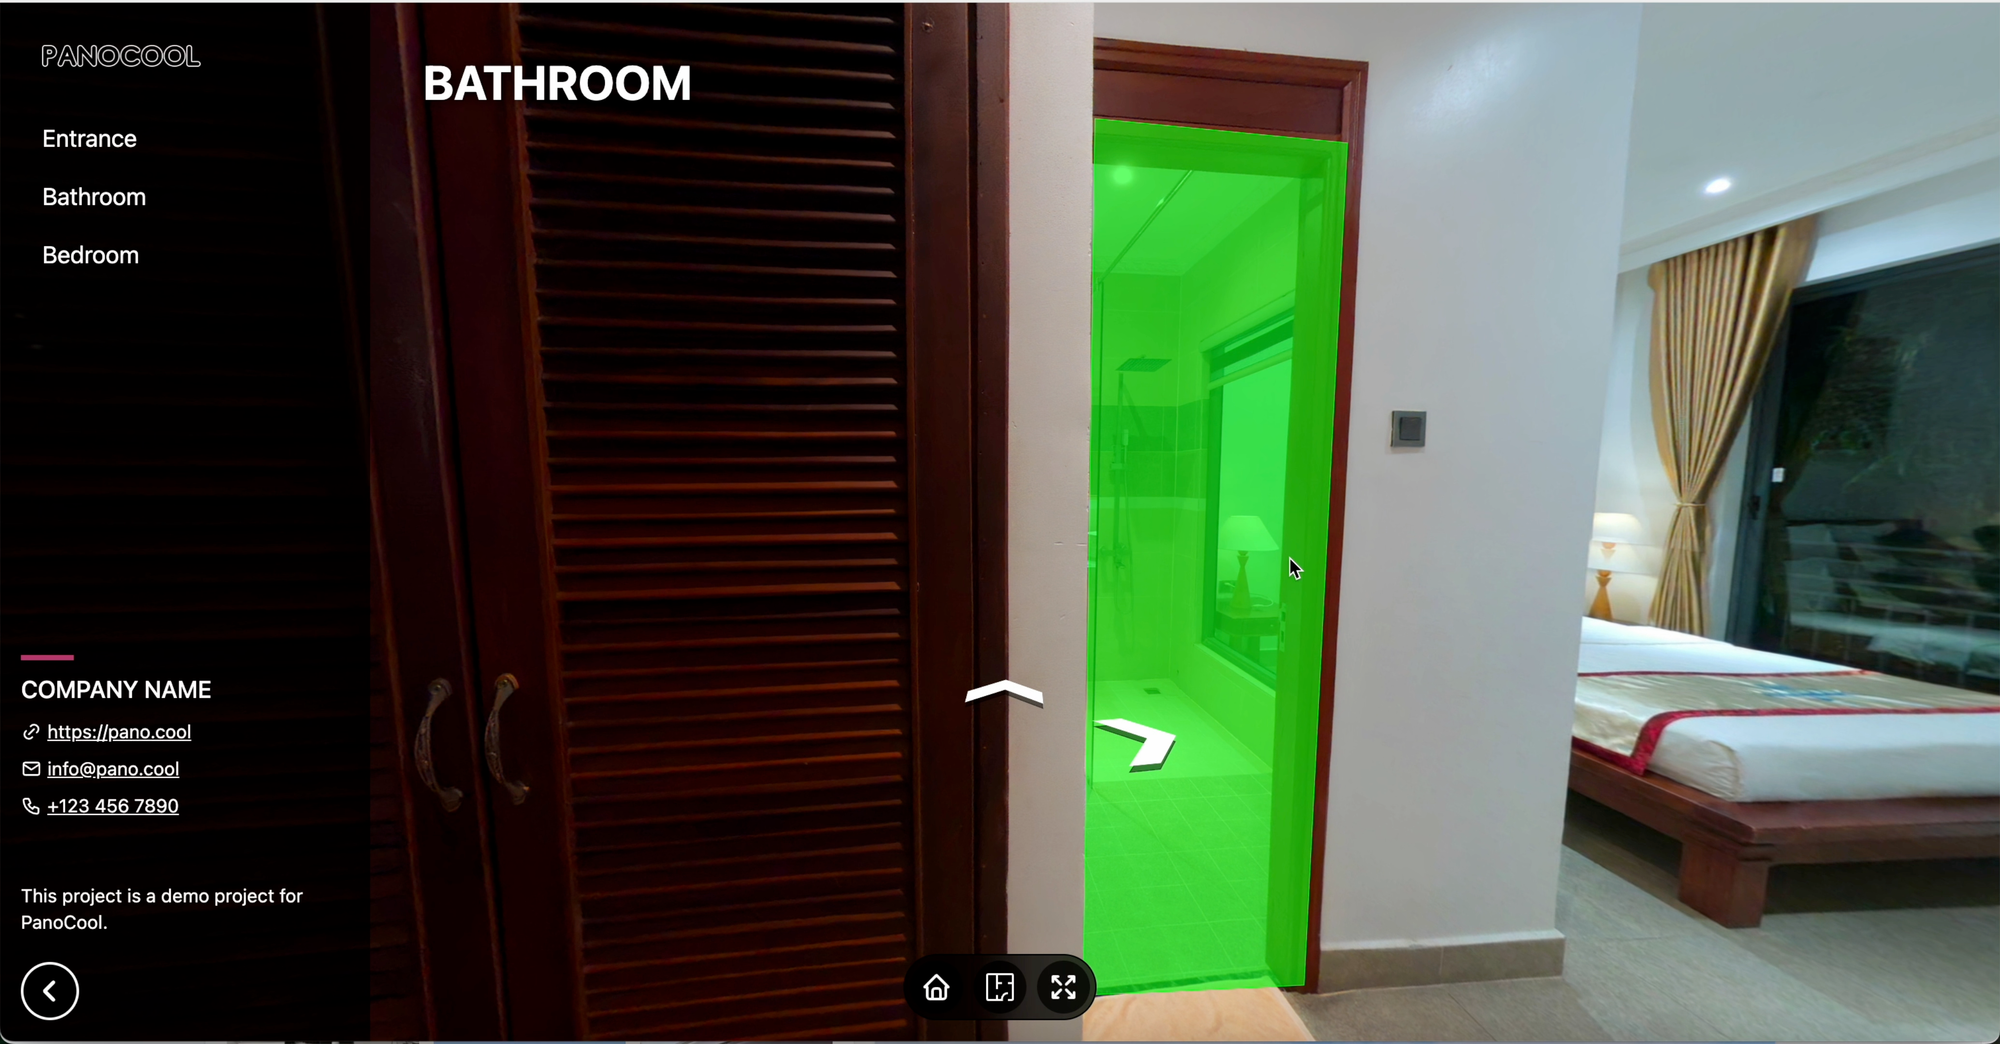
1. Contextual Scene Transitions (Real Estate & Hospitality)
Instead of placing generic arrow graphics on a kitchen floor, map a polygon hotspot directly to the physical bathroom entry door frame. When users click on the actual door, they smoothly step directly into the next room scene. This contextual logic mirrors real-world physical navigation, making tour exploration feel completely frictionless.
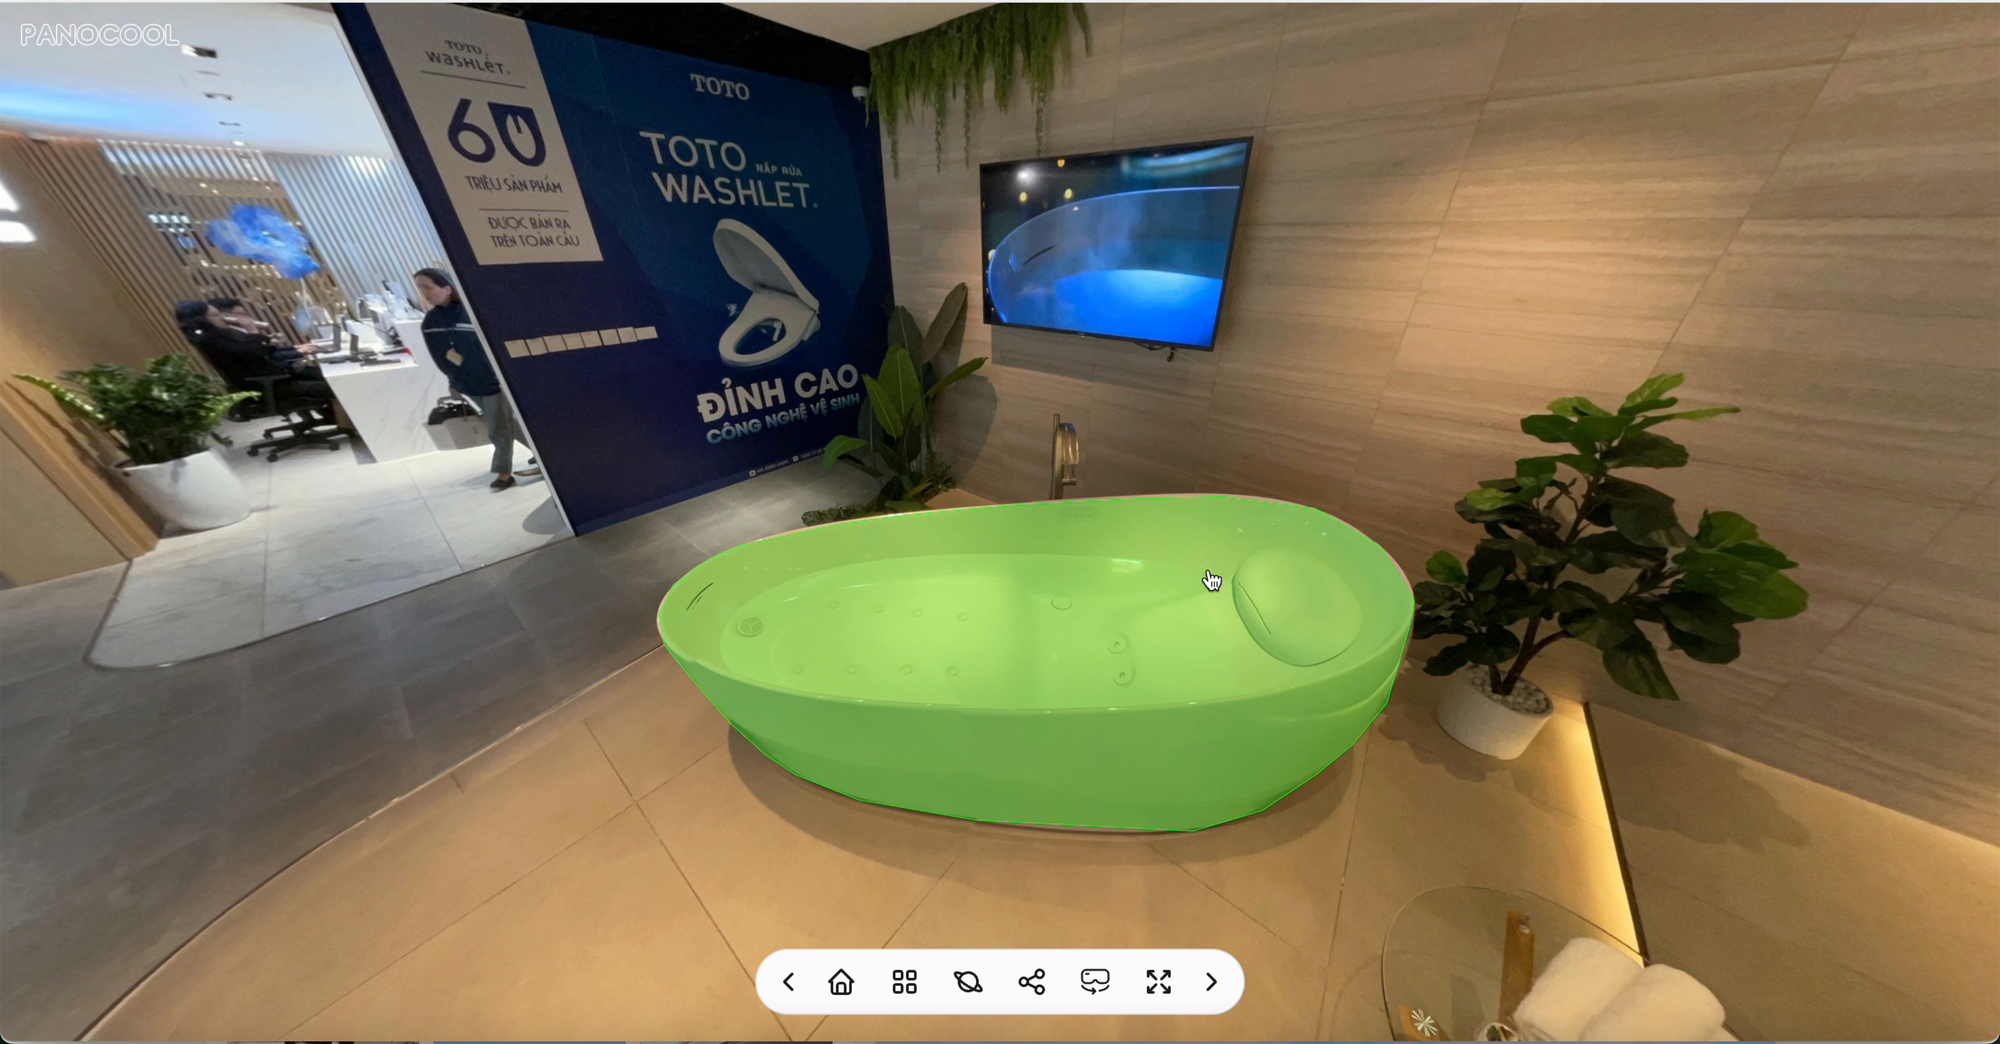
2. Product Showrooms & Virtual Retail (E-commerce)
Transform standard imagery into shoppable retail storefronts. In a digital bathroom furniture showroom layout, draw custom hotspots around individual vanities, mirrors, bathtubs, or luxury tile displays. Linking those shapes directly to informational overlays or external shopping carts allows customers to inspect product specs and purchase items seamlessly.
Conclusion
Polygon Hotspots bridge the gap between static panoramic photography and immersive web experiences. By moving beyond basic floating icons, you can create spatial layouts that feel remarkably natural, highly interactive, and customized to your specific business goals.
Start using PanoCool: https://pano.cool
Youtube Tutorial