Street View Navigation for Virtual Tour with PanoCool
Creating immersive virtual experiences just got significantly faster and more intuitive with Street View Style Arrows feature of PanoCool Virtual Studio.
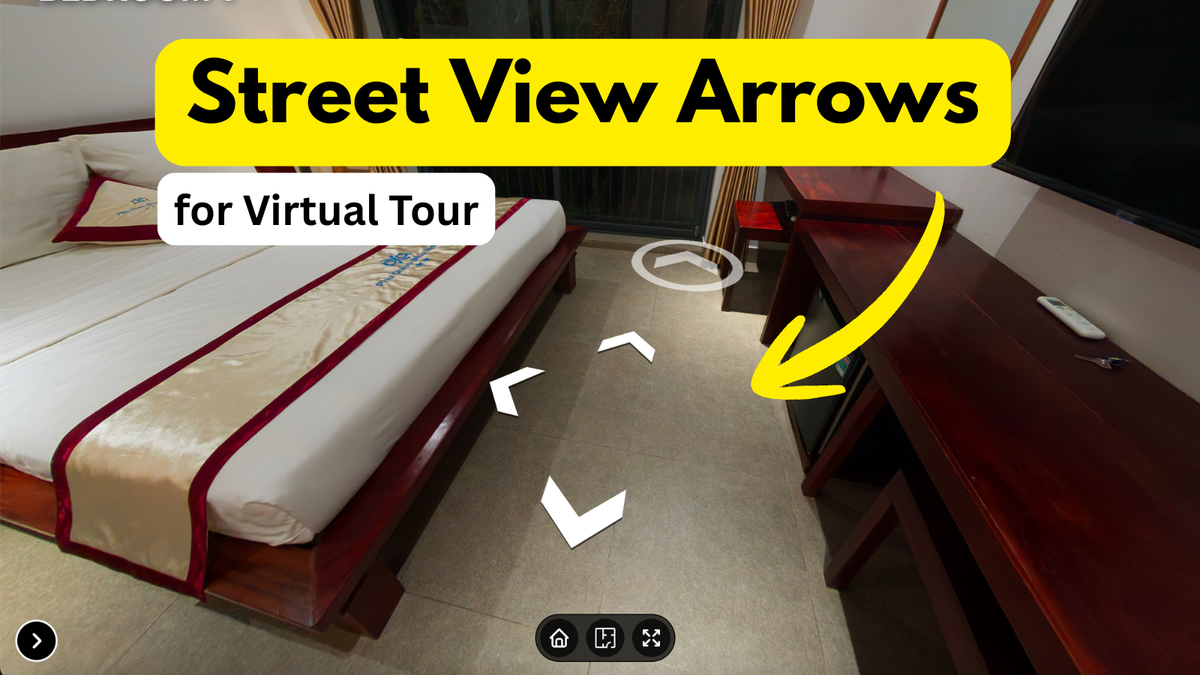
For years, the gold standard of simple, familiar navigation has been the floating arrow system popularized by Google Street View. It allows users to effortlessly "walk" through a space, understanding the relationship between rooms instantly. Until today, achieving this look required tedious, manual hotspot placement for every connection.
Not anymore. PanoCool’s new Street View Arrows Add-on automates the workflow while giving you unparalleled design control.
Here is how this game-changing feature transforms your tour creation process:
Why Street View Style?
Standard virtual tour navigation often relies on static icons (like "i" for info or generic arrows) placed somewhere in the scene. Street View arrows are different because they are spatial. They float on the floor plane, indicating direction and distance simultaneously.
The Benefits:
- Instant Familiarity: Your visitors already know how to use it.
- Increased Engagement: Fluid movement encourages users to explore deeper.
- Massive Time Savings: You no longer need to manually link every single pair of panoramas with individual hotspots.
Step-by-Step: How to Use Street View Arrows in PanoCool
Let's walk through how easy it is to set this up.
1. Start Your Project
First, create a new project and upload your 360° panoramas. We are starting with a clean slate.
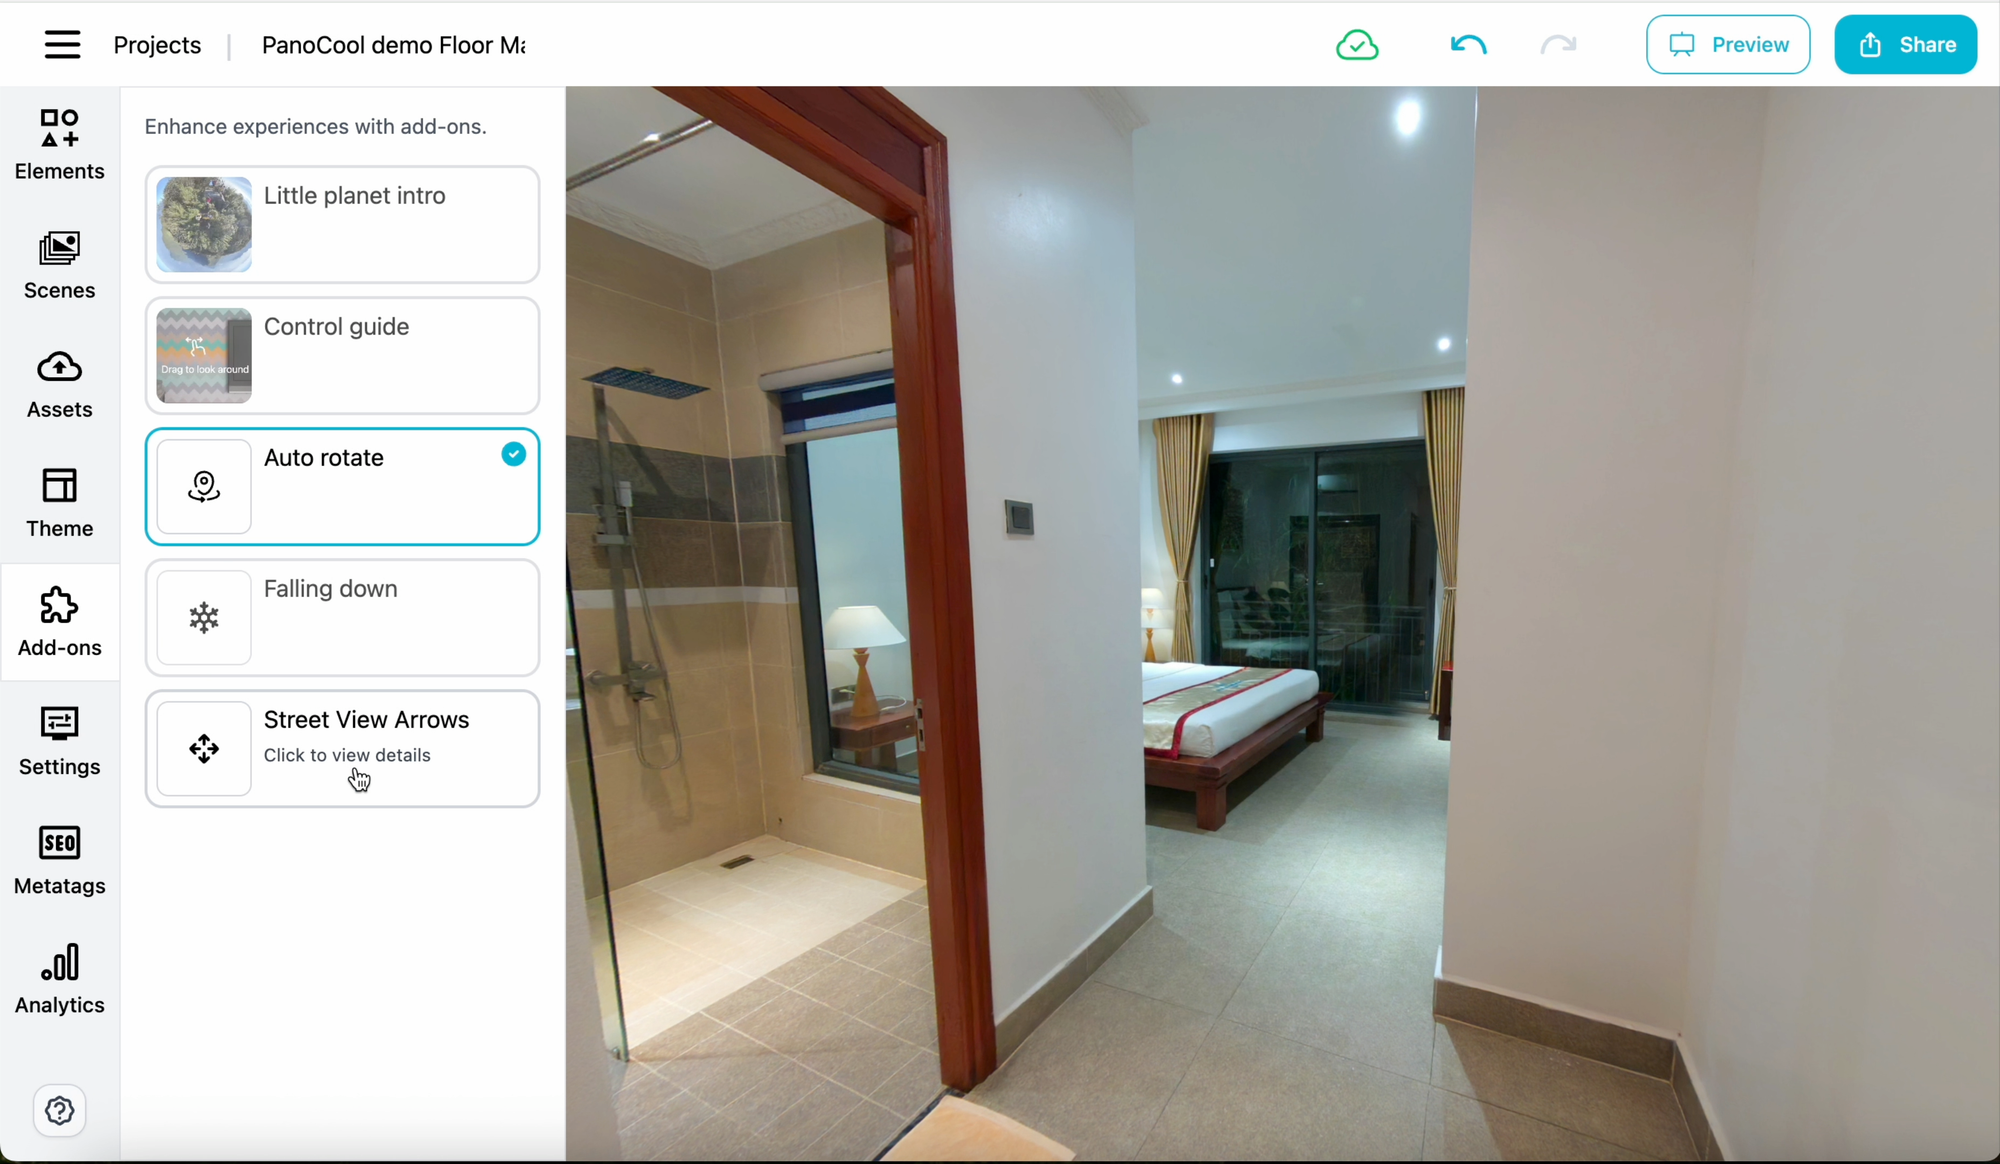
2. Activate the Add-on
Navigate to the Add-on menu in your tour editor. Select Street View Arrows to enable the tool.
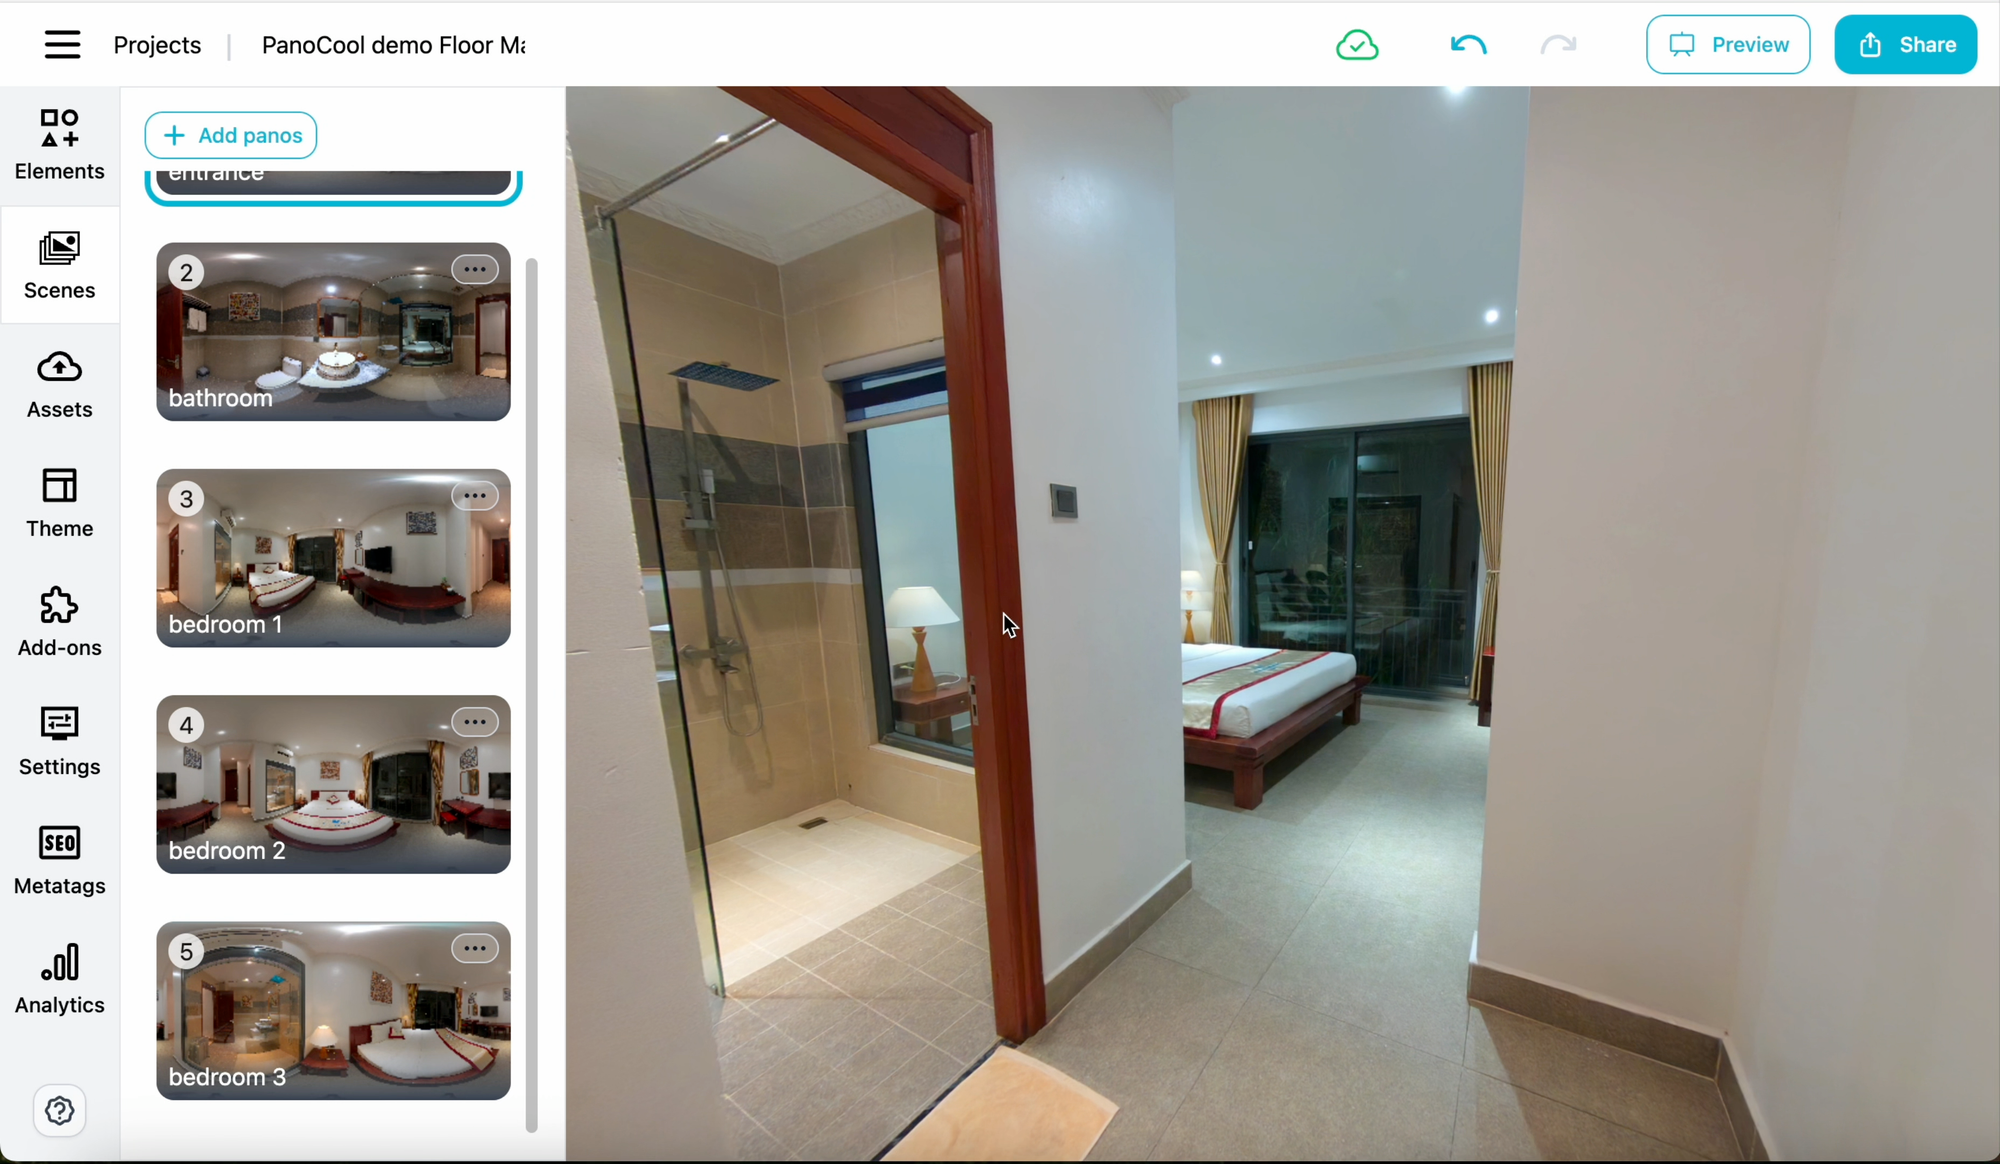
3. Map Your Space
The core concept is to place your panoramas on a virtual "floor."
If your images already contain GPS data, PanoCool can actually automate this entire placement step for you! The system will read the coordinates and arrange the panoramas automatically in relation to each other.
If your images don’t have GPS data (like in this example), you simply drag and drop your panorama "nodes" (dots representing your images) onto the blank canvas, positioning them correctly relative to one another. Once positioned, you simply draw the connection lines between them to define the walking paths.
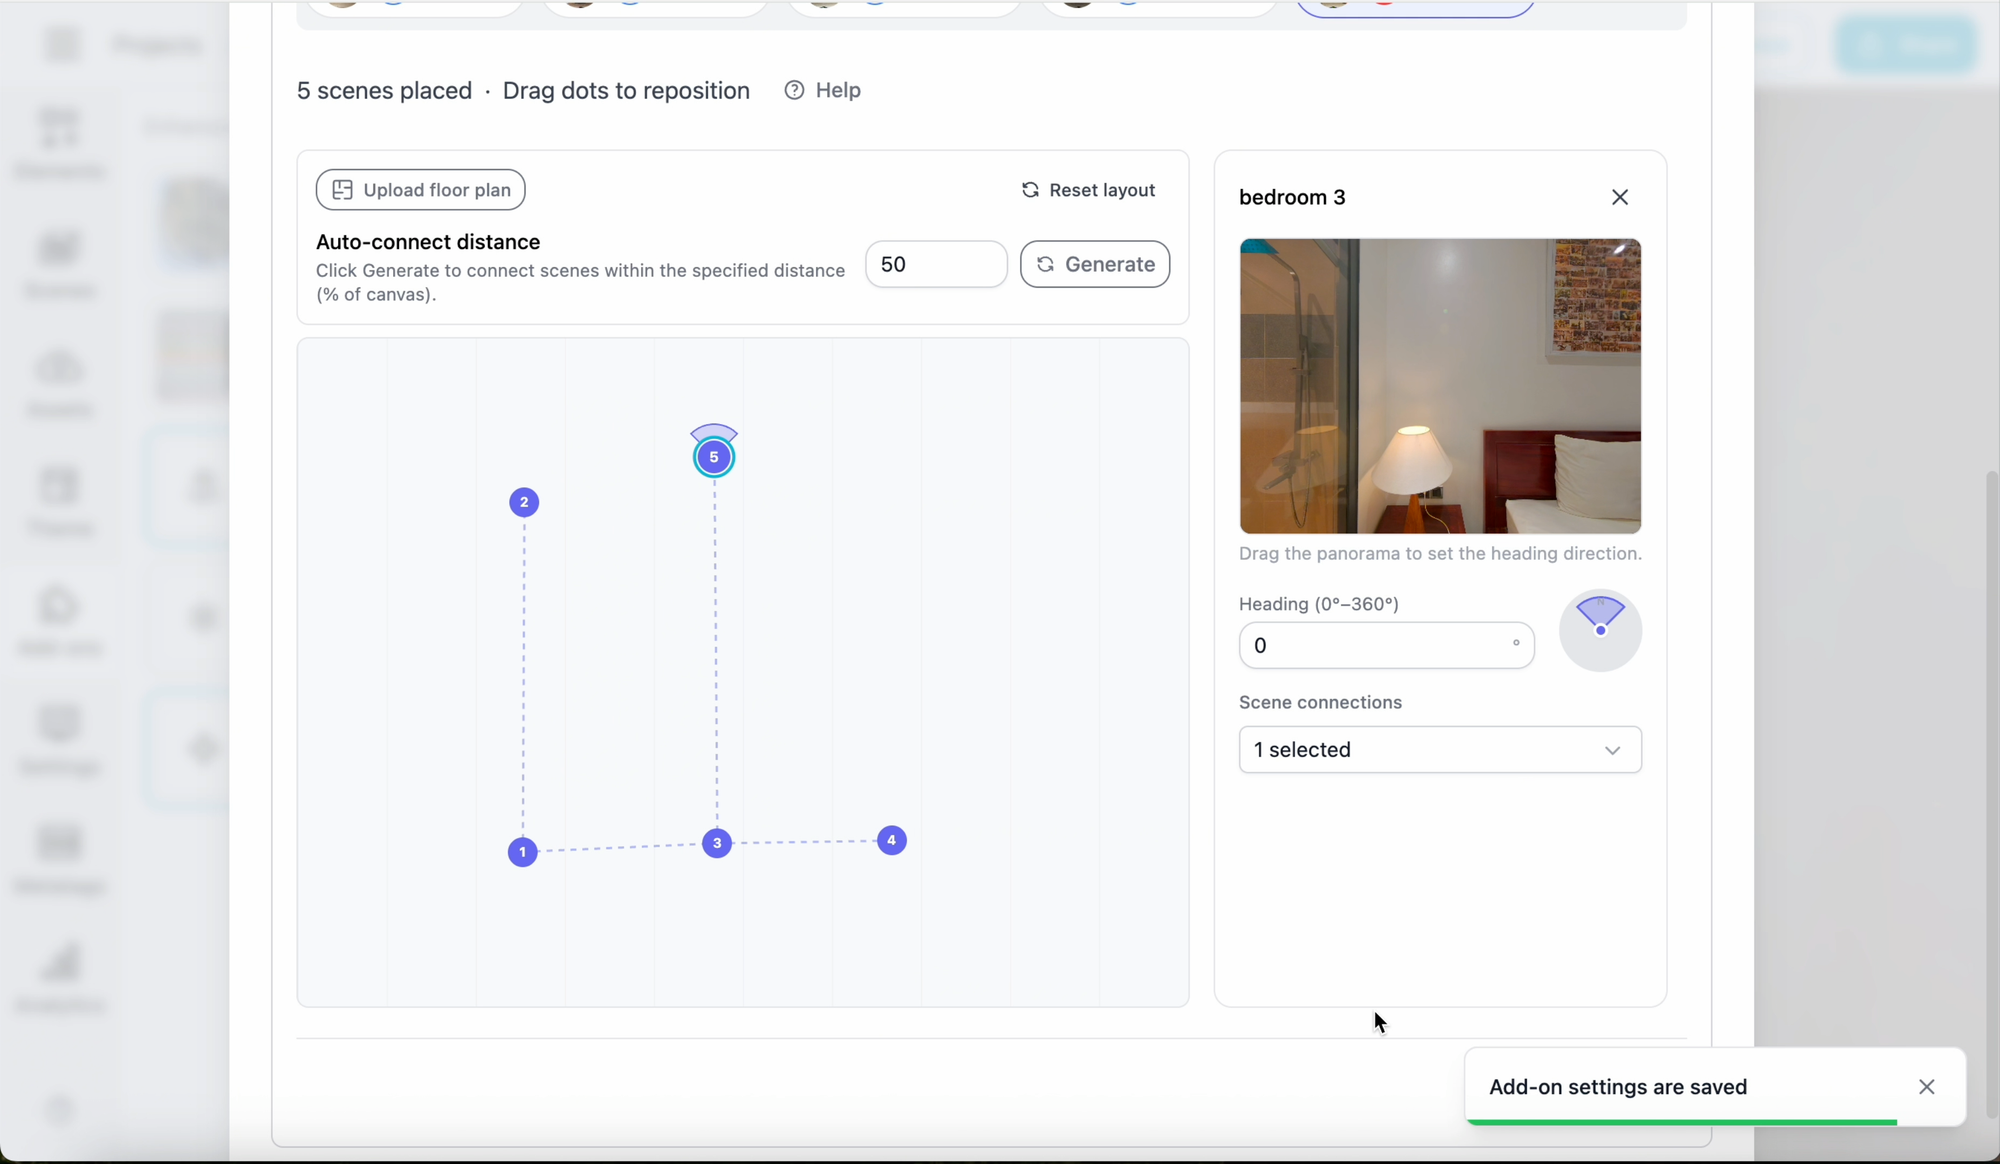
Pro Tip for Accuracy: Use the Direction Cone on each node to align the panorama’s orientation. This ensures that when a user clicks 'forward,' they are actually moving forward in the correct real-world direction.
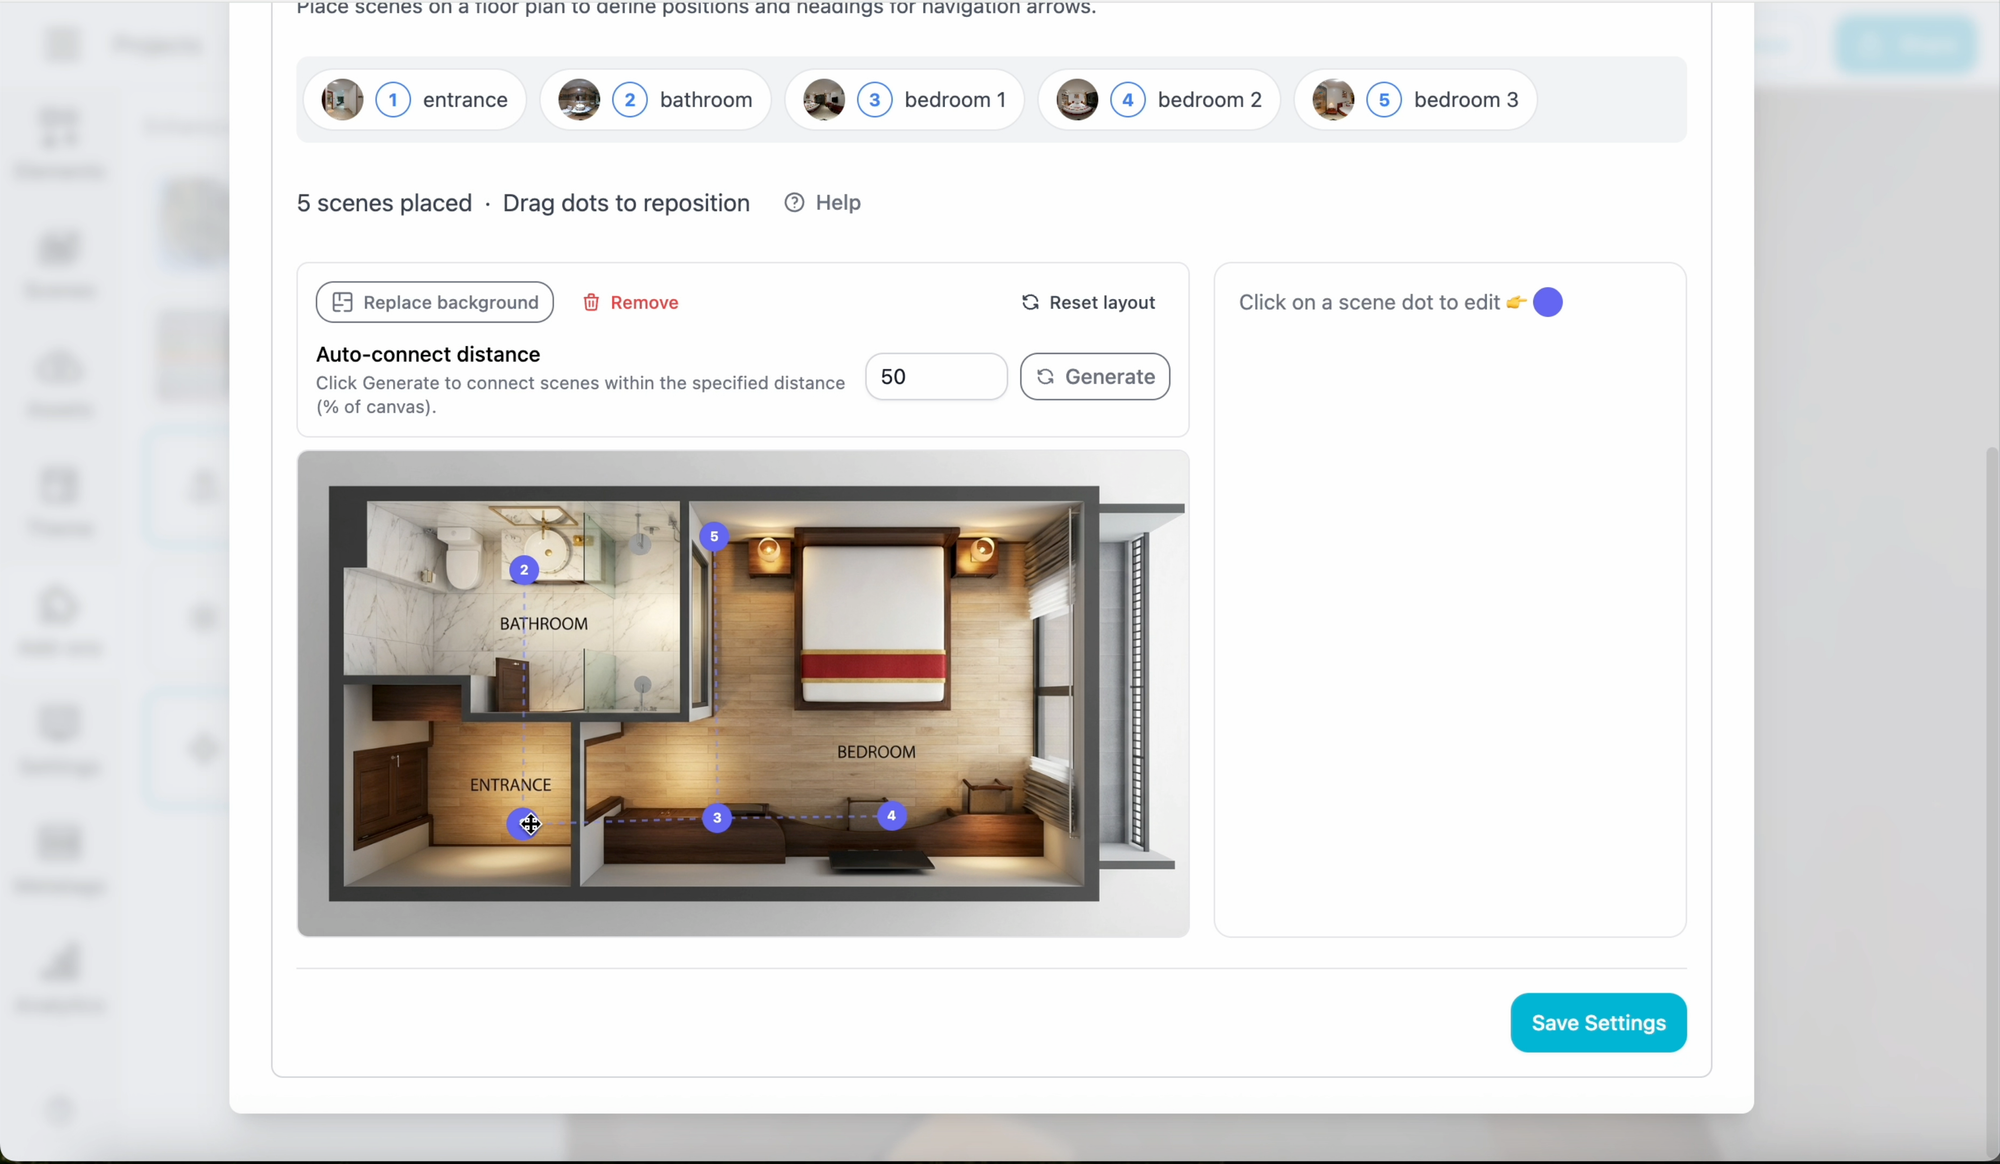
4. (Optional) Enhance with a Floor Plan
While the schematic view works perfectly, using your own actual floor plan image allows for much more precise placement. Simply upload your map as a background guide.
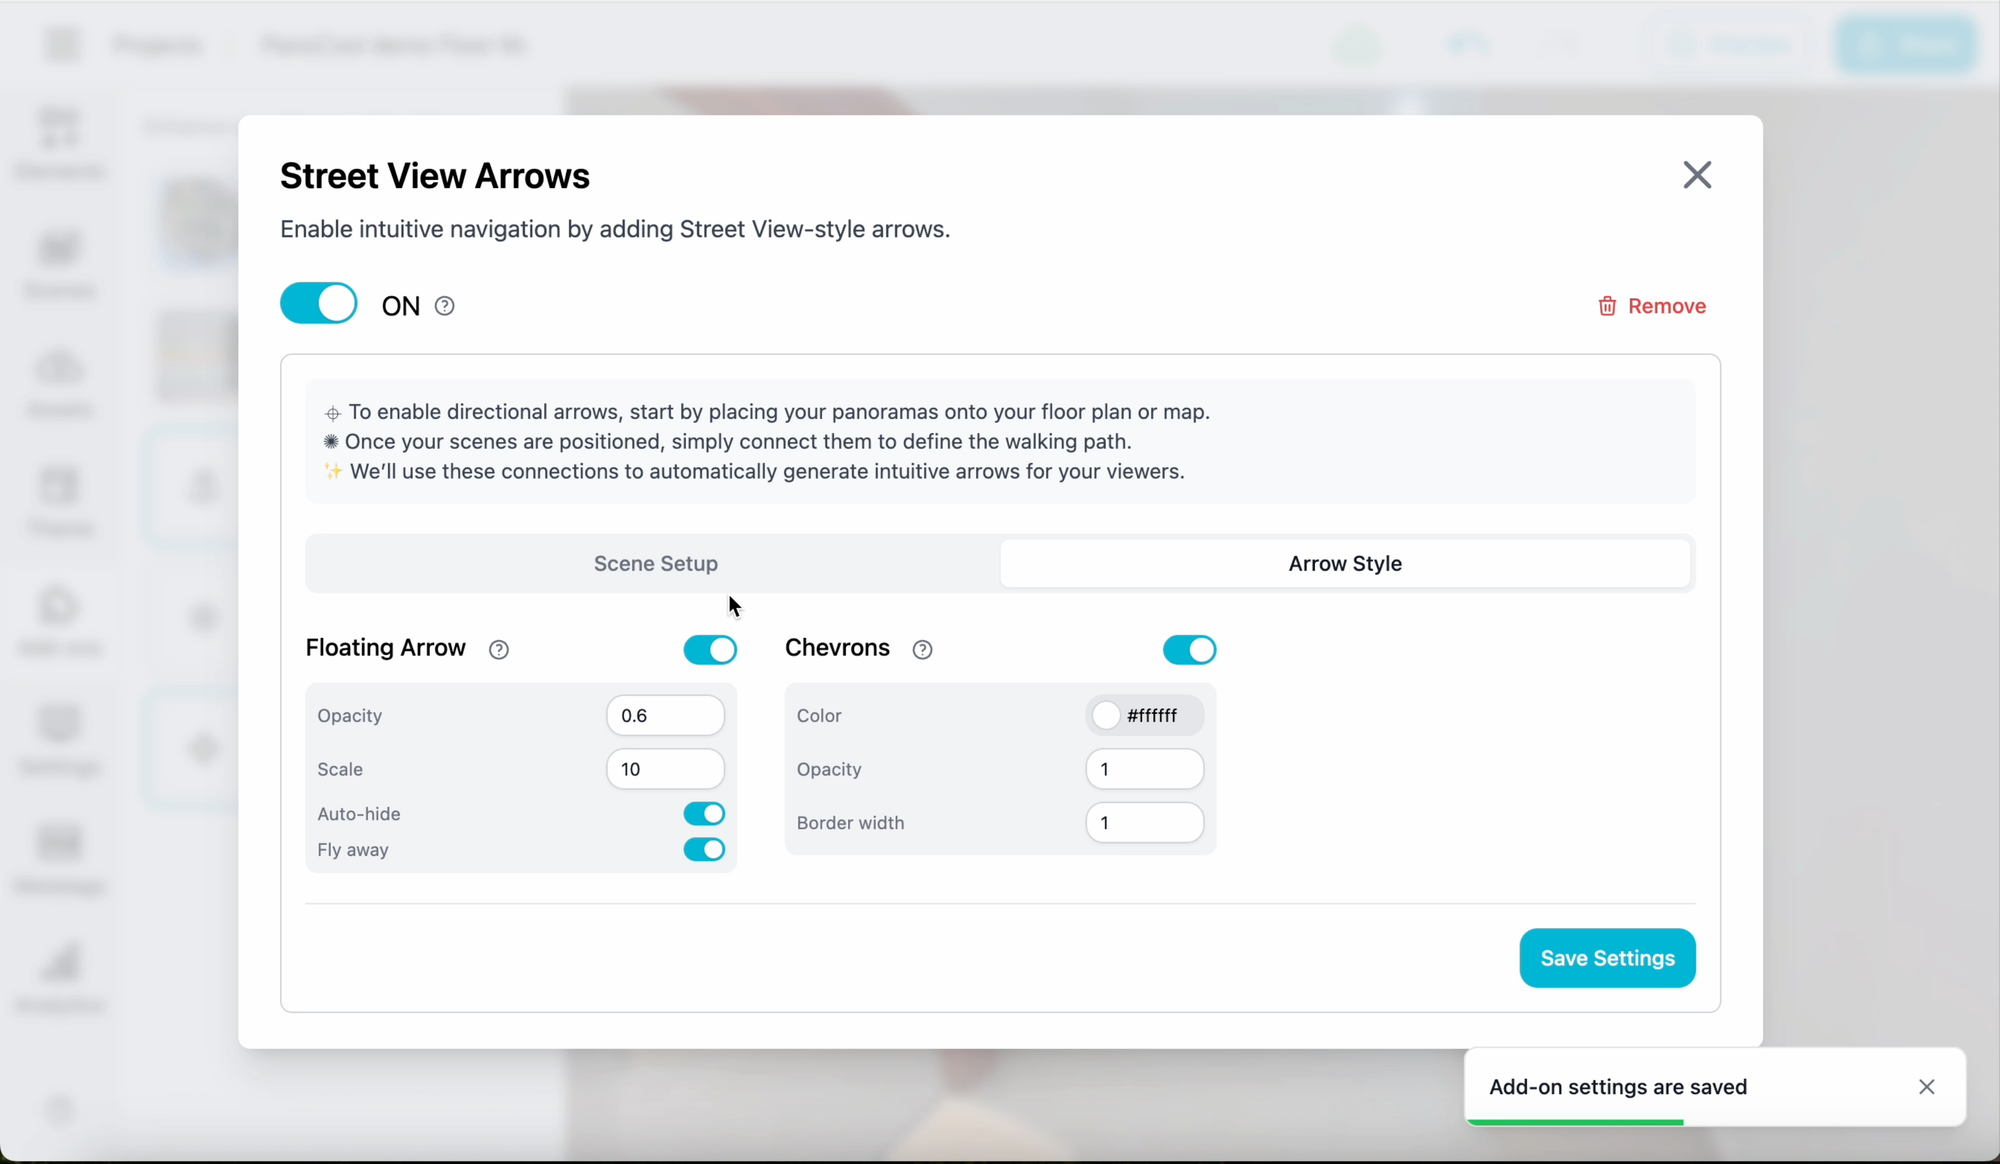
5. Customization and Brand Alignment
A massive advantage of PanoCool is that you get this seamless navigation without sacrificing your custom branding. Unlike rigid systems, PanoCool lets you utilize Street View Arrows alongside your favorite menus, floor plans, and interactive elements.
Furthermore, you have full control over the visual appearance. In the Arrow Style tab, you can customize the floating arrows and chevrons to match your design palette.
6. Preview and Save
Hit Save, and then click Preview to see the magic in action. Your tour now features smooth, professional, and familiar Street View-style navigation that visitors will love.
Ready to Build Intuitive Tours Faster?
The Street View Arrows Add-on is available for all PanoCool users. Experience the perfect balance of automated efficiency and professional customization.