Add Flat Photos to 360 Virtual Tours with PanoCool
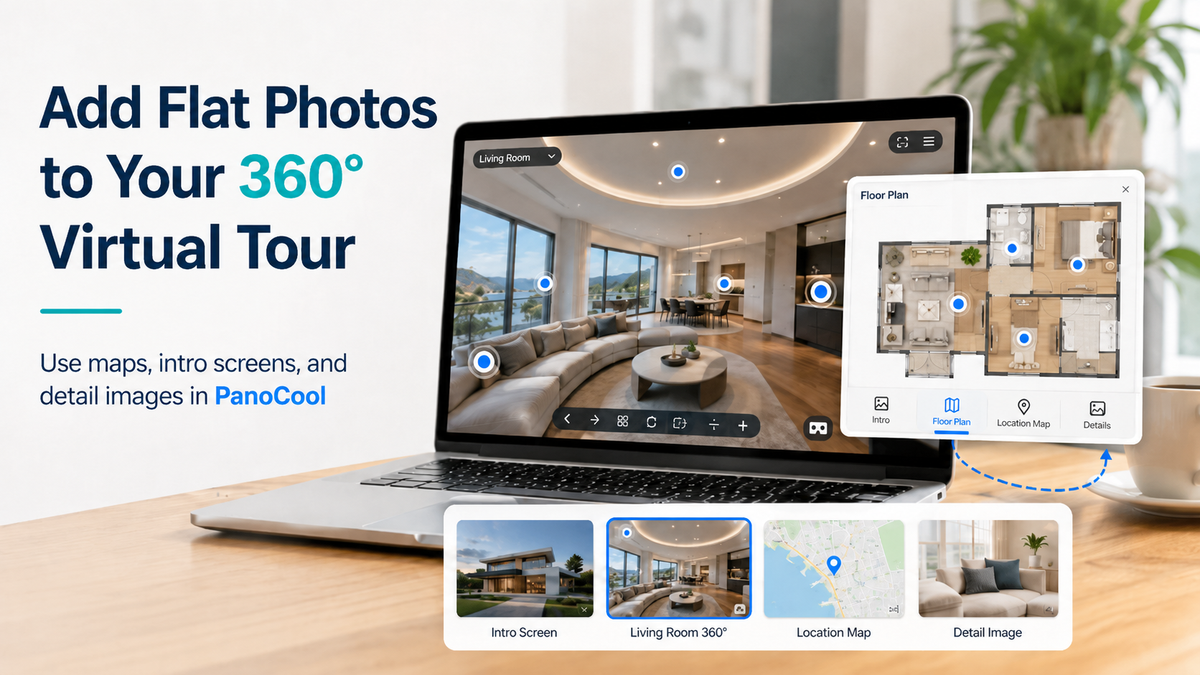
When we think about a virtual tour, 360° photos are usually the first thing that comes to mind. They are the core of the experience, allowing visitors to look around freely and explore a space as if they were actually there.
But not every part of a virtual tour needs to be presented in 360°. Sometimes, a regular flat photo is actually the better way to present information. Combining 360° scenes with normal photos can make your virtual tour more informative, easier to navigate, and more visually interesting.
PanoCool Virtual Tour Studio supports both 360° photos and flat photos as scenes, so you can freely combine them within the same virtual tour.
Why Add Flat Photos to a Virtual Tour?
Flat photos can be useful whenever you want the viewer to focus on a specific piece of visual information instead of looking around an entire 360° environment.
Here are a few ideas.
1. Create a Custom Map or Site Plan
You can use an image of a property map, resort map, campus map, or site layout as a scene.
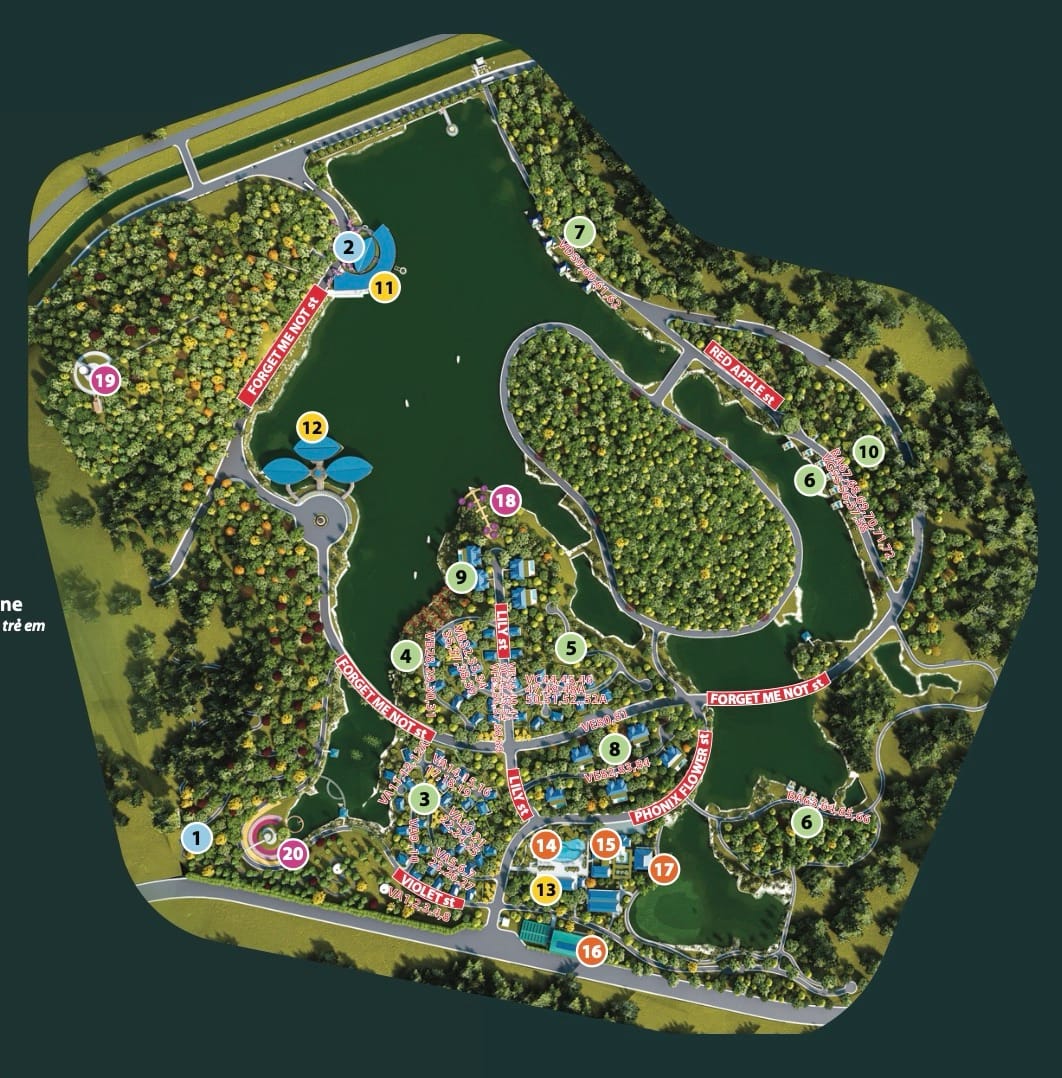
Then, add hotspots directly on top of the map to let visitors jump to different locations in your tour.
For projects where spatial context is important, maps can make it much easier for viewers to understand where each location is in relation to the others.
PanoCool also provides dedicated floor-plan and map features for more advanced navigation, including interactive hotspots and directional information.
2. Build an Introduction or Welcome Screen
Instead of opening your virtual tour immediately inside a 360° panorama, you can start with a designed cover image.
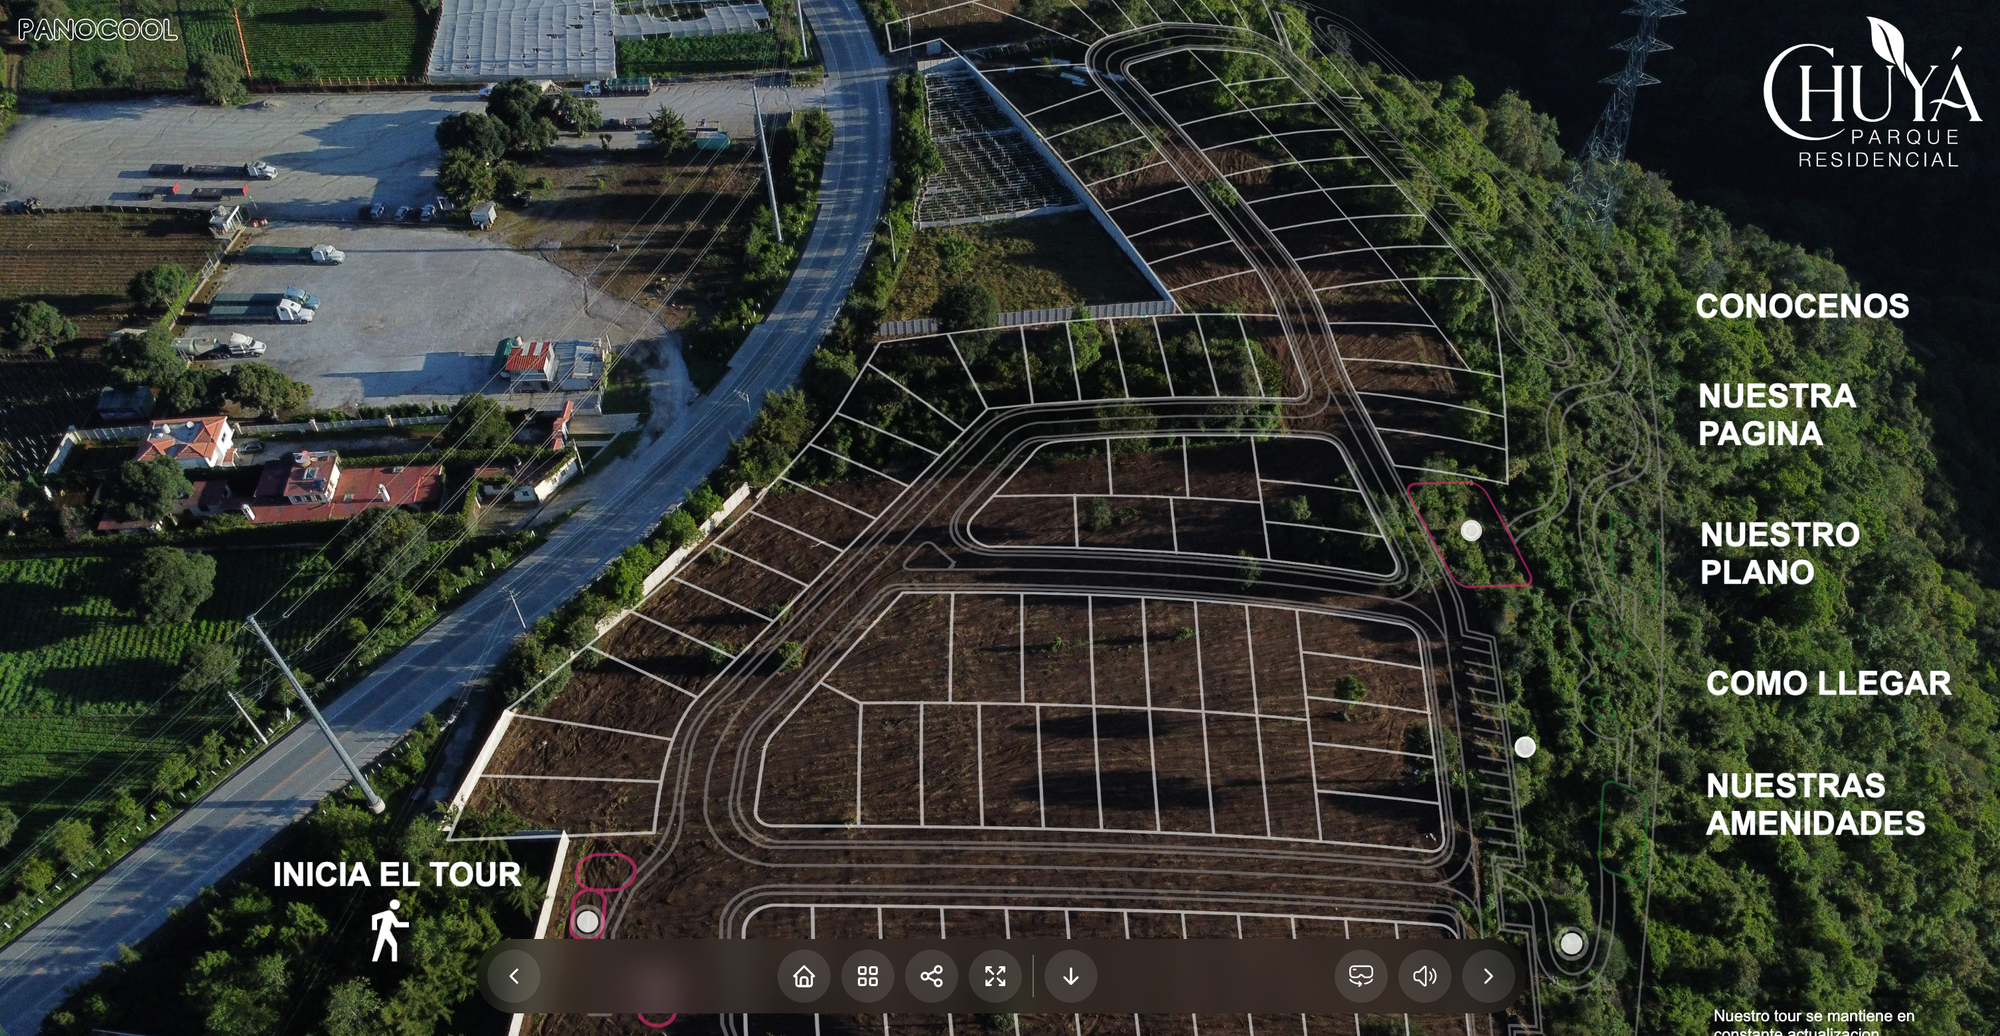
For example, your intro scene could contain:
- The property or business name
- A logo
- A hero photo
- Short introductory text
- Navigation hotspots such as Start Tour, View Rooms, or Explore Property
This can make a virtual tour feel more like a complete interactive presentation instead of simply a collection of panoramas.
3. Show Detailed Photos
Sometimes a 360° photo provides the overall environment, while a normal photo provides the detail.
For example, you might add flat photos showing:
- Architectural details
- Furniture or interior finishes
- Artwork
- Hotel amenities
- Restaurant dishes
- Product displays
- Equipment or machinery
- Before-and-after images
- Construction details
You can then connect these images to your 360° scenes using hotspots.
PanoCool hotspots can also trigger other content such as information, links, galleries, and scene navigation, making it possible to build richer experiences around your main 360° content.
4. Present Floor Plans, Diagrams, or Technical Drawings
Flat scenes are particularly useful for content that was never intended to be viewed in 360°.
For example:
- Floor plans
- Building elevations
- Construction drawings
- Property boundaries
- Infographics
- Event layouts
- Emergency or evacuation maps
- Educational diagrams
Because hotspots can also be placed over flat scenes, these images can become interactive rather than remaining static references.
5. Create Interactive Menus
You can even design your own graphical navigation screen externally and upload it as a flat image.
For example, a resort virtual tour could have a visual menu containing images for:
Rooms · Restaurant · Swimming Pool · Spa · Activities
Place hotspots over those areas and connect each one to the appropriate scene.
This gives you another way to create highly customized navigation experiences.
Flat Photos Work Like Scenes in PanoCool
In PanoCool, a flat photo can be added to your project just like a 360° photo.
Once uploaded, it appears inside the Scenes tab.
You can simply drag the scene from the Scenes tab into your tour or select it whenever you need to create a connection.
You can also place hotspots directly over a flat photo, just as you would with a 360° scene.
That means a normal image doesn't have to be just something viewers look at—it can become an interactive part of your virtual tour.
For example, if you upload a custom illustrated map, you could place a hotspot over each building. Clicking a building could then take the visitor directly to its corresponding 360° panorama.
Control How Far Visitors Can Zoom Into Flat Photos
Flat photos work slightly differently from 360° photos when it comes to zooming.
Normally, the maximum useful zoom depends on the actual resolution of the uploaded image. PanoCool can use the original pixel dimensions of the image to determine how far viewers should be allowed to zoom without unnecessarily enlarging it.
You can also customize this behavior manually.
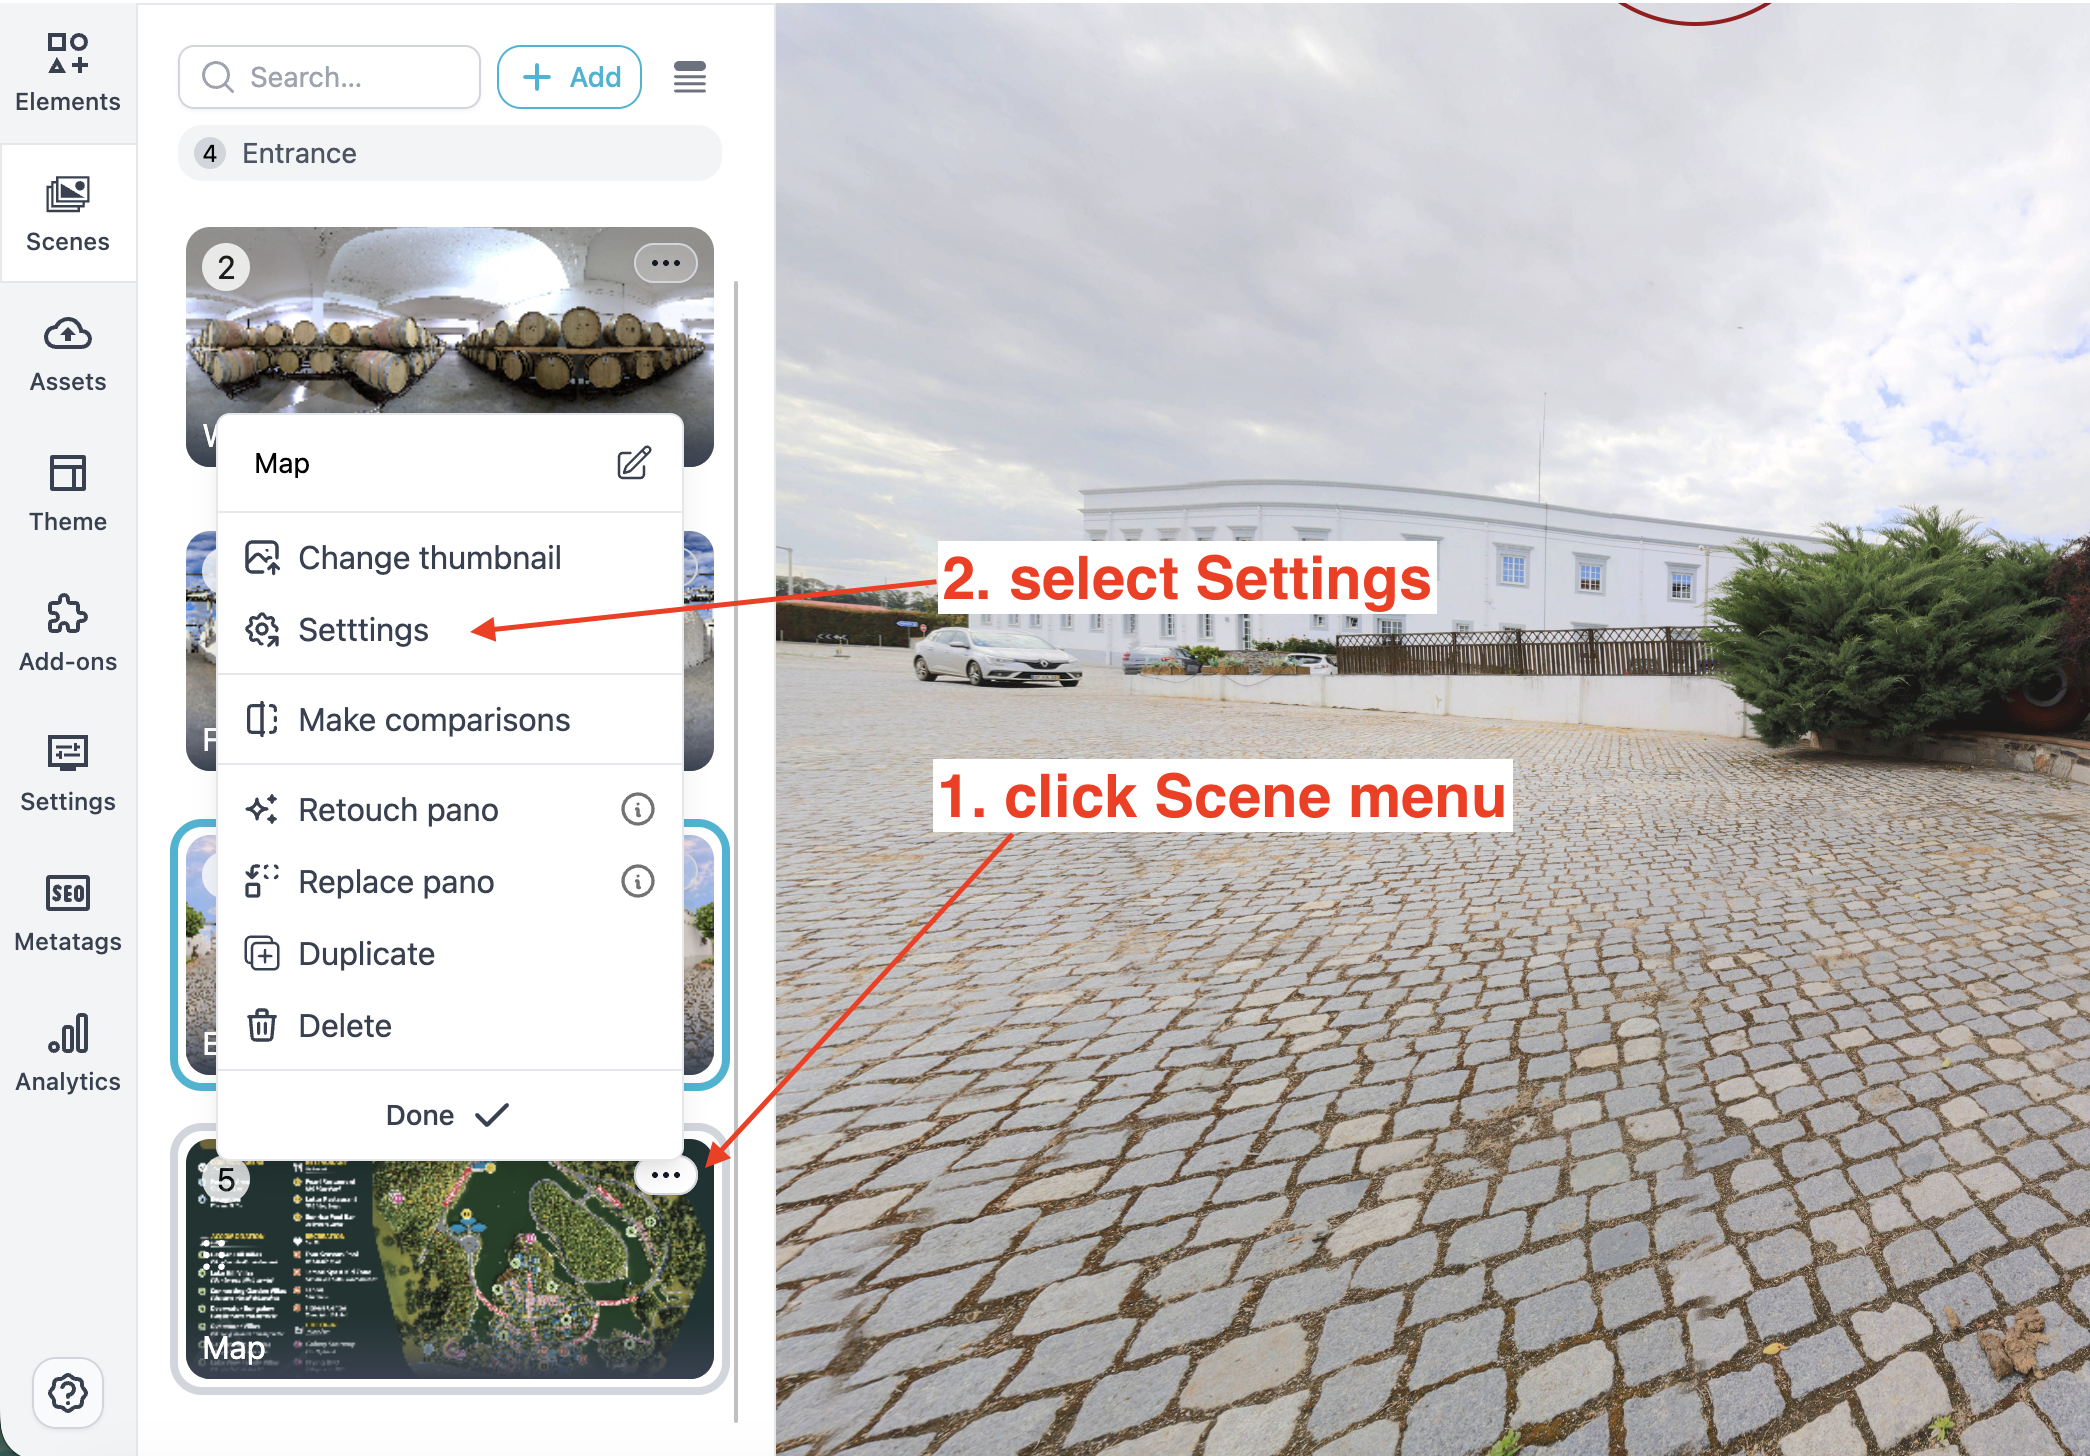
Open the menu for the flat-photo scene and select: Settings → View Settings
Then enable: Use max pixel room
From there, you can configure the Zoom Scale Factor.
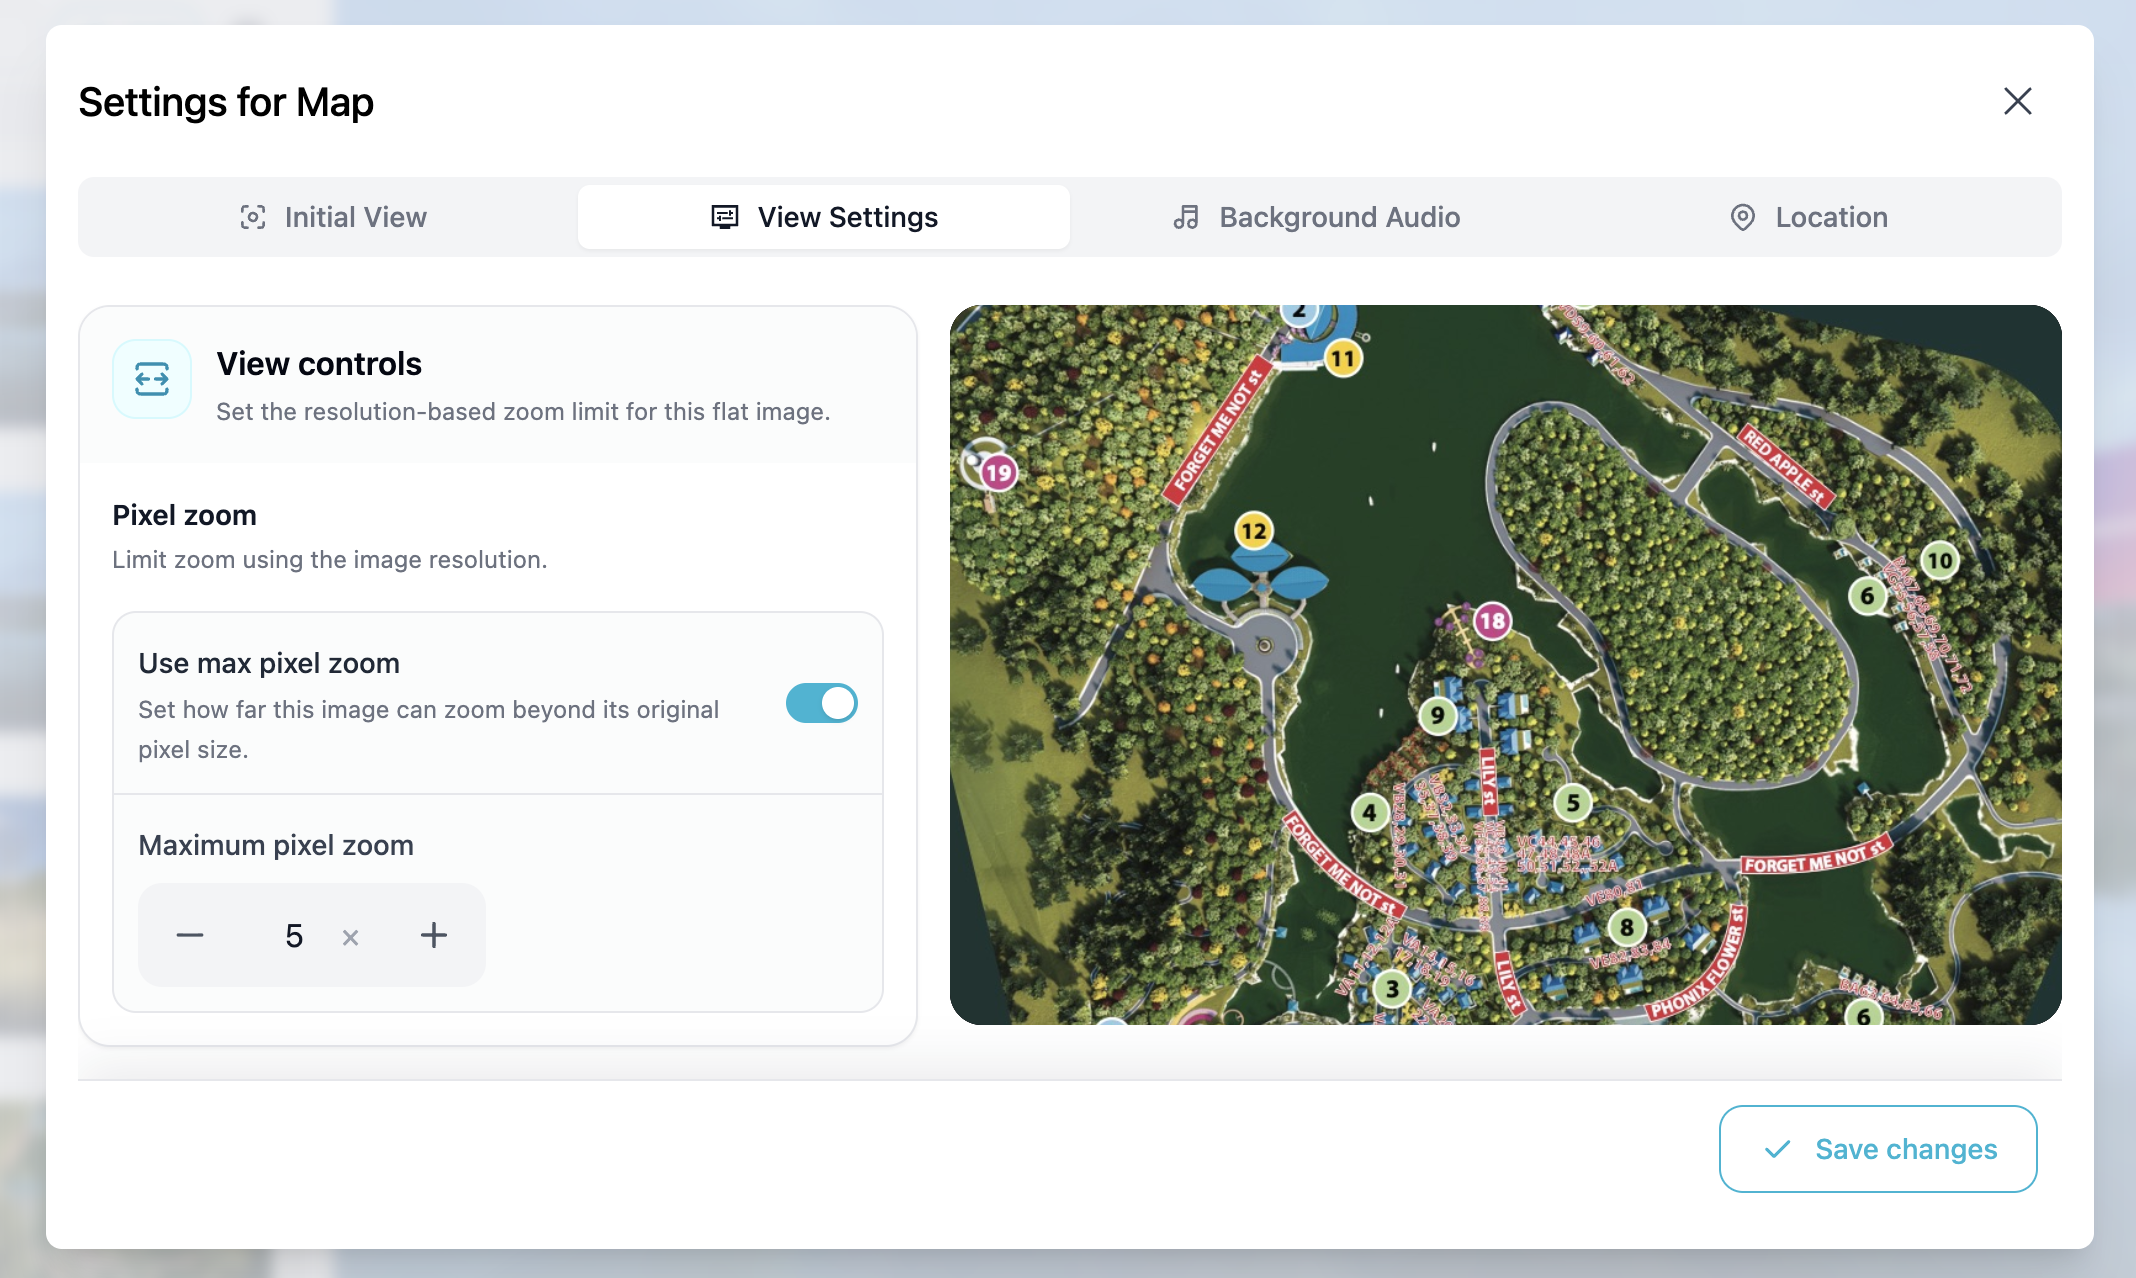
Understanding Zoom Scale Factor
The easiest way to think about this setting is as a multiplier for how far the viewer can zoom into the original image.
For example:
Zoom Scale Factor = 1
The image can be viewed approximately up to its original pixel resolution.
Zoom Scale Factor = 2
The viewer can zoom approximately 2× beyond the image's original resolution.
So imagine you have a detailed map image that is 4000 pixels wide.
With a zoom scale factor of 1, PanoCool limits the zoom around the image's natural resolution.
With a zoom scale factor of 2, visitors can zoom further in, effectively allowing the image to be enlarged to around twice that level.
This can be useful for maps, architectural plans, diagrams, or other high-resolution images where visitors may want to inspect small details.
Keep in mind that increasing the zoom scale does not create additional image detail. If the original image has a low resolution, zooming too far may make it appear blurry or pixelated.
For that reason, we recommend uploading a sufficiently high-resolution source image first, then adjusting the Zoom Scale Factor based on how closely you want visitors to inspect it.
Combine 360 photos and flat photos
Flat photos do not need to appear only at the beginning of a virtual tour. You can use them anywhere in the experience and open them through menus, hotspots, or other navigation elements.
For example, you can create a custom menu item called Map and link it to a flat-photo scene containing your own property map, resort map, campus map, or site plan.
Visitors can open the Map whenever they want, then use hotspots placed directly on the map to jump to different 360 scenes in the tour.
This gives you a flexible way to combine immersive 360 scenes with more traditional visual navigation.
For example, a resort tour could include menu items such as:
Home · Rooms · Restaurant · Activities · Map
The Map item can open a custom illustrated flat image showing the entire resort. Each building or area on the map can then contain a hotspot that takes the visitor directly to the corresponding 360° scene.
You can use the same approach for many types of projects:
- A real estate tour with a Floor Plan menu item
- A school or university tour with a Campus Map
- A construction project with a Site Plan
- A hotel with a Property Map
- An industrial facility with a Facility Layout
- A museum or exhibition with a Visitor Map
Because flat photos behave as scenes in PanoCool, they can become a fully integrated part of the navigation rather than just supplementary images.
This allows you to mix 360° panoramas, maps, floor plans, diagrams, and detailed photos throughout the same virtual tour and connect everything together using menus and hotspots.
Build More Than Just a 360 Tour
360 photography remains at the center of immersive virtual tours, but sometimes the best way to explain something is simply a well-designed image.
By supporting both 360 photo and flat-photo scenes, PanoCool gives you more freedom to decide how each part of your project should be presented.
Use 360° panoramas when you want visitors to explore.
Use flat photos when you want them to focus.
And connect everything together with hotspots to create a virtual tour that is not only immersive, but also easier to understand and navigate.