How to set up multi-language virtual tours in PanoCool
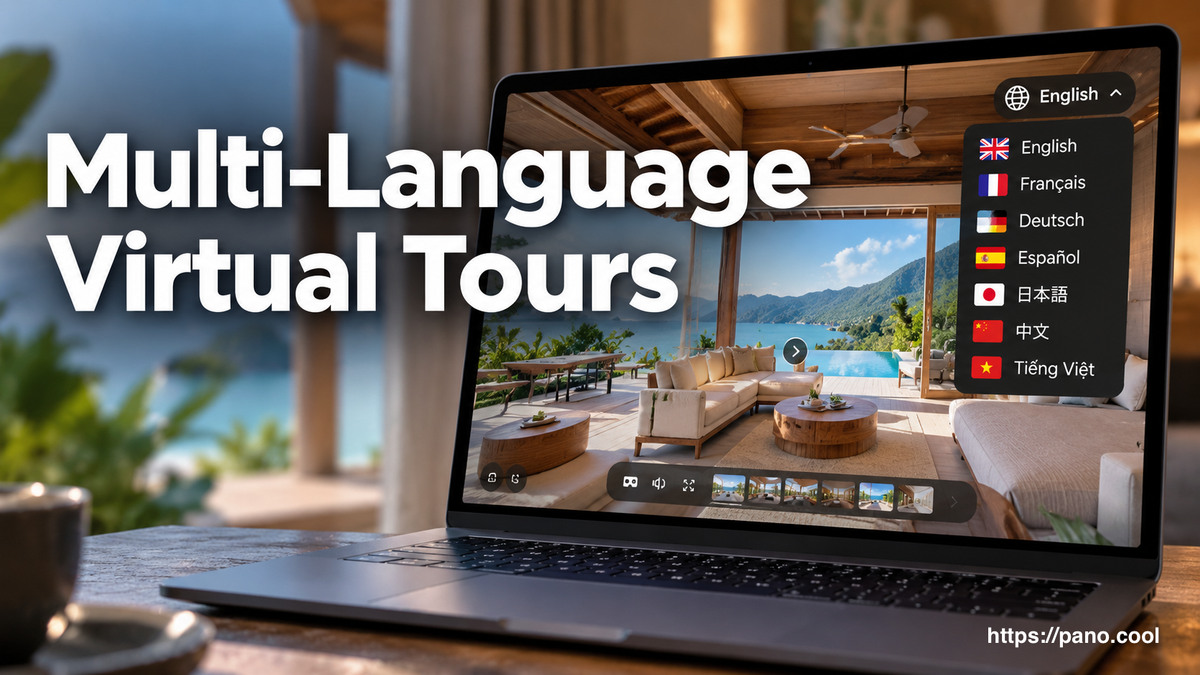
PanoCool can show one virtual tour in up to five languages, and visitors switch between them with a language selector on the tour. The menu, scene titles, hotspot labels, popups and the viewer's own buttons all change with it, so a guest from Tokyo and a guest from Paris walk the same tour in their own words.
What visitors see
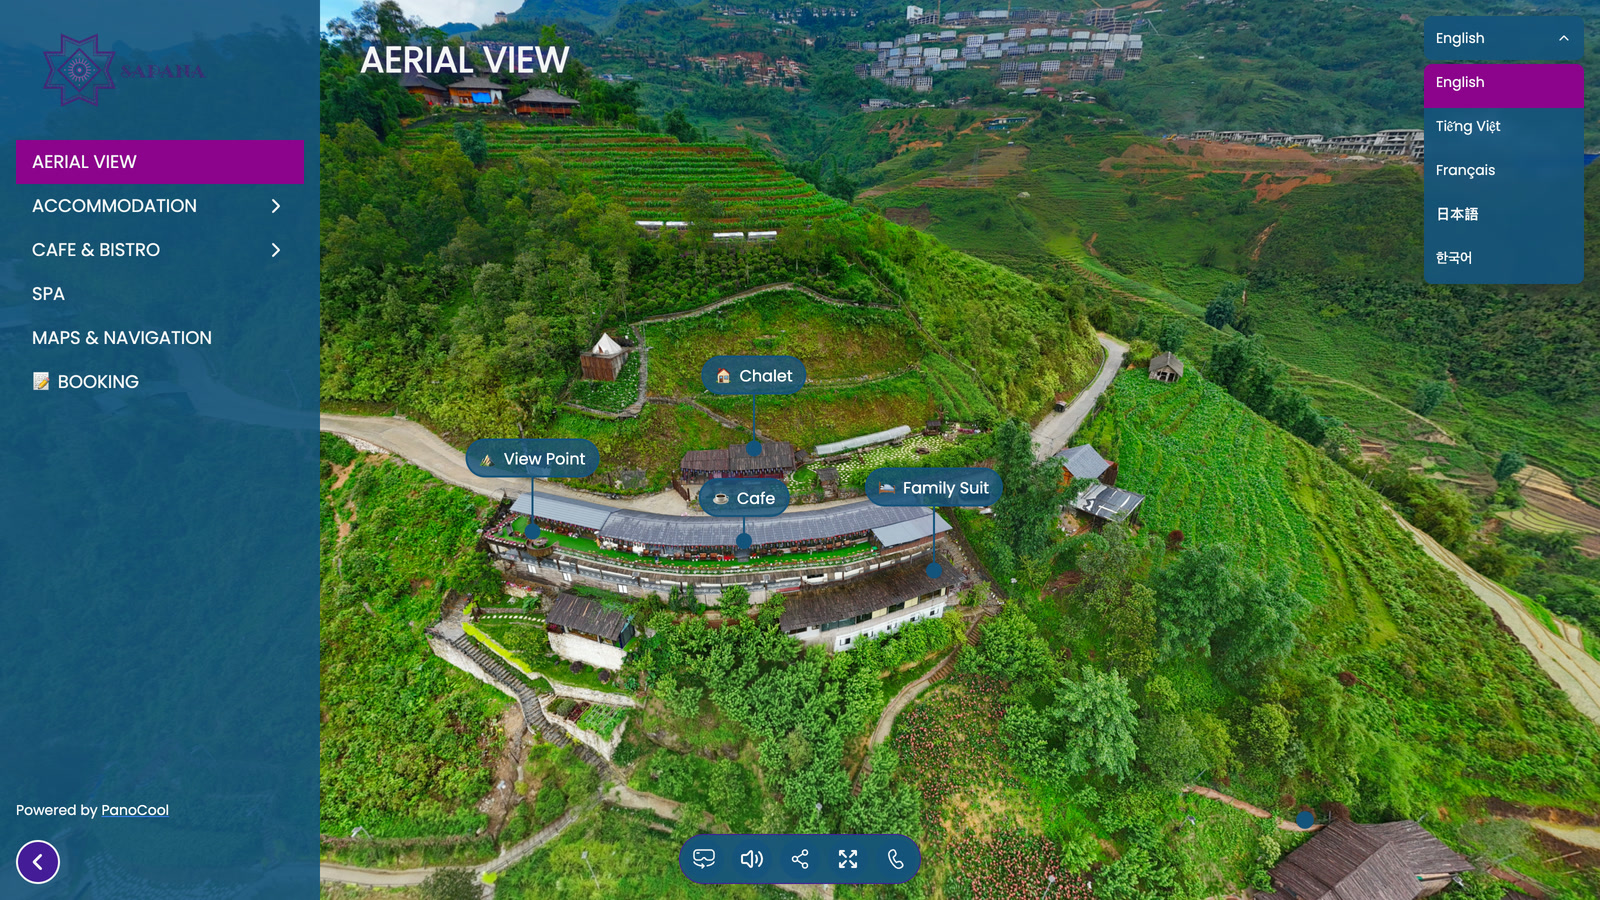
A language selector sits in a corner of the tour, as tabs or a dropdown. Picking a language switches every translated text at once, and anything you have not translated yet shows in the tour's original language.
This guide takes about ten minutes, plus the time to review your translations. You will turn the feature on, add languages, translate by hand or with AI, choose how visitors start, and style the selector.
Before you start
- Plan: multi-language tours are part of the Super Cool plan. On other plans, clicking Languages shows an upgrade prompt.
- Languages: a tour can have up to 5 languages: the one it is written in, plus up to 4 translations, chosen from 31.
- Your tour's text: write your scene names, hotspot labels and popups first, in one language. That language becomes the original, and every other language is a translation of it.
- Saving: the Languages settings save on their own as you change them; there is no Save button. Only the translation window has one.
Step 1: Turn on Multiple languages
Open your tour in Virtual Tour Studio, click the Settings tab on the left, then click Languages.
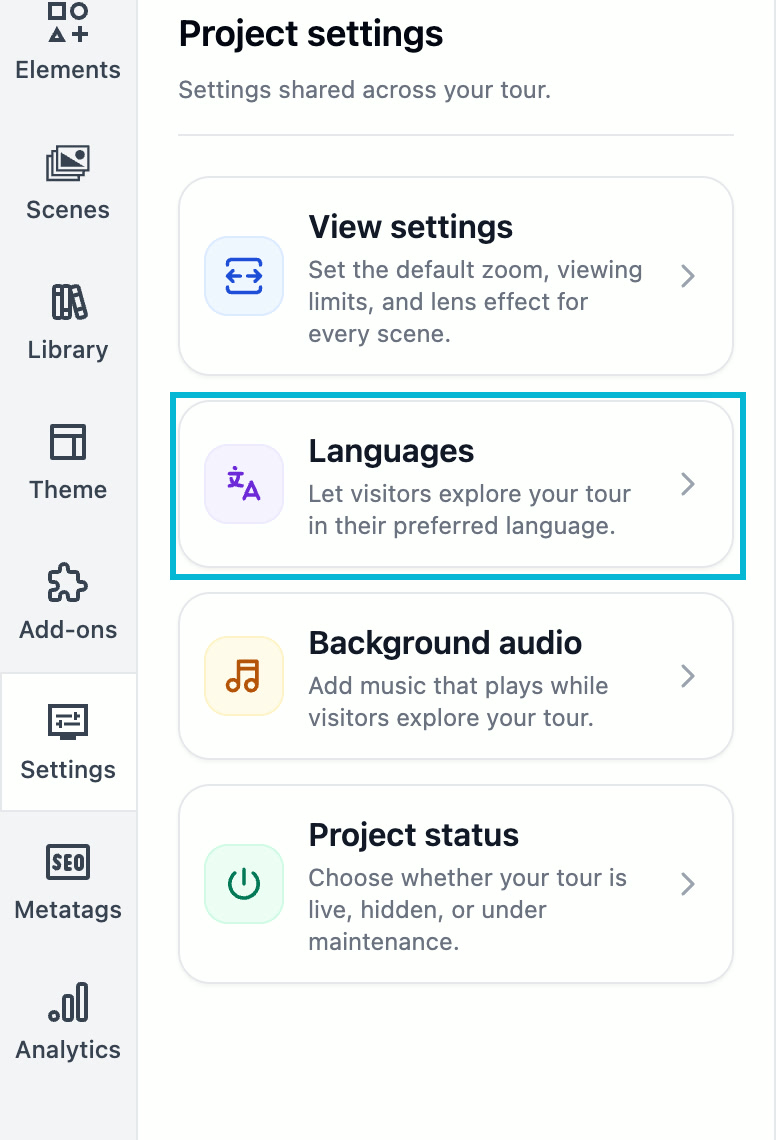
Switch on Multiple languages at the top of the panel. Then check Original language: it should be the language your tour is written in, such as English.
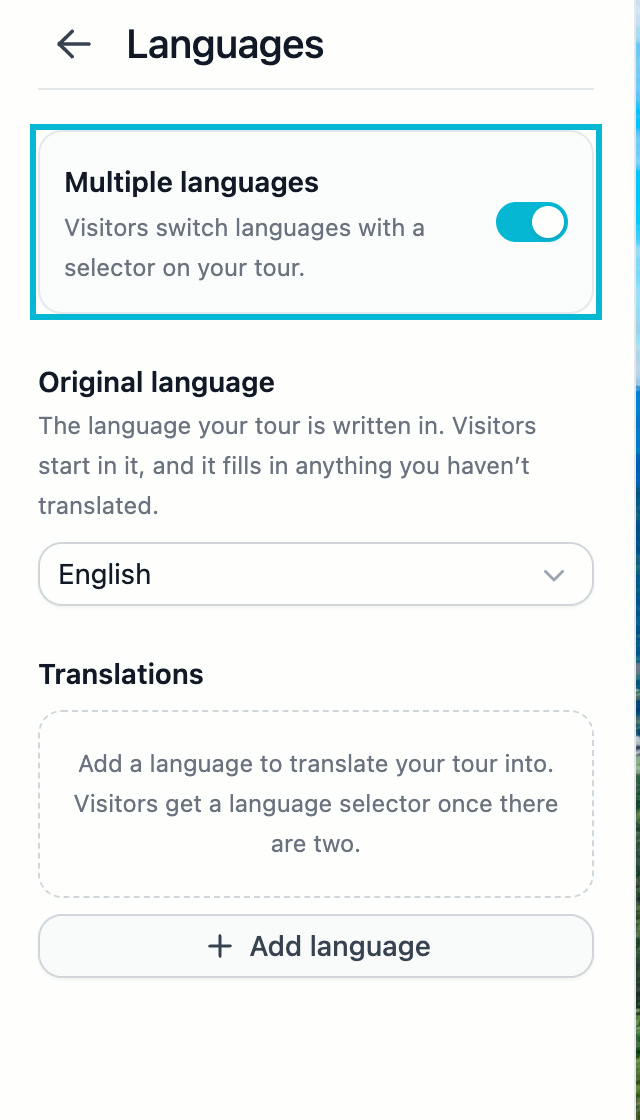
The original language does two jobs. Visitors start in it unless you choose otherwise in Step 4, and it fills in any text you haven't translated. If your tour is actually written in another language, pick that one here: this relabels your text, it does not translate it.
Step 2: Add the languages you need
Under Translations, click Add language and type to search. You can search by the English name ("French") or the language's own name ("Français"), then press Enter or click it.
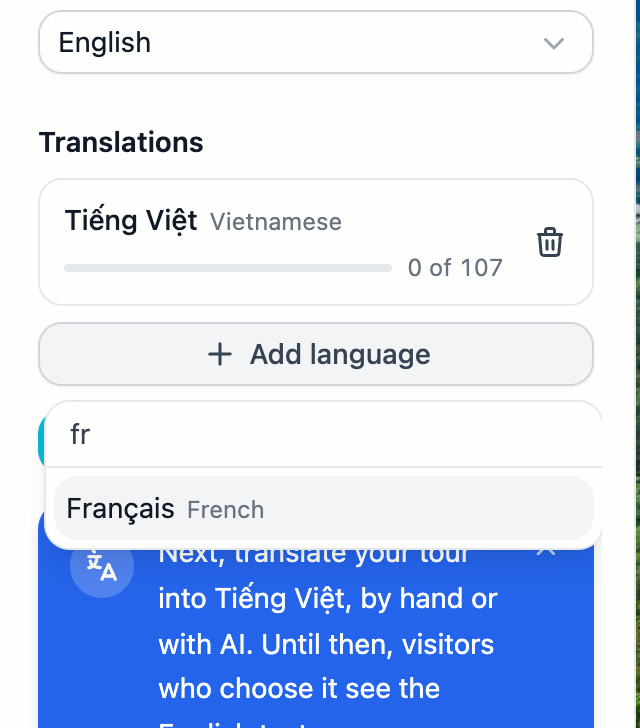
Repeat for each language, up to four. Each one gets a row with a progress bar, such as "0 of 107": how many of your tour's texts are translated so far.
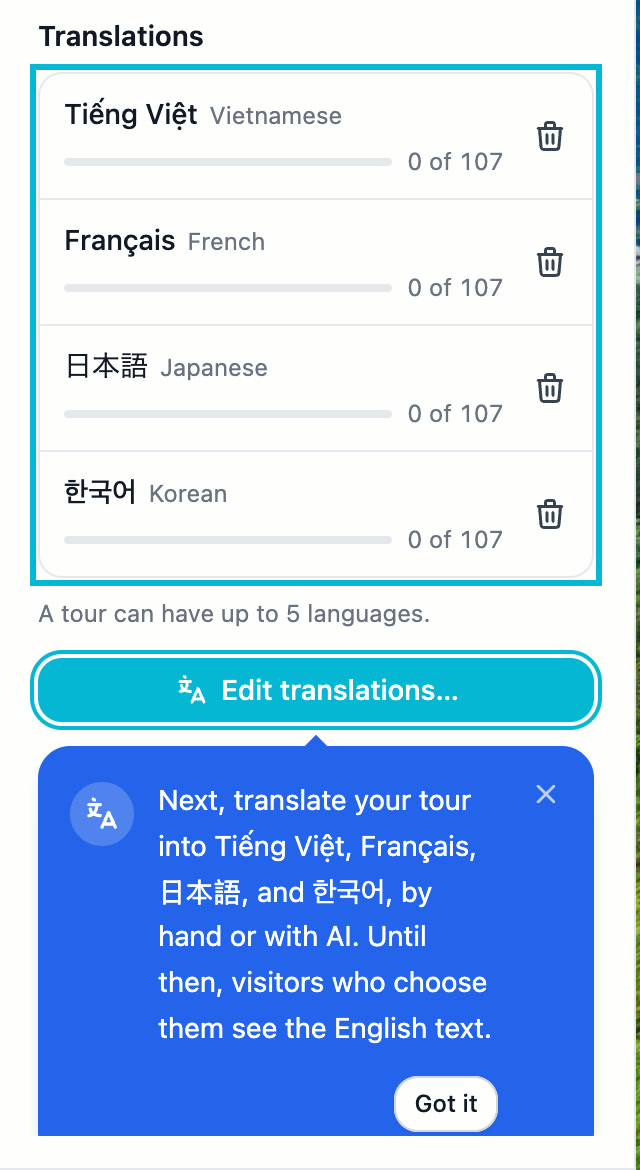
A hint under Edit translations… reminds you which new languages still need translating. Until you translate them, visitors who pick them see the original text.
To remove a language, click its trash icon. Its translations go with it, and if there were any, a notification offers Undo for 10 seconds.
Step 3: Translate, with AI or by hand
Click Edit translations… to open the Translations window. Pick a language on the left. Each row shows a text from your tour on the left and its translation on the right, grouped by project, scene, hotspot, popup, menu and the viewer's own labels such as "Loading…".
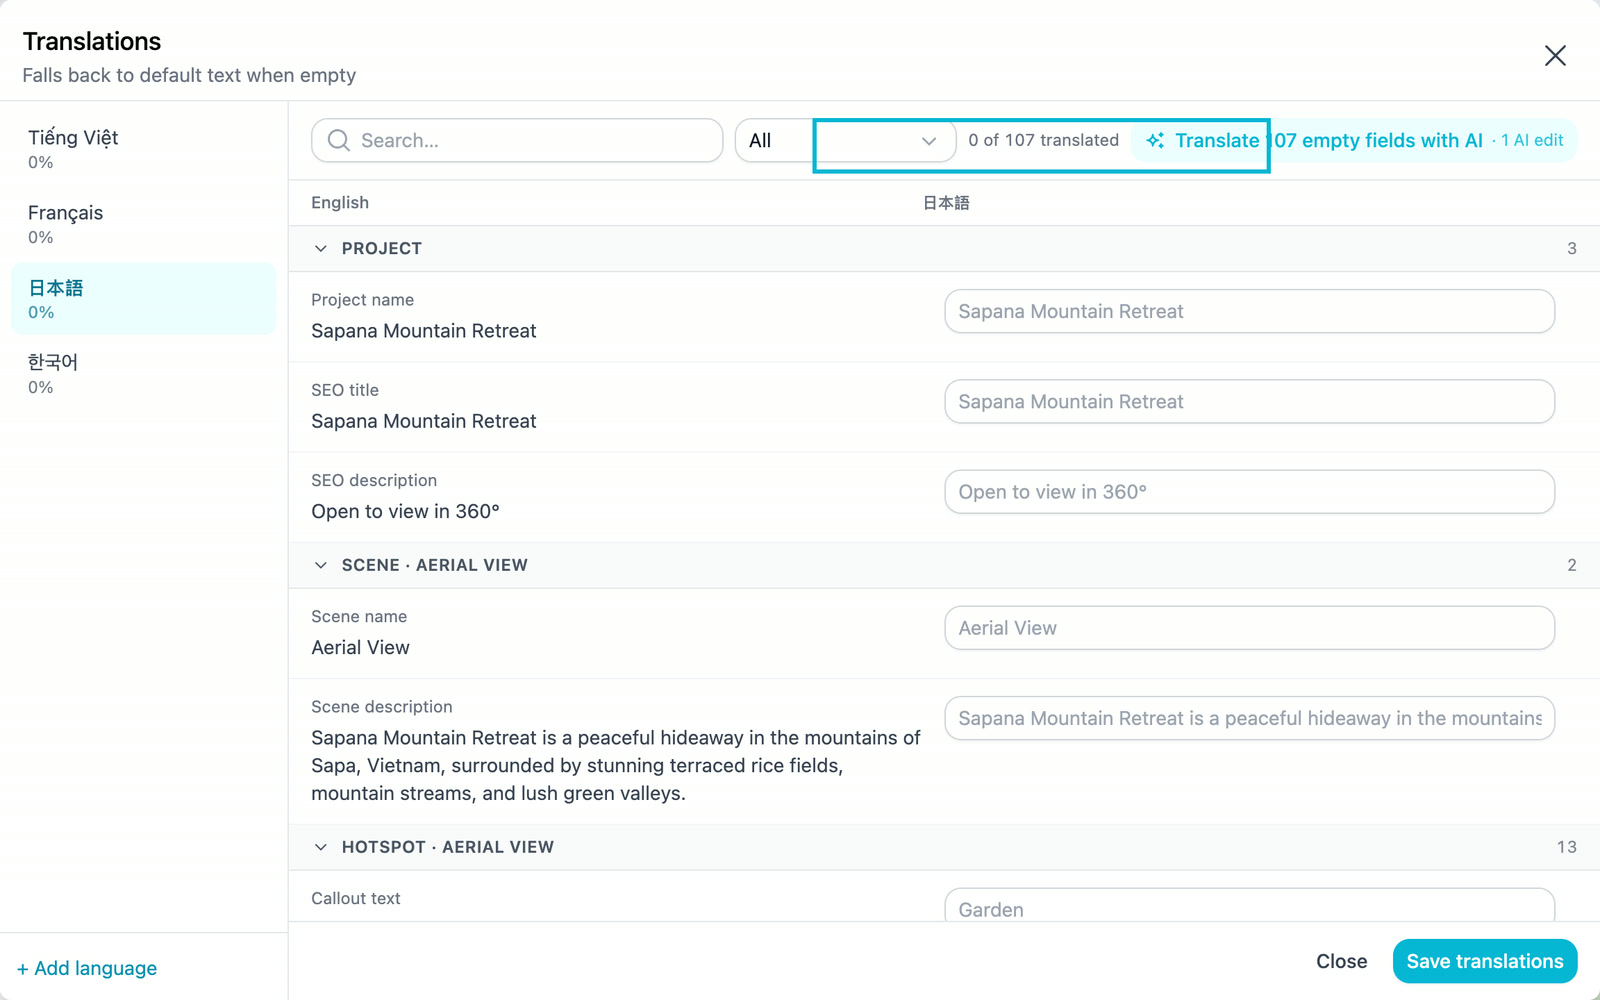
With AI: click Translate N empty fields with AI. It fills every empty field for the selected language in one go, usually in a few seconds. Fields you already translated, or type in while it runs, are left alone.
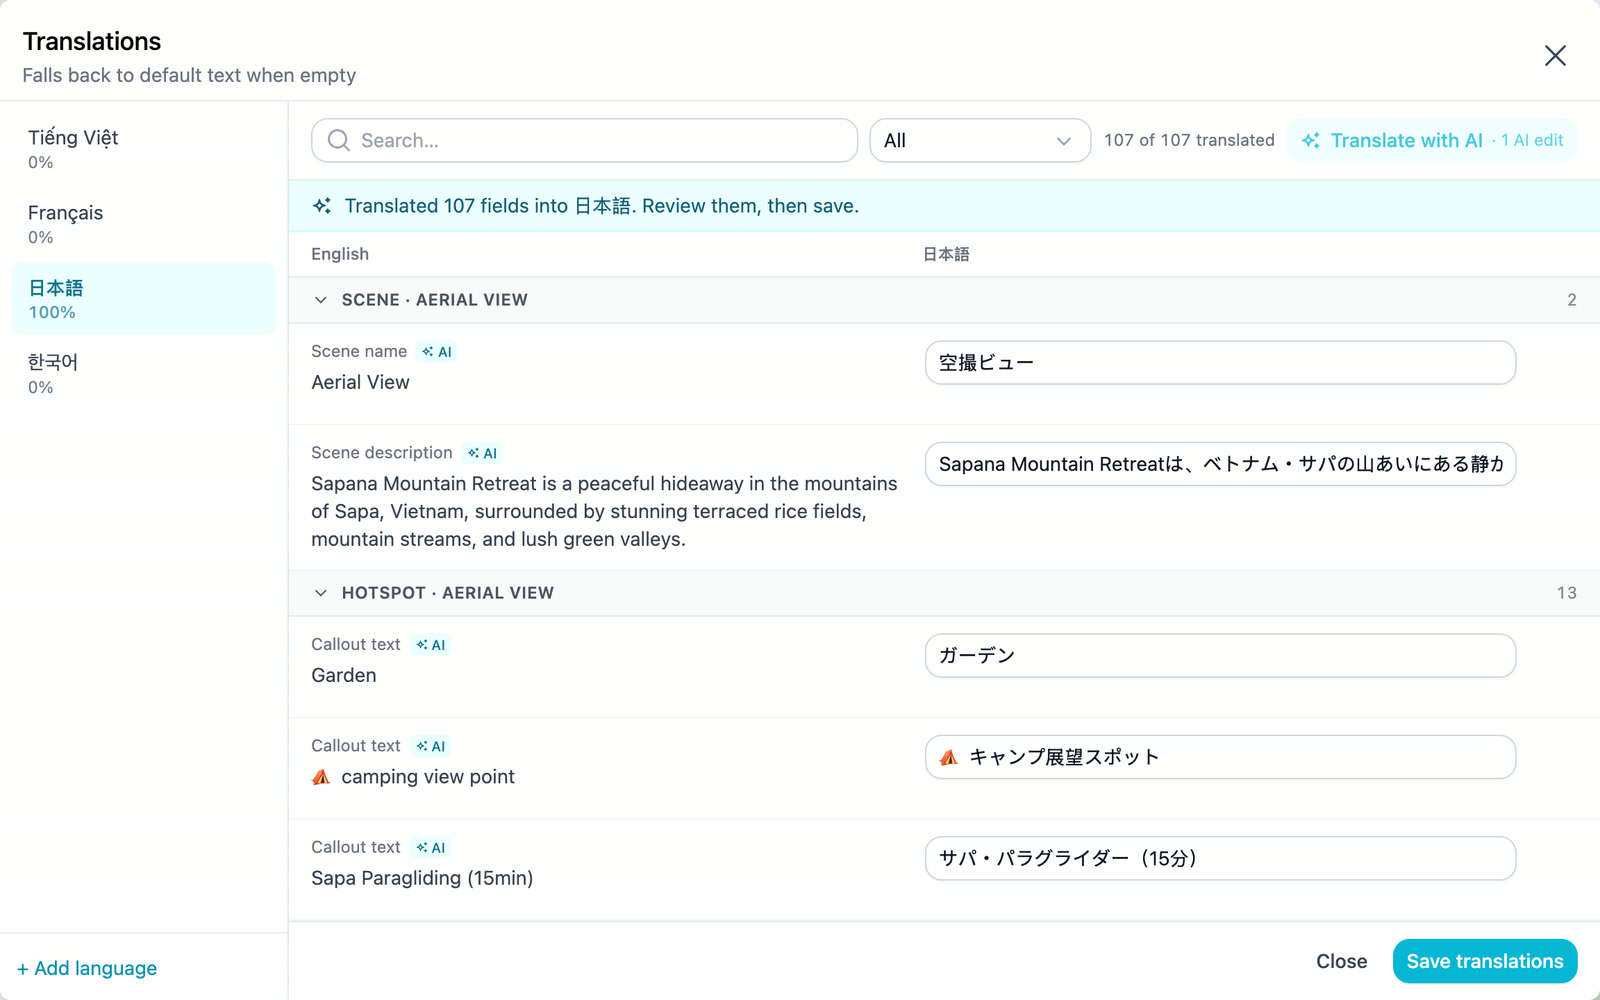
Each result is a draft marked AI until you edit it. Read them over, fix anything that sounds off, then click Save translations. Nothing reaches visitors before you save.
By hand: type into the right-hand column. Use the search box, or filter to Untranslated, to find what's left. A field you leave empty shows the original text to visitors.
A few things to know about AI translation:
- Cost: 1 AI edit per language per run, whatever the size of the tour, charged only when the run succeeds.
- Formatting: bold text, links and images in popups are kept as they are.
- Names: descriptive names like "Kitchen" are translated; names of businesses, brands and people are kept.
- Next language: select it on the left and run it again. Each language is its own run.
Step 4: Choose how visitors start
Once your tour has a second language, a Starting language section appears under Translations with two switches.
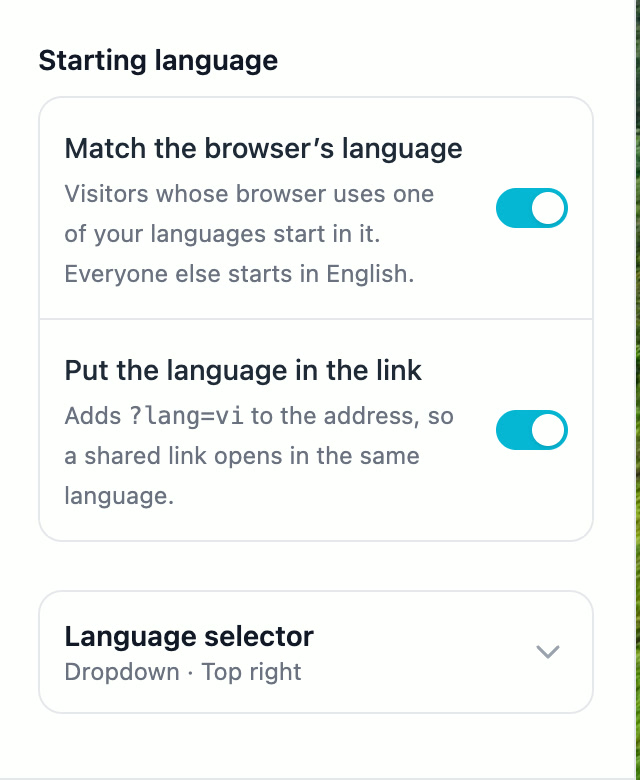
- Match the browser's language: visitors whose browser is set to one of your languages start in it. Everyone else starts in the original language. A visitor in Lyon with a French browser lands in French without touching the selector.
- Put the language in the link: when a visitor switches language, the address gets
?lang=, for example?lang=fr. Anyone who opens that shared link sees the tour in French.
Step 5: Style the language selector
Open the Language selector section at the bottom of the panel. Its preview shows the selector exactly as visitors will see it, and updates as you change the settings below.
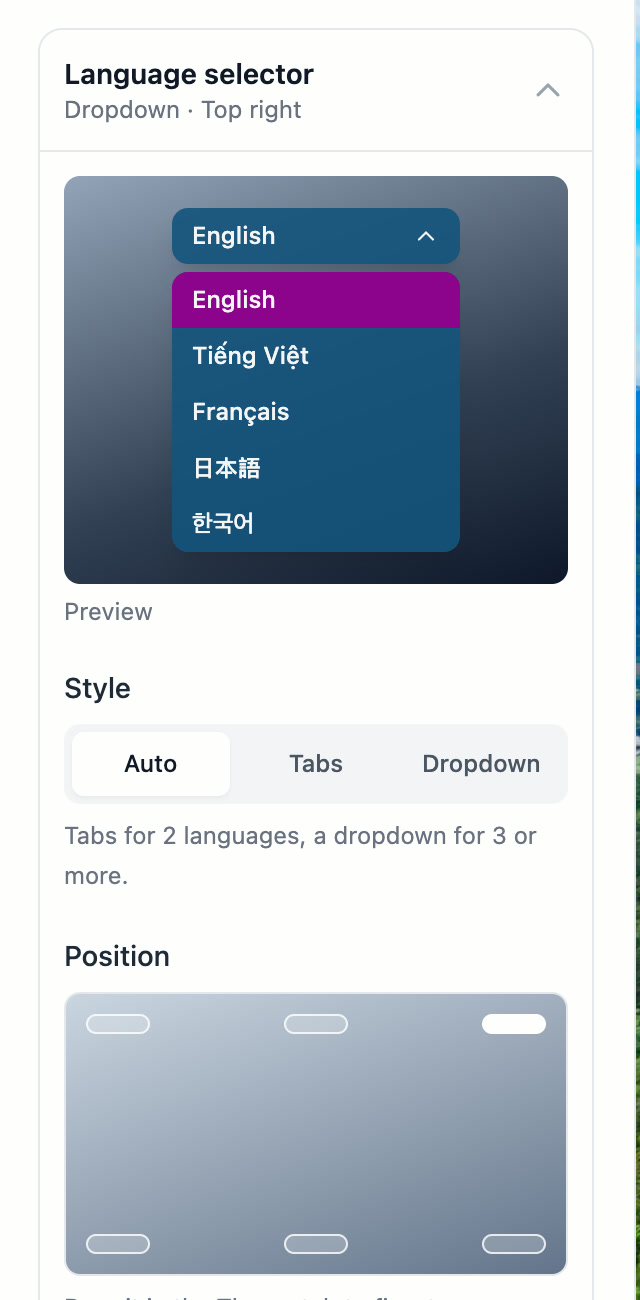
- Style: Auto shows tabs for 2 languages and a dropdown for 3 or more. Choose Tabs or Dropdown to fix one.
- Position: pick one of six spots, top or bottom, at the left, center or right. To fine-tune it, drag the selector in the Theme tab; it stays anchored to the nearest edges on every screen size. Snap back returns it to the spot you picked.
- Labels: what the selector calls each language. Each one uses its own name by default, such as "Tiếng Việt". Short labels like "EN" and "FR" suit tabs on phones.
- Colors: Use theme colors matches your tour's theme and highlights the current language the way the theme highlights a selected option. Turn it off to pick the background, highlight, highlight text and text colors yourself.
Check it as a visitor, then share it
Open your tour from Share and switch languages with the selector. The menu, scene titles, hotspot labels and popups should all change together.
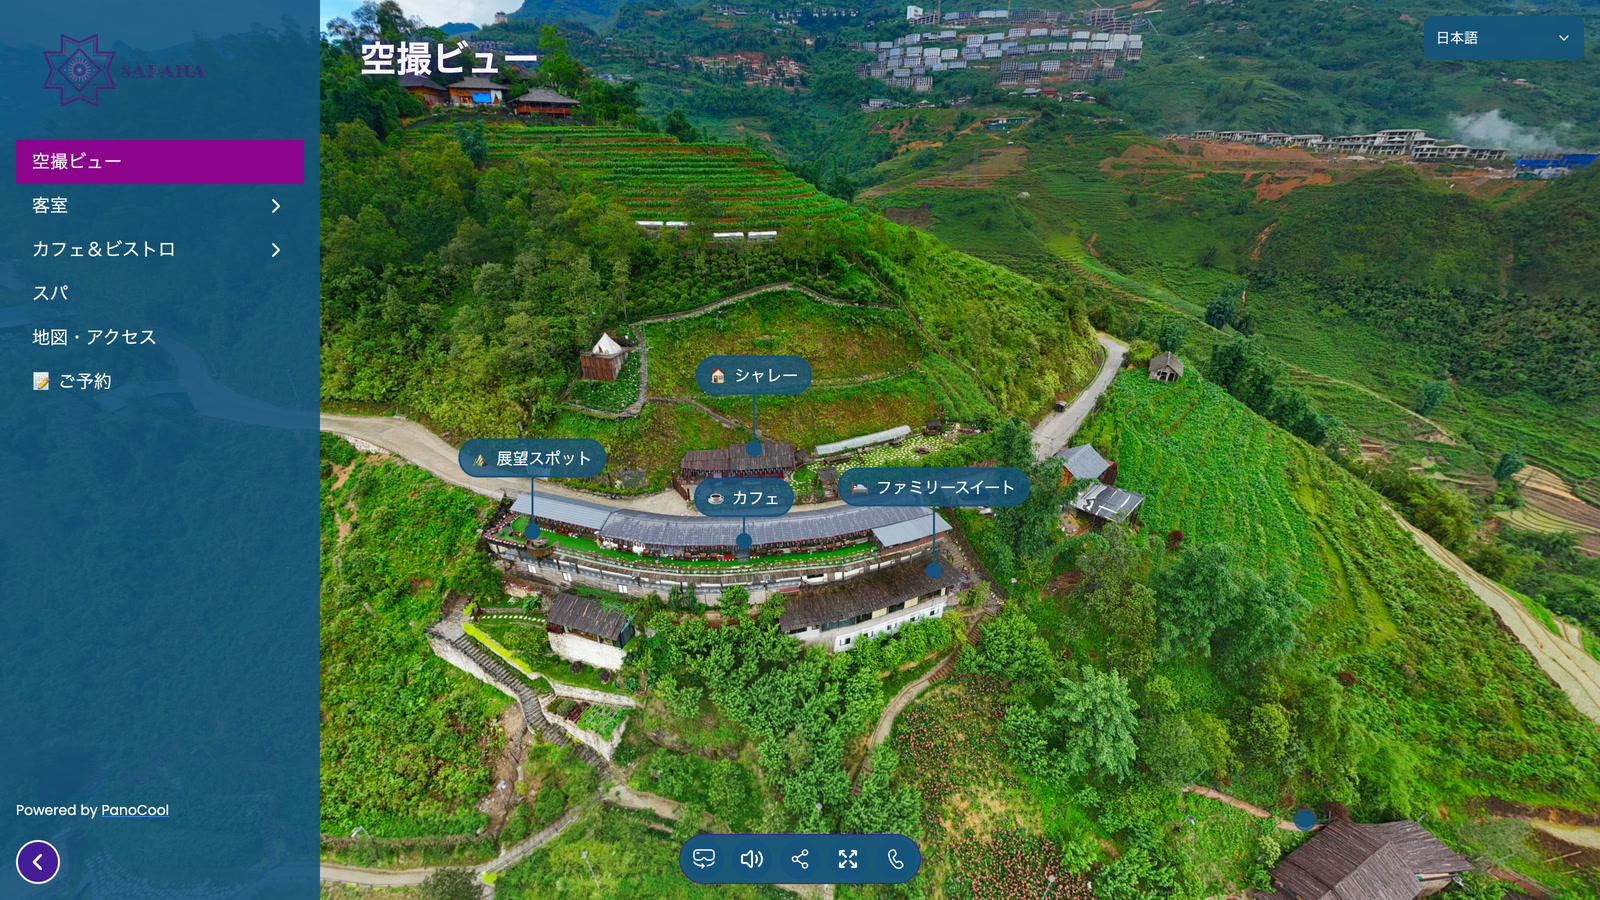
It works the same on phones, where the selector takes less room.
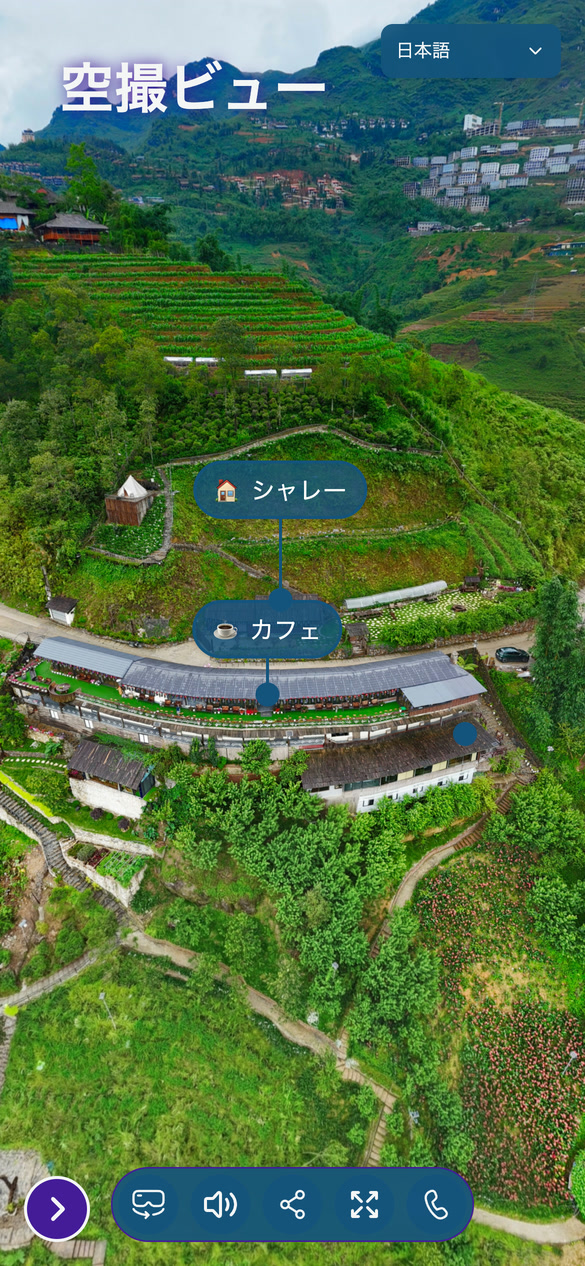
To send someone a tour that opens in their language, turn on Put the language in the link (Step 4) and add ?lang= with the language's code to any share link. For example, ?lang=ja opens in Japanese and ?lang=vi in Vietnamese.
Tips and common questions
What do visitors see where a translation is missing? The original language's text, so a half-translated tour still reads fine.
I added scenes after translating. What now? Their texts show up as untranslated and the progress bars drop. Run Translate with AI again: it only fills the empty fields, for 1 AI edit per language.
Can I fix an AI translation? Yes. Edit the field like any other and its AI mark goes away.
Why can't I pick a language as the original? It is already one of your translations. Remove it under Translations first, then pick it.
What happens if I turn Multiple languages off? The selector disappears and visitors see the original language. Your languages and translations are kept, ready for when you turn it back on.
Do shared popups need translating twice? No. Translations of reusable popups and galleries are shared, so they apply everywhere that popup is used.
For every setting in detail, see the Multi-language tours reference.