How to Create a 3D House Tour from Insta360 X6 Photos with AI Auto Connect
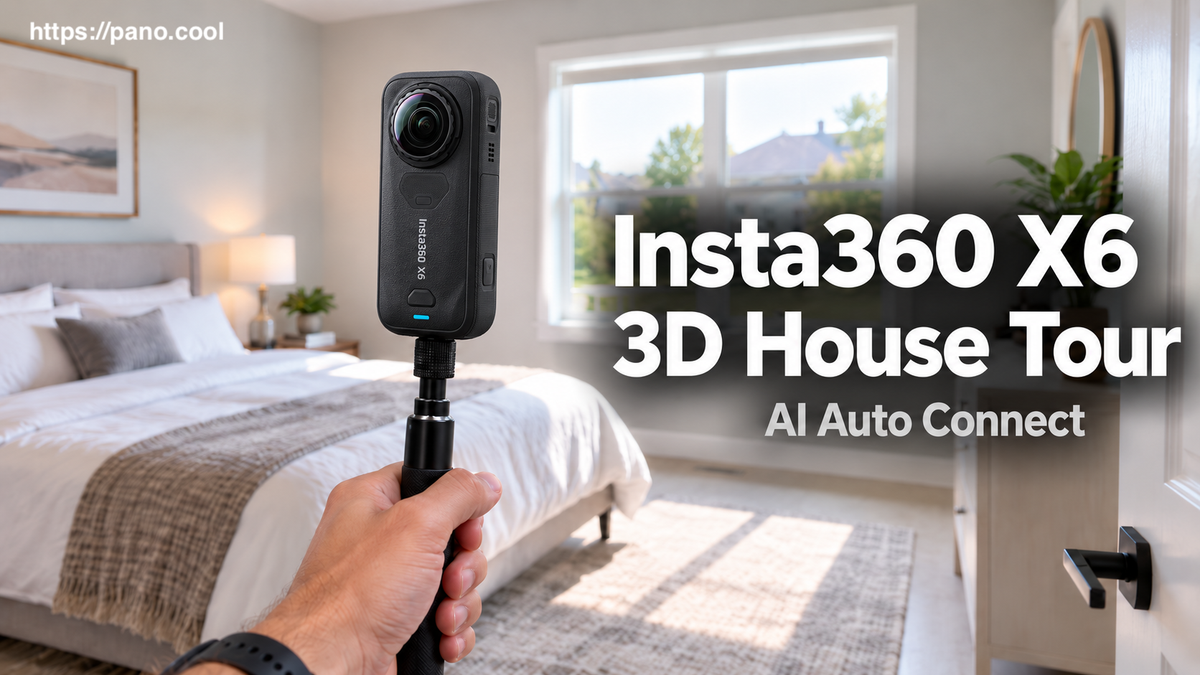
Creating a 3D house tour used to mean spending a lot of time manually placing scenes, connecting every 360 photo, and building navigation one hotspot at a time.
With an Insta360 X6 and PanoCool AI Auto Connect, you can make the process much faster.
In this guide, we’ll turn a set of 360 photos captured with the Insta360 X6 into a walkthrough-style 3D house tour. One guided window takes you all the way from your photos to a link you can share: it connects the scenes automatically, lets you preview and adjust the result, generates a floor plan with AI, and handles multiple floor levels.
Start with Your Insta360 X6 Photos
The first step is capturing a set of 360 photos throughout the property.
For this example, we photographed a villa using the Insta360 X6, placing the camera at several positions throughout the rooms.
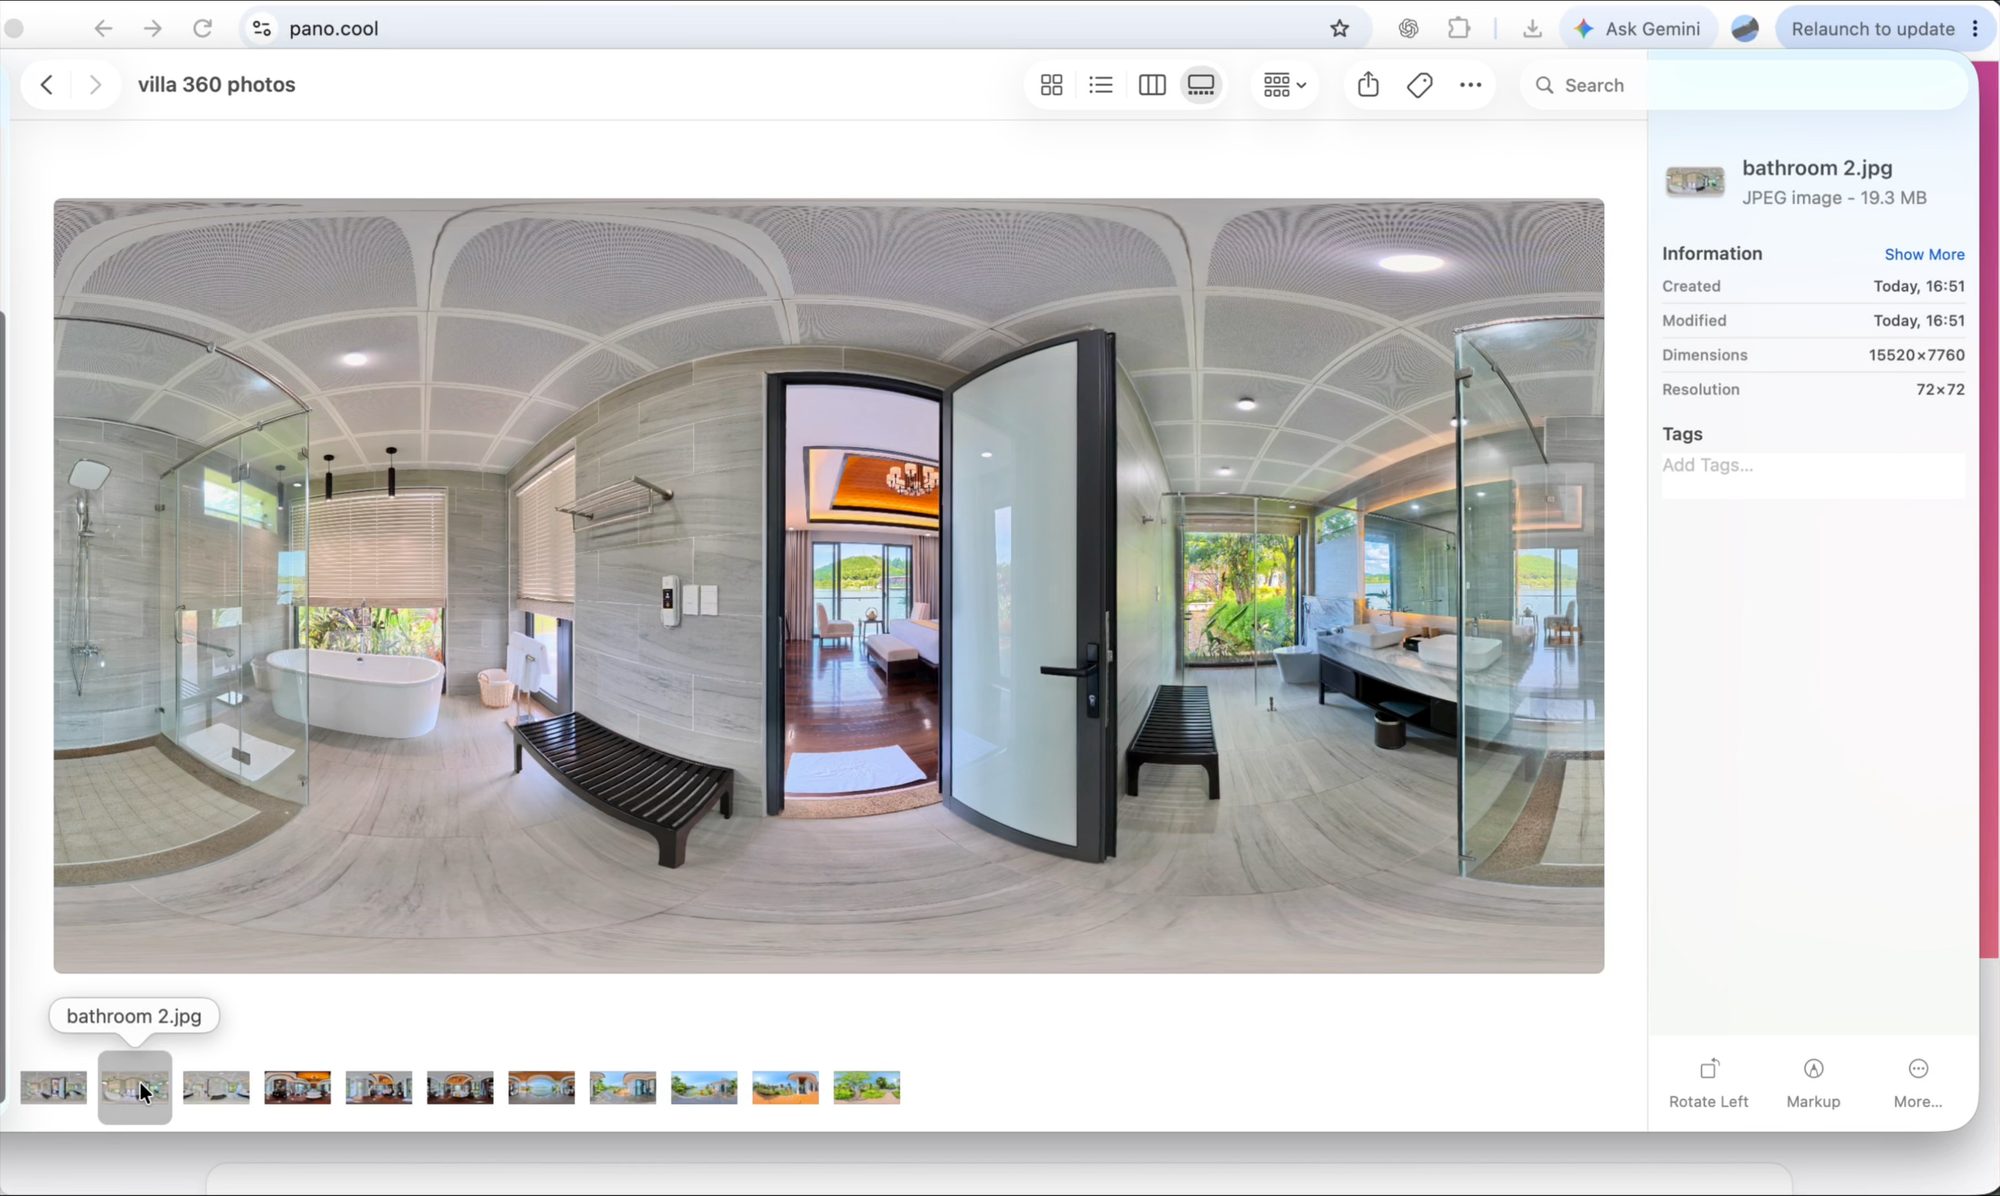
For the best results with AI Auto Connect, there are a few things to keep in mind while shooting:
- Place the camera at natural walking positions throughout the property.
- Keep the camera at the same height for every shot.
- Make sure each camera position can see at least the previous or next position.
- When moving between rooms, keep doors open so nearby spaces are visible.
- Avoid making the distance between two consecutive positions too large.
- AI Auto Connect is currently designed primarily for indoor 360 photos.
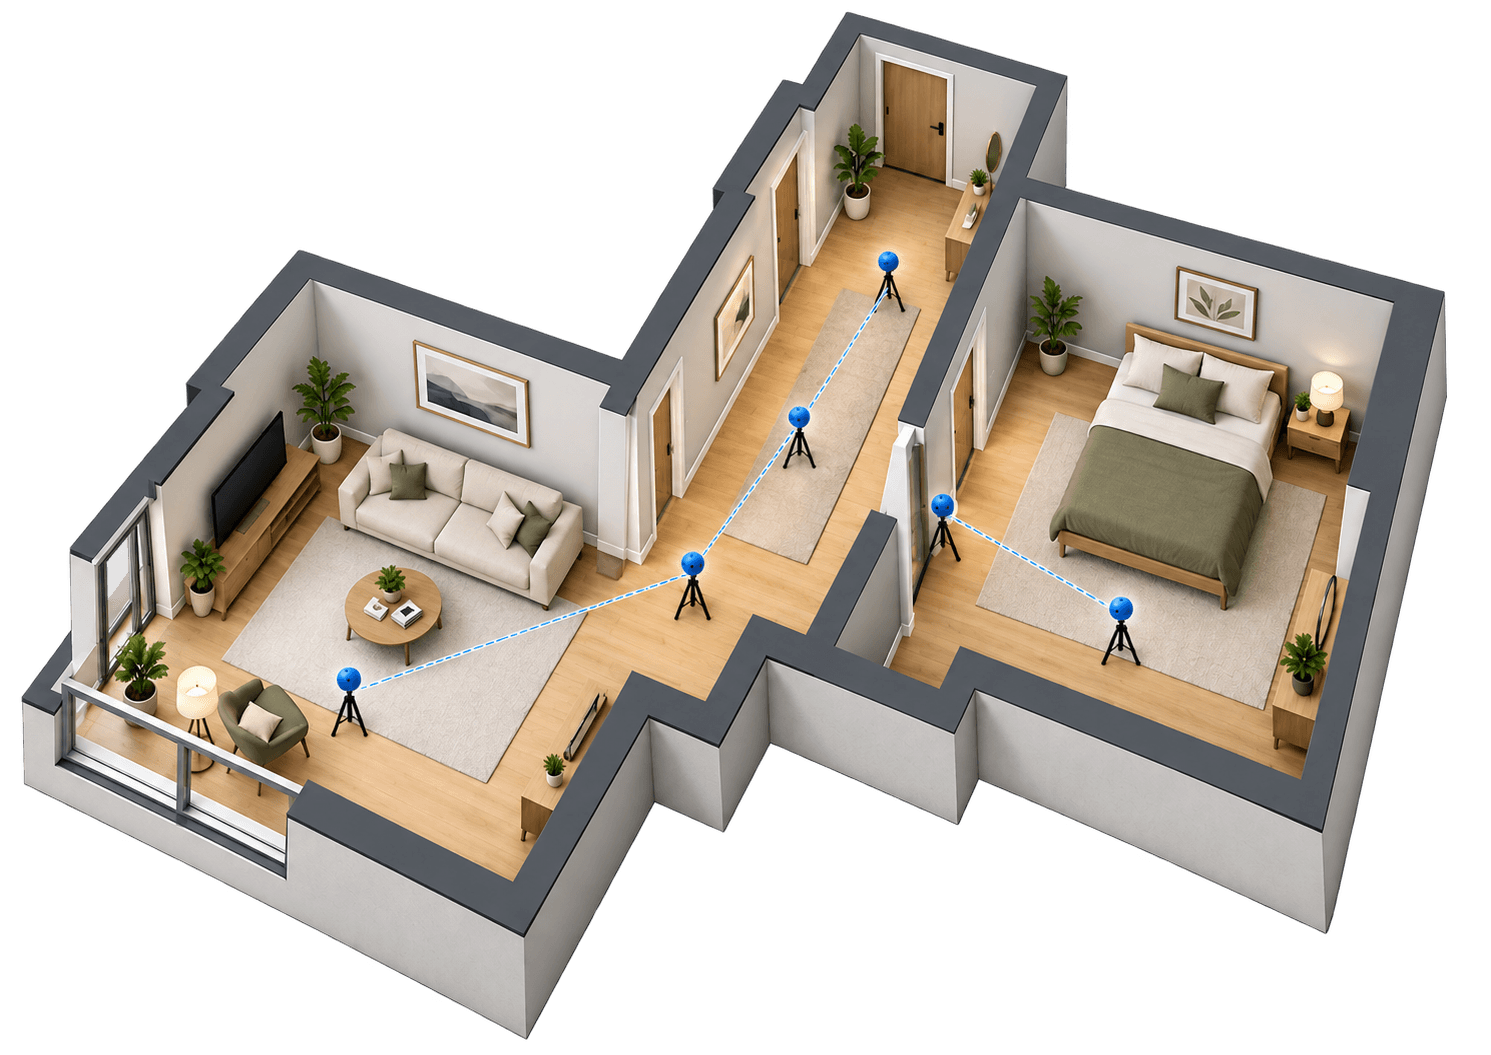
These overlapping views give the AI enough visual information to understand how the scenes relate to each other. Large mirrors, glass walls and long empty corridors give it less to work with, so a photo taken there may need a little help later.
If you want to see the full Insta360 X6 capture workflow, you can also check out this video tutorial: https://youtu.be/jNtCiCBFdEo
Upload the 360 Photos to PanoCool
Once your photos are ready, go to PanoCool at: https://pano.cool
Open PanoCool Studio, create a project, and drag your 360 photos into the Scenes panel.
PanoCool automatically recognizes panorama photos, and once they are uploaded, you can open any scene and look around it in a full 360° view.
AI Auto Connect runs on your PanoCool account, so sign in if you haven’t already. You don’t need to wait for every upload to finish before you start, as long as you keep the tab open until they’re done.
Tip: if you already know which theme you want, such as Slide Menu 2, choose it in the Theme tab now. AI Auto Connect can add a Floor plan button to your tour, and it adds it to the theme you’re using at the time.
At this point, you already have your photos inside the project. The next step is turning them into a connected walkthrough.
Automatically Connect the Photos with AI
Instead of manually adding navigation between every pair of scenes, open the Elements tab and click AI Auto Connect.
A guided window opens and takes you through a few short steps. The first one explains what AI Auto Connect does, with a quick demo video. Click Get started.
PanoCool then checks your scenes before anything runs:
- You need at least two 360 photos. Flat photos, videos and 3D scenes are left out automatically.
- One run connects up to 30 scenes. If your project has more, click Choose scenes and untick the extra ones.
- You’ll see how many AI edits the run will use (one per scene) and how many you have.
Click Next.
Now PanoCool asks whether the photos were all taken on one floor.
For a single-level house or apartment, choose One floor and click Start connecting.
PanoCool AI will analyze the 360 photos, work out where each one was taken, and connect the scenes that are next to each other.
Processing normally takes a few minutes depending on how many photos you’re connecting. You can close the window while it works: the button in the Elements tab changes to AI Auto Connect is running… and brings it back. Just keep the editor open, because leaving or reloading the page stops the run.
Preview Your 3D House Tour
When processing finishes, you’ll see how many scenes were placed and how many connections were found, next to a plan with each 360 photo shown as a point and lines showing the connections between scenes.
Nothing has been saved yet, so this is the moment to check the result.
Click Preview tour to test the tour the way a visitor would.
Instead of jumping between disconnected panorama photos, visitors can now use the floating navigation arrows to move naturally through the property, with a smooth walking transition from one scene to the next.
This creates the familiar walkthrough experience people expect from a modern 3D house tour or real estate virtual tour.
Fix Missing Connections Manually
AI can save a lot of time, but it doesn’t mean every photo will always be positioned perfectly.
For example, you may find a scene that could not be placed, often one shot in front of a large mirror or glass wall. The result names these scenes, and they wait in a row below the plan.
You don’t need to run the entire process again.
Click Edit to open the plan full screen. Drag those scene points into approximately the correct positions, turn a scene if it faces the wrong way, and link it to nearby scenes. The arrows follow the plan. Click Done when you’re finished.
Then click Preview tour again to check the result.
This combination of automatic setup + manual adjustment makes it much faster than building the whole walkthrough from scratch while still giving you full control over the final tour.
When everything looks right, click Next.
Generate a Floor Plan from Your 360 Photos
Once the scenes are connected, you can take the layout one step further.
PanoCool AI can draw a floor plan of the space. It reads the walls, doors and windows in each 360 photo and draws them behind your scene points, with each room’s name and size. This step is optional: click Skip floor plan if you don’t need one.
Before starting, you can select the language used for room labels in Room names in, such as:
Bedroom, Living Room, Kitchen, Bathroom, and other room names.
Select your preferred language and click Start. Like the connections, the drawing uses one AI edit per scene.
After processing, PanoCool will show the generated floor plan.
If something needs adjusting, click Edit… and refine it before using it. You can move a wall, turn a window into a door, or rename a room.
Leave Add a Floor plan button to your tour ticked (it is by default). It adds a button to your tour so visitors can open the floor plan.
When everything looks right, click Use this floor plan, then Next.
Visitors will see your 360 photo positions directly on the generated floor plan. This makes the layout much easier to understand and helps them see where each scene is located within the property.
Apply, Save and Share
The last step lists everything that will be saved: the Street View arrows, the floor plan drawing, and the Floor plan button.
Click Apply and save.
PanoCool saves everything to your tour in one go and shows Your walkthrough is ready, along with your tour’s link. Click Copy link to share it, or Open in a new tab to see the tour exactly as visitors will.
Click Back to editor to keep working on your tour.
Create a Multi-Floor 3D House Tour
AI Auto Connect also supports properties with multiple floor levels.
For example, imagine a coffee shop with two floors. Start AI Auto Connect as usual, but this time choose Several floors when asked about floors. You can add floors and give them simple names such as: F1, F2
Then pick the floor each scene was taken on from the menu under its photo before you start connecting. Each floor needs at least two scenes. A garden or a studio away from the main building works best as its own floor, too.
PanoCool analyzes the scenes within their assigned levels and creates separate layouts for each floor. In the floor plan step, switch between the floors at the top to draw each one.
After applying the result, the tour will contain multiple floor plans with their own scene markers.
In the tour, visitors also get a floor selector, allowing them to quickly jump between different levels of the property, and the Floor plan button shows every floor you drew.
This is especially useful for larger homes, villas, offices, restaurants, hotels, and other multi-story spaces.
Add Rooms That AI Couldn’t Connect
Sometimes a scene does not need to be part of the main walkthrough path.
A bathroom, storage room, balcony, or small side room might not have enough visual overlap for AI to connect it confidently.
In that case, you can simply create a manual navigation hotspot.
Add a Point of Interest, drag the destination scene onto it, and choose a style that fits your tour.
For example, the Circle Portal style provides a clear visual indication that visitors can enter another space.
This gives you another way to connect special rooms without changing the main automatically generated navigation.
Customize the 3D House Tour
Once the walkthrough is working, you can customize how the tour looks.
Open the Theme tab and adjust the design to fit your project.
For example, the Slide Menu 2 theme can provide visitors with a quick way to access important rooms and areas.
If you switch themes after running AI Auto Connect, the new theme starts with its own set of buttons, and the Floor plan button doesn’t come with it. That’s why it’s easiest to choose your theme before you start.
You can also continue improving the tour with features such as a custom logo and branding, room menus, points of interest, information popups, photo galleries, videos, floor maps, and other interactive content.
The AI-generated connections provide the foundation, while these additional elements help turn the project into a complete property presentation.
Share Your Finished Tour
Once everything looks good, click Share.
PanoCool generates a ready-to-use link that you can send directly to clients, include in a real estate listing, share on social media, or embed on a website. It’s the same link AI Auto Connect gave you at the end.
You can go from a collection of Insta360 X6 panorama photos to a complete 3D house tour without having to manually connect every scene.
A Faster Workflow for Real Estate Virtual Tours
Modern 360 cameras such as the Insta360 X6 make it possible to capture an entire property quickly, but capturing the photos is only part of the workflow.
The time-consuming part has traditionally been organizing and connecting those scenes afterward.
With PanoCool AI Auto Connect, much of that work can now be automated. In one guided flow, it analyzes your indoor 360 photos, builds the initial walkthrough, organizes multiple floors, draws a floor plan, and hands you a link to share.
You can then make any necessary adjustments and customize the presentation before sharing the final tour.
For real estate photographers, agents, property owners, hotels, and anyone regularly creating 3D house tours and virtual tours, that can turn hours of repetitive setup into a much simpler workflow.
Try PanoCool: https://pano.cool