Open House theme: a Map, a Photos gallery and buttons of your own
Open House theme in PanoCool has room for a Map that marks the home, a Photos gallery, and custom buttons of your own, in the order you choose. Best fit for real estate virtual tour, 3D house tour.
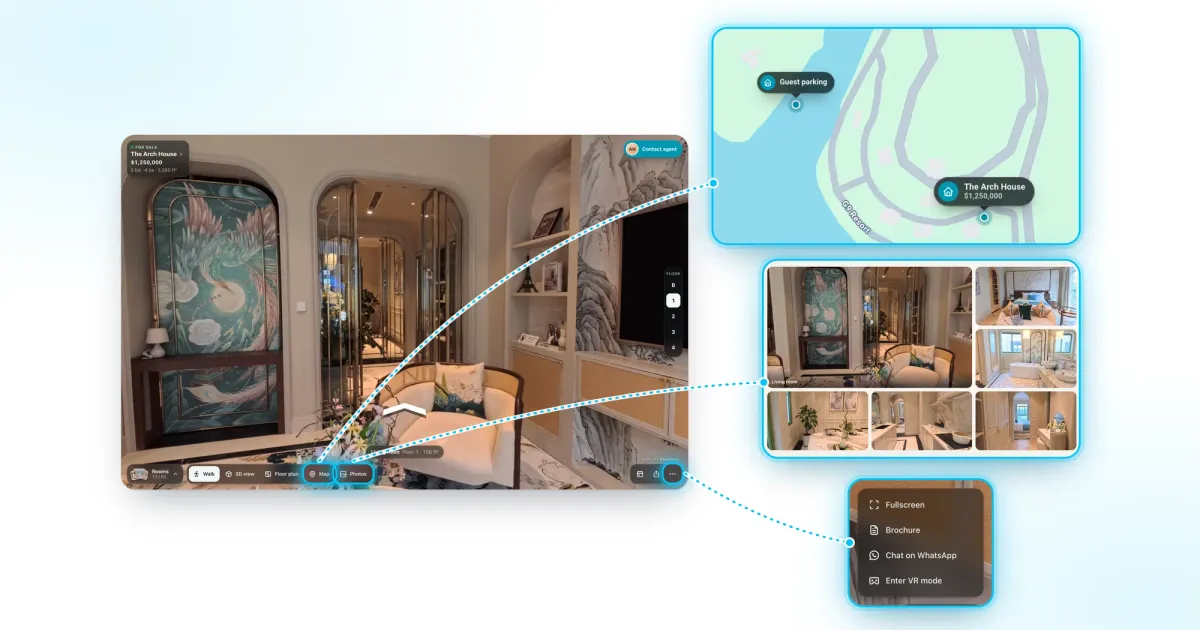
With Open House theme, buyers want to see where a home is, not only what’s inside it. You can add two tabs of your own after Walk, 3D view and Floor plan: a Map that marks the home, or a Photos gallery. Each one opens full screen, like the 3D view.
Add a Map tab
A Map tab shows where the home is, with one marker or up to 10, such as the house and its guest parking.
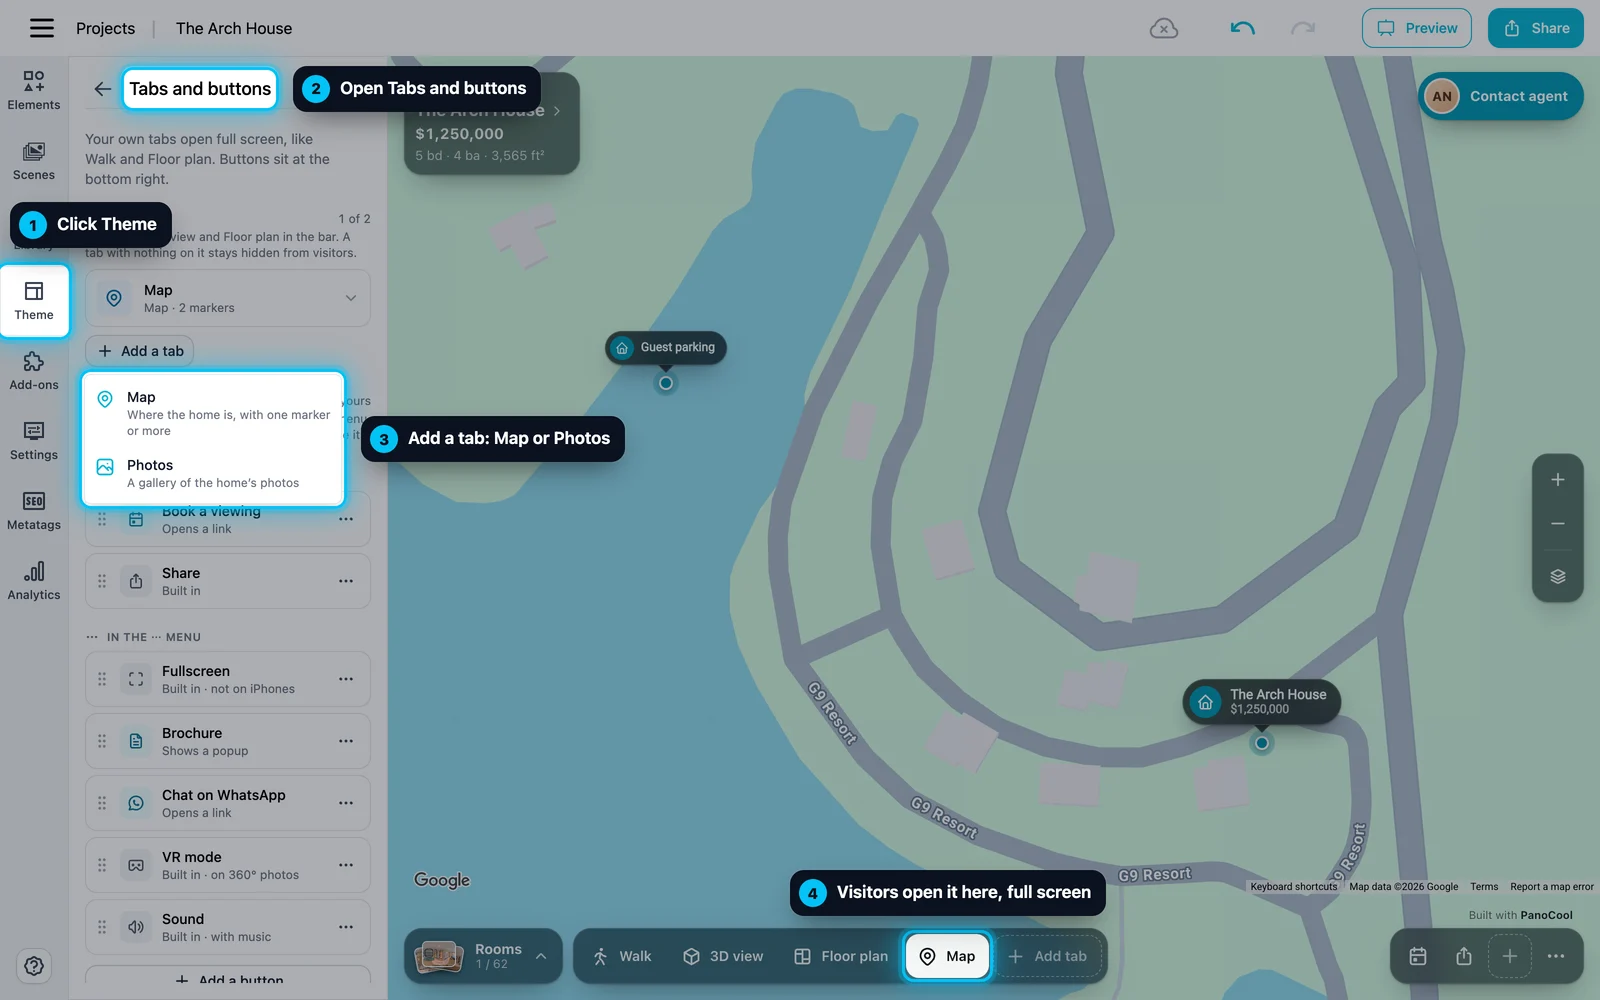
- Open your tour in the editor and click Theme.
- Click Tabs and buttons.
- Under Tabs, click Add a tab, then Map.
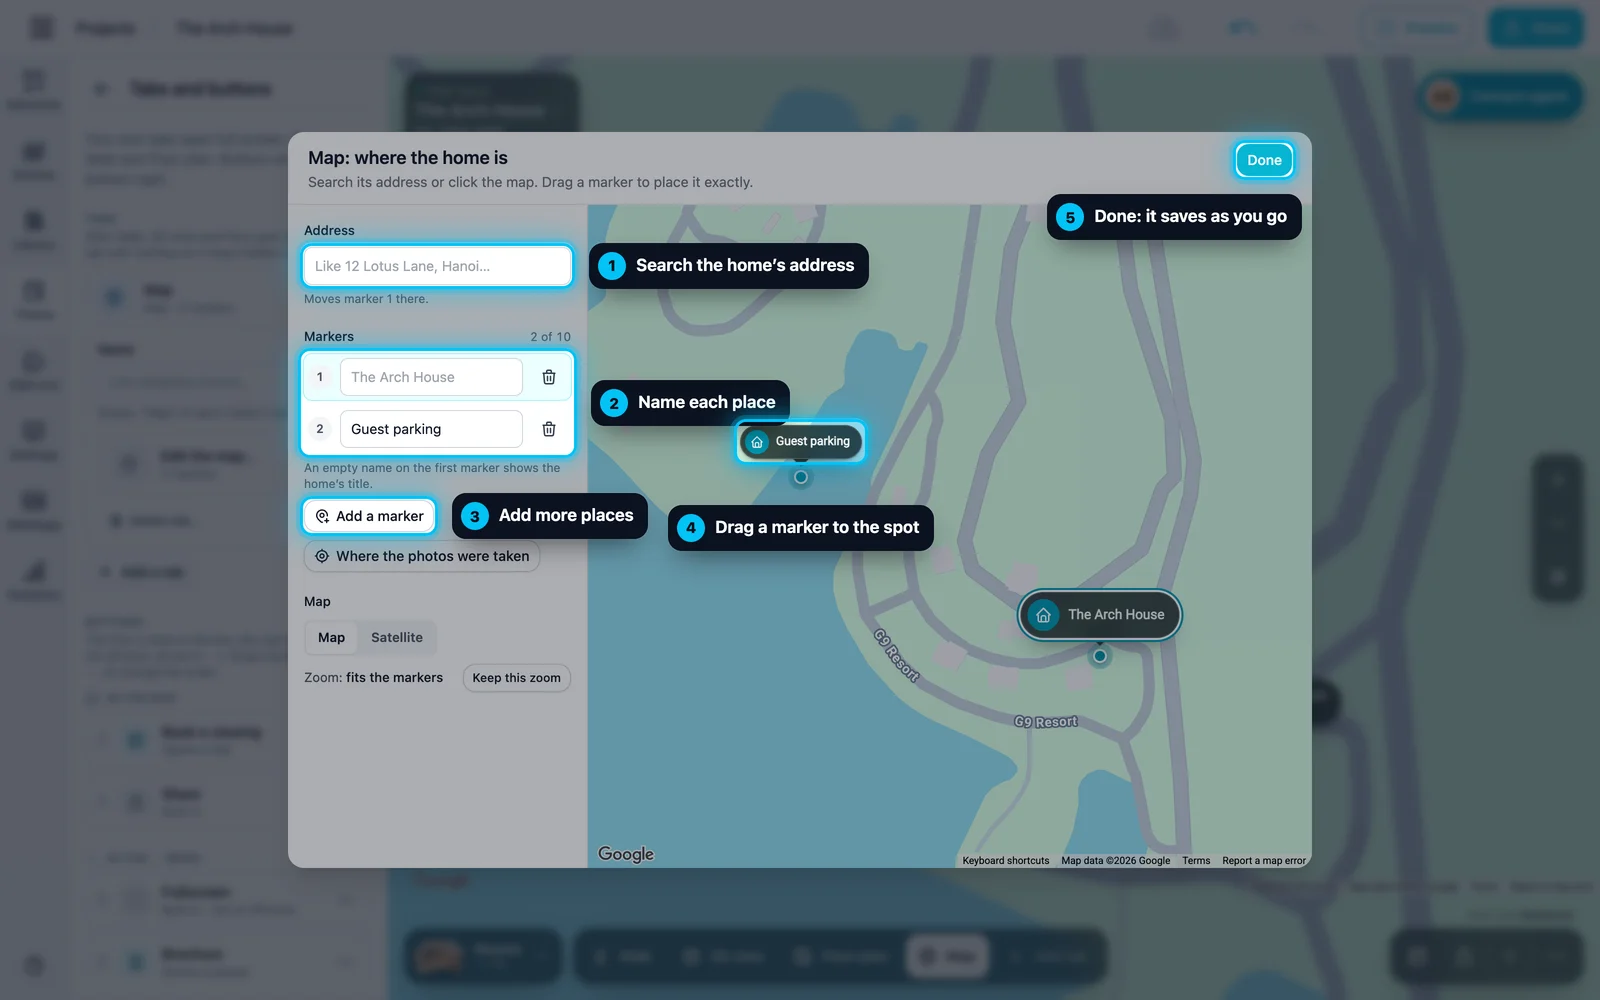
The map editor opens with a marker where your photos were taken, when the photos say. Then:
- Search the home’s address and pick it from the list. Marker 1 moves there.
- Name each place, such as “Guest parking”. Left empty, the first marker shows the listing’s title.
- Click Add a marker, then click the map to add more places.
- Drag a marker to the exact spot. You can also click it and nudge it with the arrow keys.
- Click Done. Everything saves as you go.
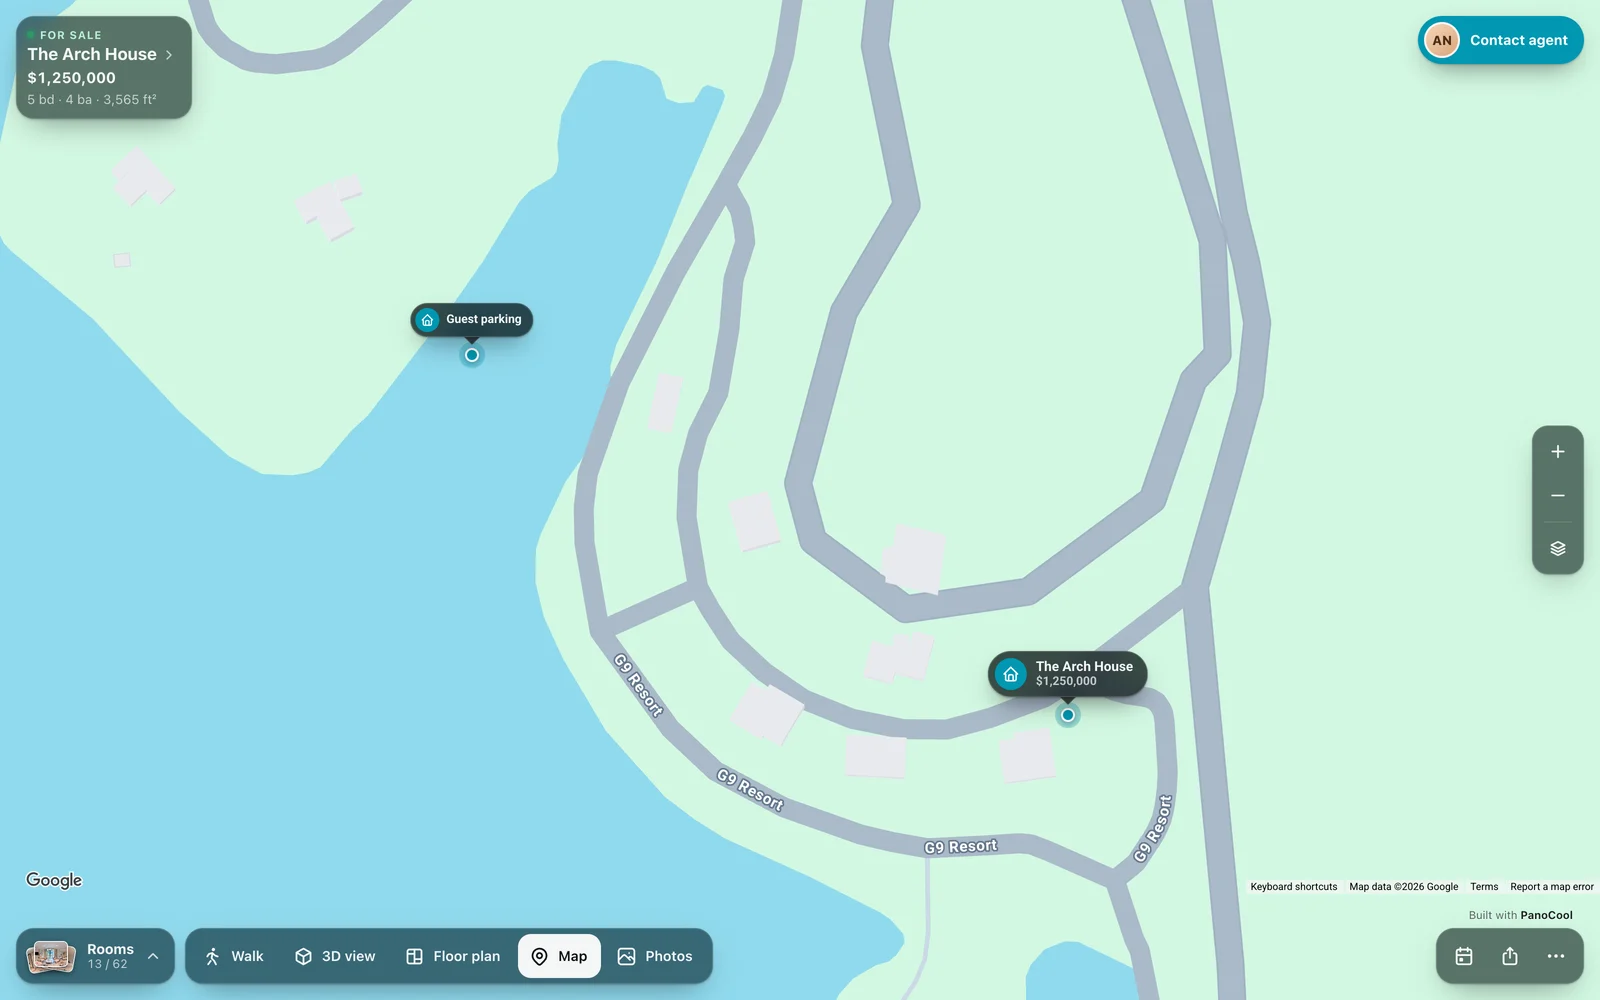
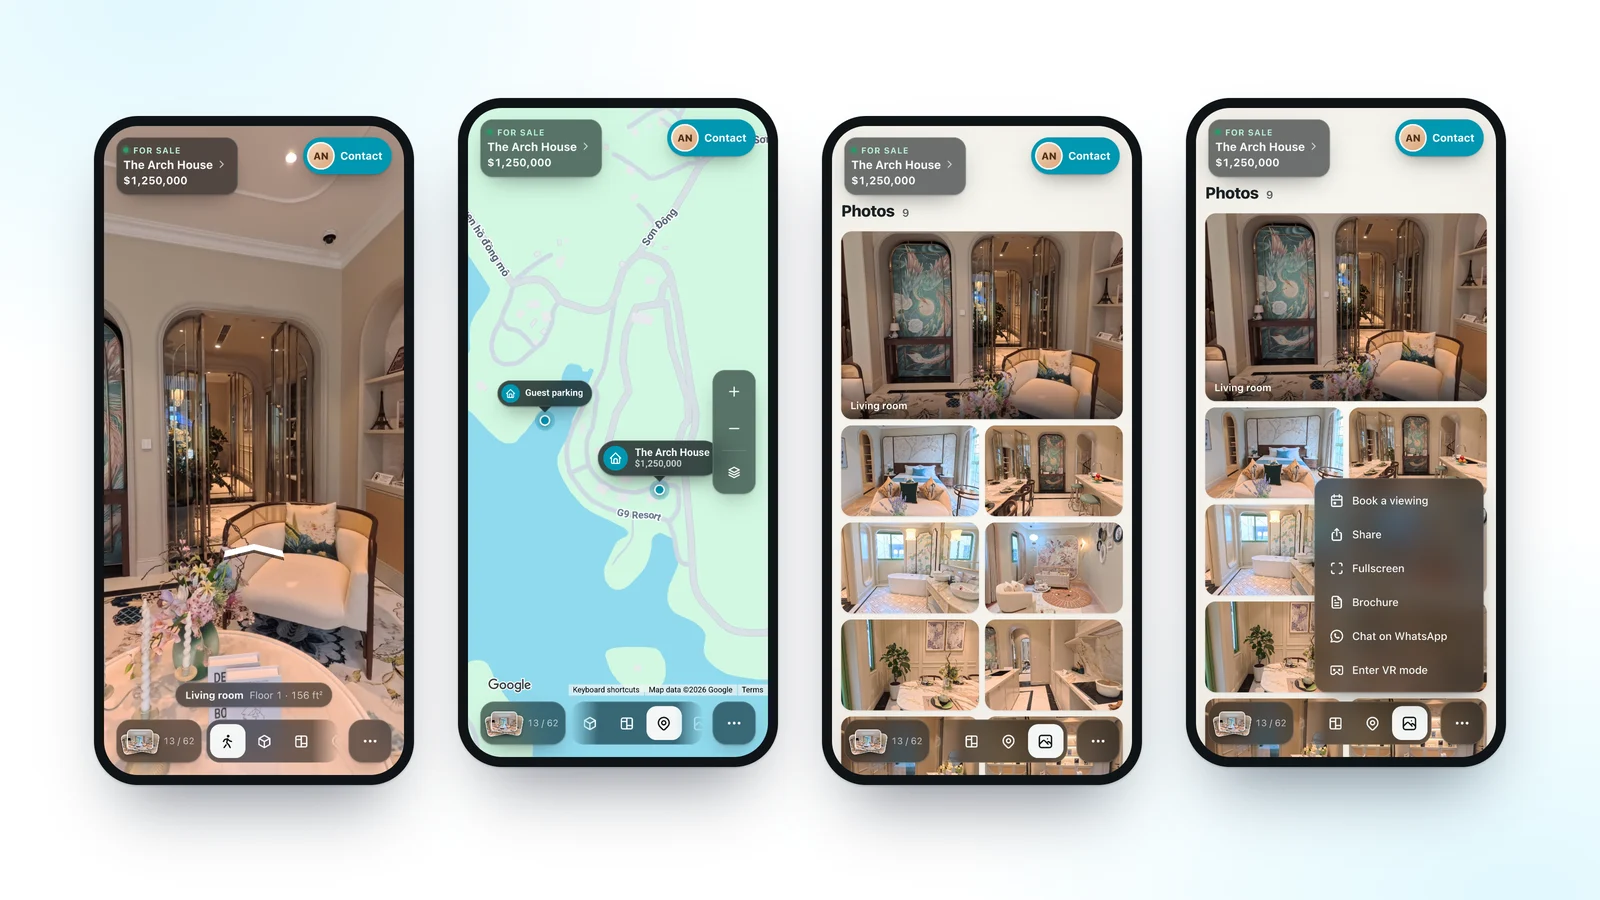
Visitors see each marker as a tag with a house over its spot, and the home’s tag shows the price from your listing. They zoom with + and −, switch to satellite, and click a marker to see it up close.
Add a Photos tab
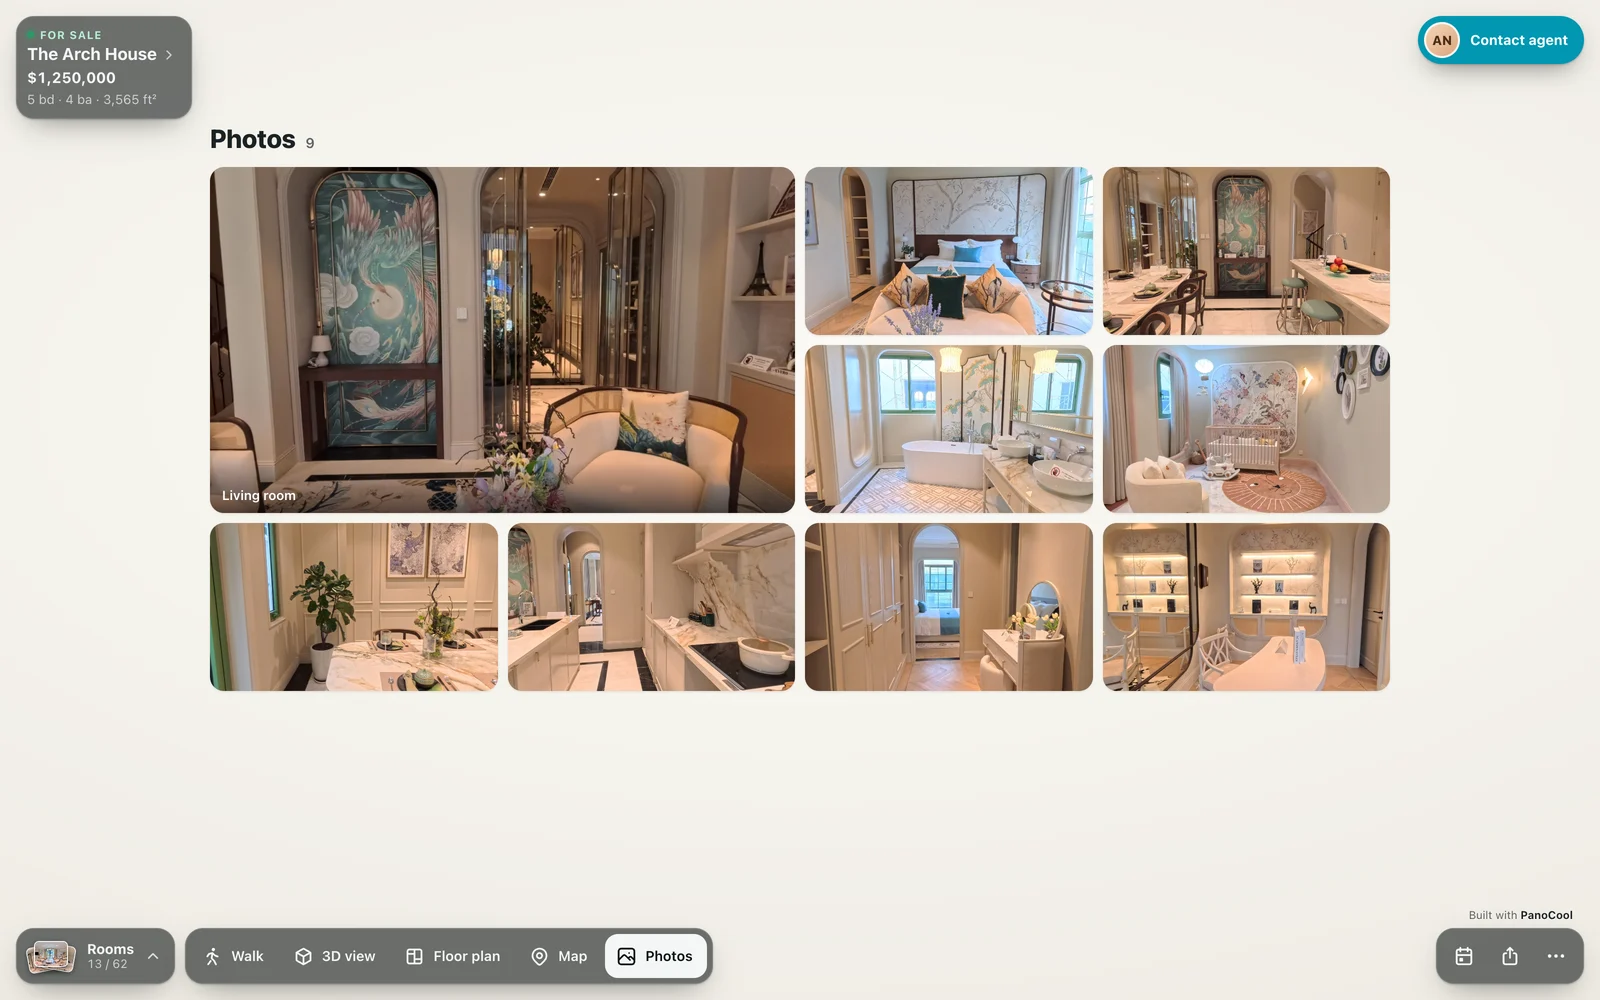
A Photos tab shows the home’s photos in a grid, the first one large. Visitors click a photo to see it full screen with its caption, then swipe or use the arrows for the rest.
- In Theme › Tabs and buttons, click Add a tab, then Photos.
- Upload the photos, add captions and drag them into order.
On Super Cool and Business, you can click Choose existing gallery… instead, to show a gallery you’ve already made.
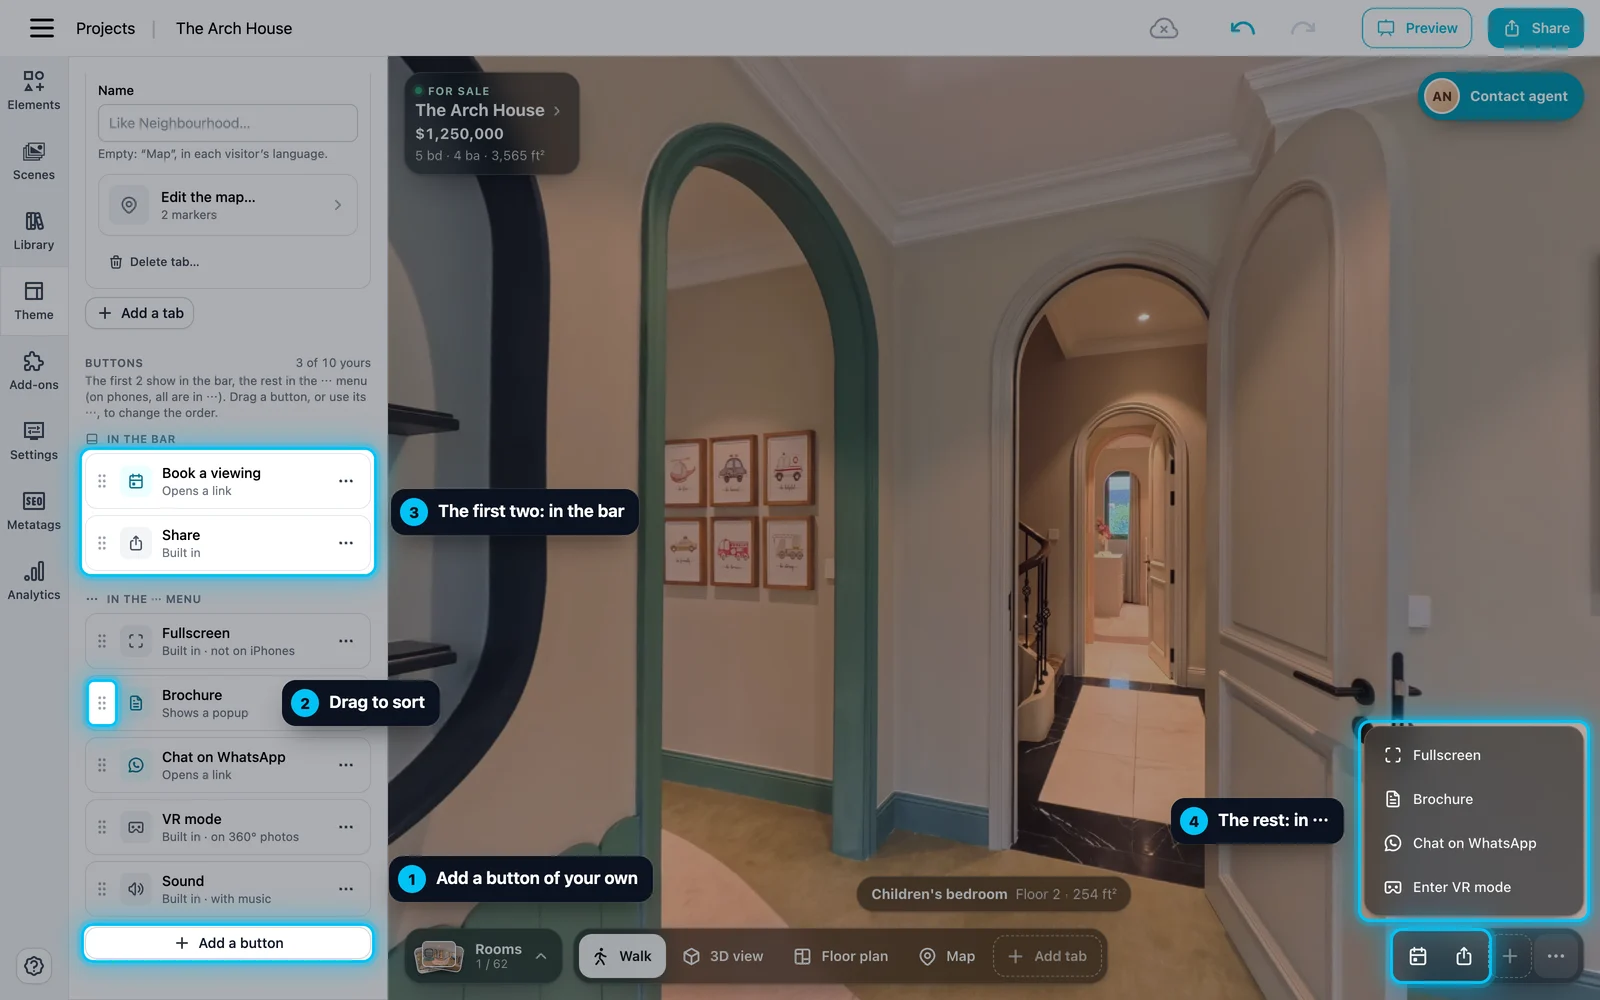
Your own buttons, in the order you choose
Add up to 10 buttons at the bottom right, like “Book a viewing” or “Chat on WhatsApp”. They work like the action buttons in our other themes.
- In Theme › Tabs and buttons, click Add a button under Buttons.
- Choose what a click does: go to another panorama, show a popup, open a link, show a photo gallery, play a slideshow, or show a map of where the photos were taken.
- Pick an icon or text, add a tooltip, and click Save.
Then drag the buttons into the order you want. Share, Fullscreen, VR mode and Sound move too. The first two show in the bar, and the rest wait in the ⋯ menu.
A button shows only where it works, such as VR mode on 360° photos. When one is missing, the next one moves up into the bar.
On phones
On a phone, the row of tabs scrolls sideways, so every tab stays one swipe away. All the buttons wait in the ⋯ menu, and the map and the photos fill the screen.
Get started
Open a tour in the editor and click Theme. Not on Open House yet? Click Browse themes and choose Open House, then open Tabs and buttons.
On the free plan? Tabs and buttons come with Cool, Super Cool and Business: see plans.
Every setting is in the step-by-step guide, and the PanoCool Assistant in the app can answer your questions about it.