How to Create a Day & Night Effect for 360 Photos
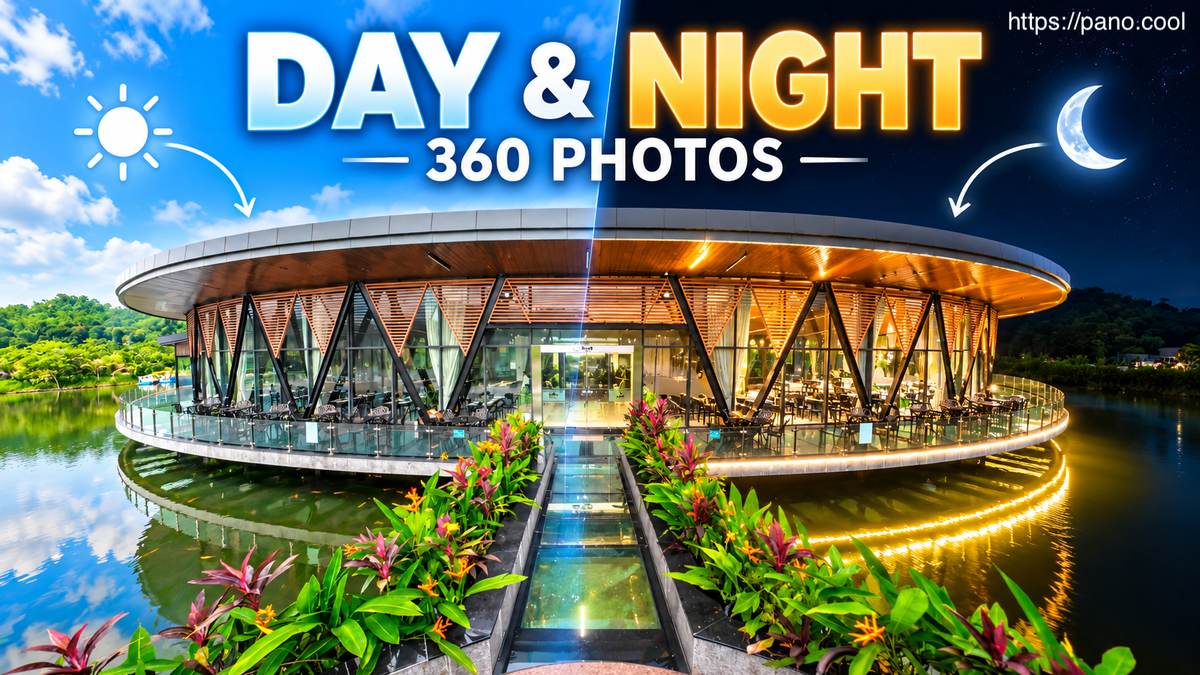
A single 360 photo can already give visitors a good sense of a place, but sometimes you want to show how the same location changes throughout the day.
For example, a restaurant may feel completely different at night when the lights come on. A resort may look brighter and more open during the day, while the evening atmosphere feels warmer and more relaxing.
With PanoCool, you can place two 360° photos of the same location side by side and let visitors switch between them with a simple Day / Night button.
In this guide, we’ll show you how to create that effect.
What You Need
You’ll need two 360° photos captured from approximately the same position:
- One daytime panorama
- One nighttime panorama
For the example in this tutorial, both photos were captured at the same restaurant using an Insta360 X6.
The camera does not need to be pointing in exactly the same direction when each photo is taken. PanoCool allows you to align the panoramas afterward.
Step 1: Upload Your Day and Night 360° Photos
Start by uploading both panoramas to your virtual tour in PanoCool Studio.
You can create or open your project at: https://pano.cool
Once uploaded, you should have two scenes showing the same location at different times of day.
Step 2: Create a Comparison
Find your daytime scene and click the three-dot menu, select Make Comparisons
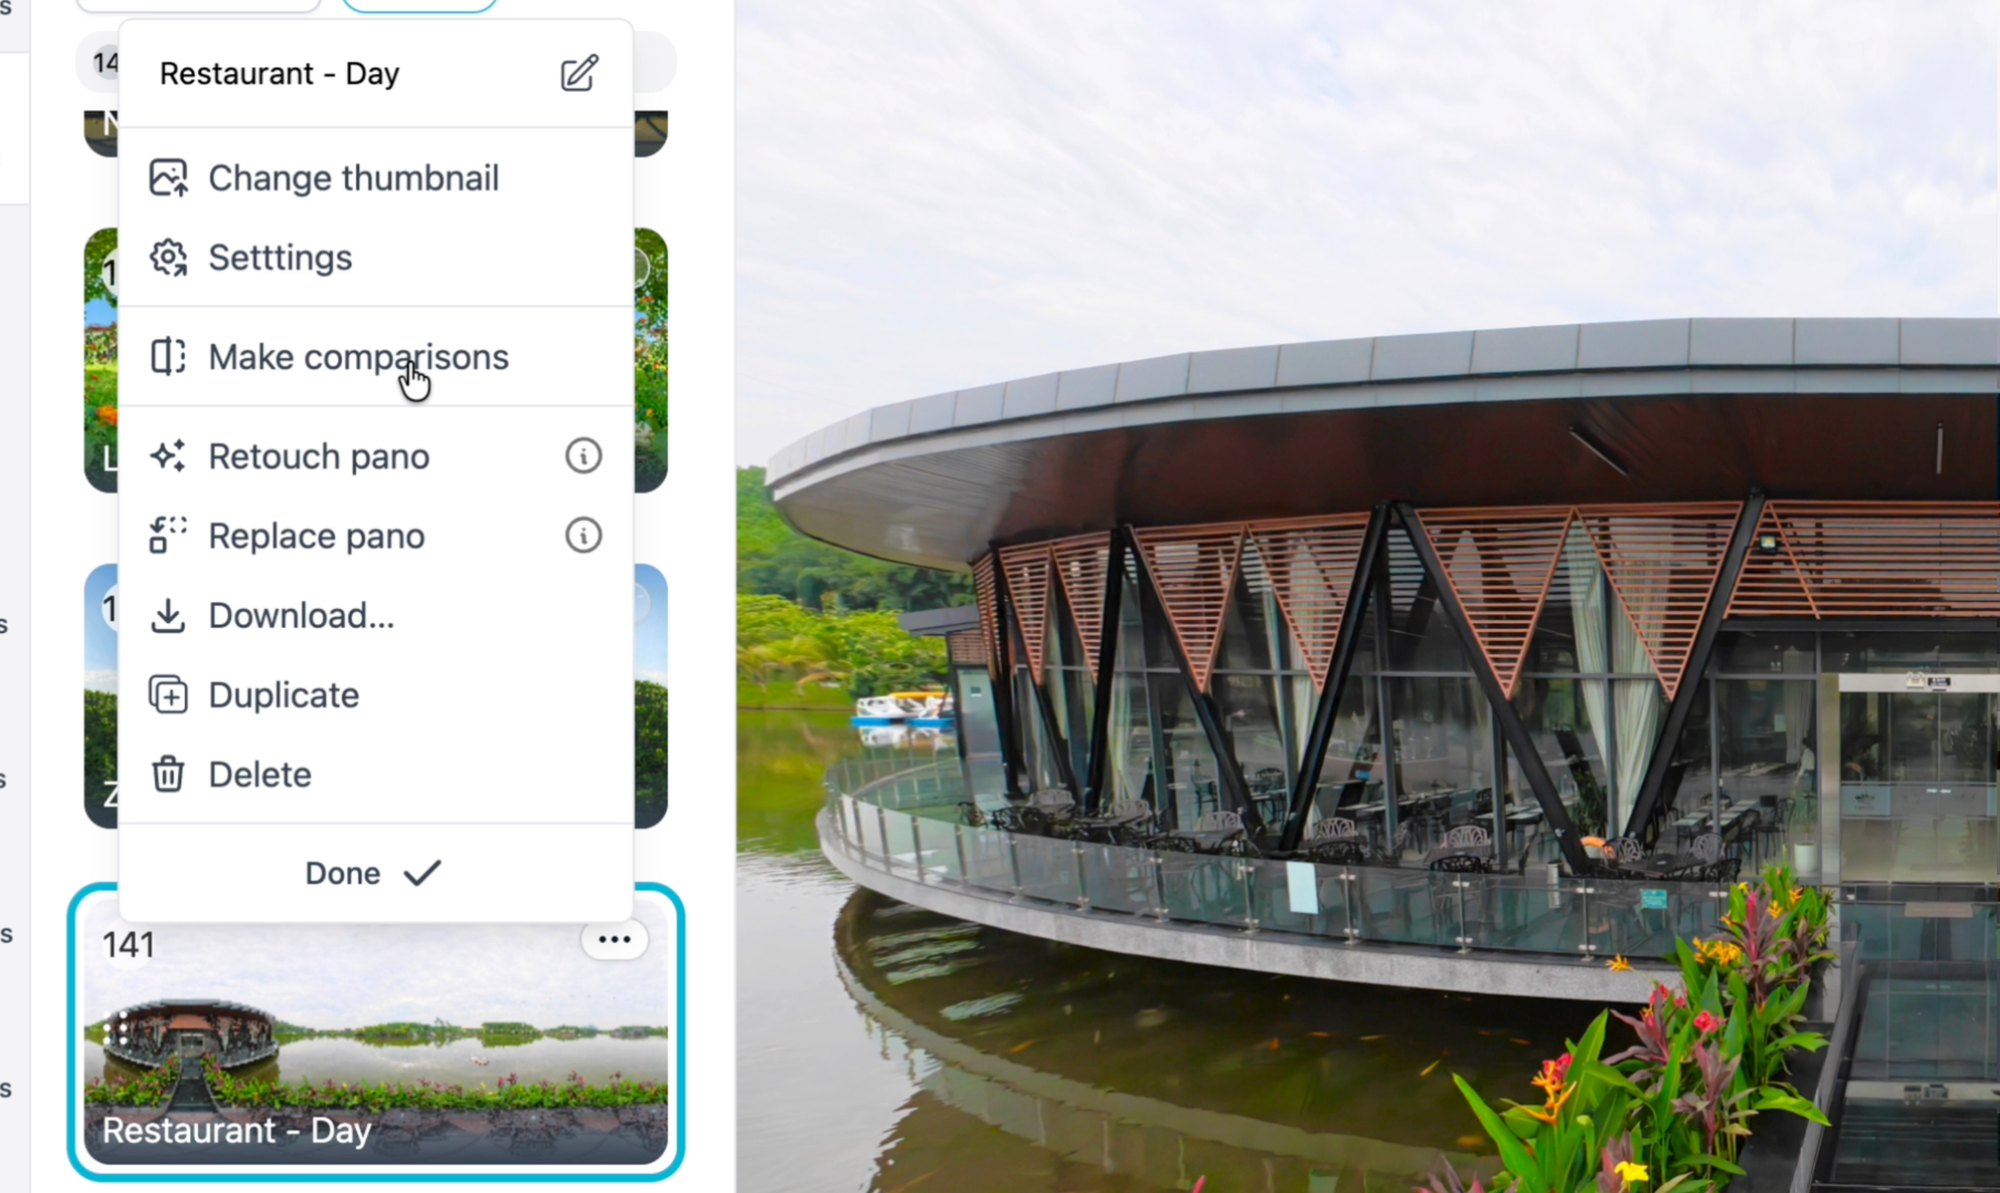
PanoCool will ask you to choose another scene to compare with the current one.
Since our current panorama is the daytime photo, we’ll select the nighttime panorama. The two scenes are now connected as a comparison. Visitors will be able to switch between them without navigating away from the current view.
Step 3: Customize the Day and Night Buttons
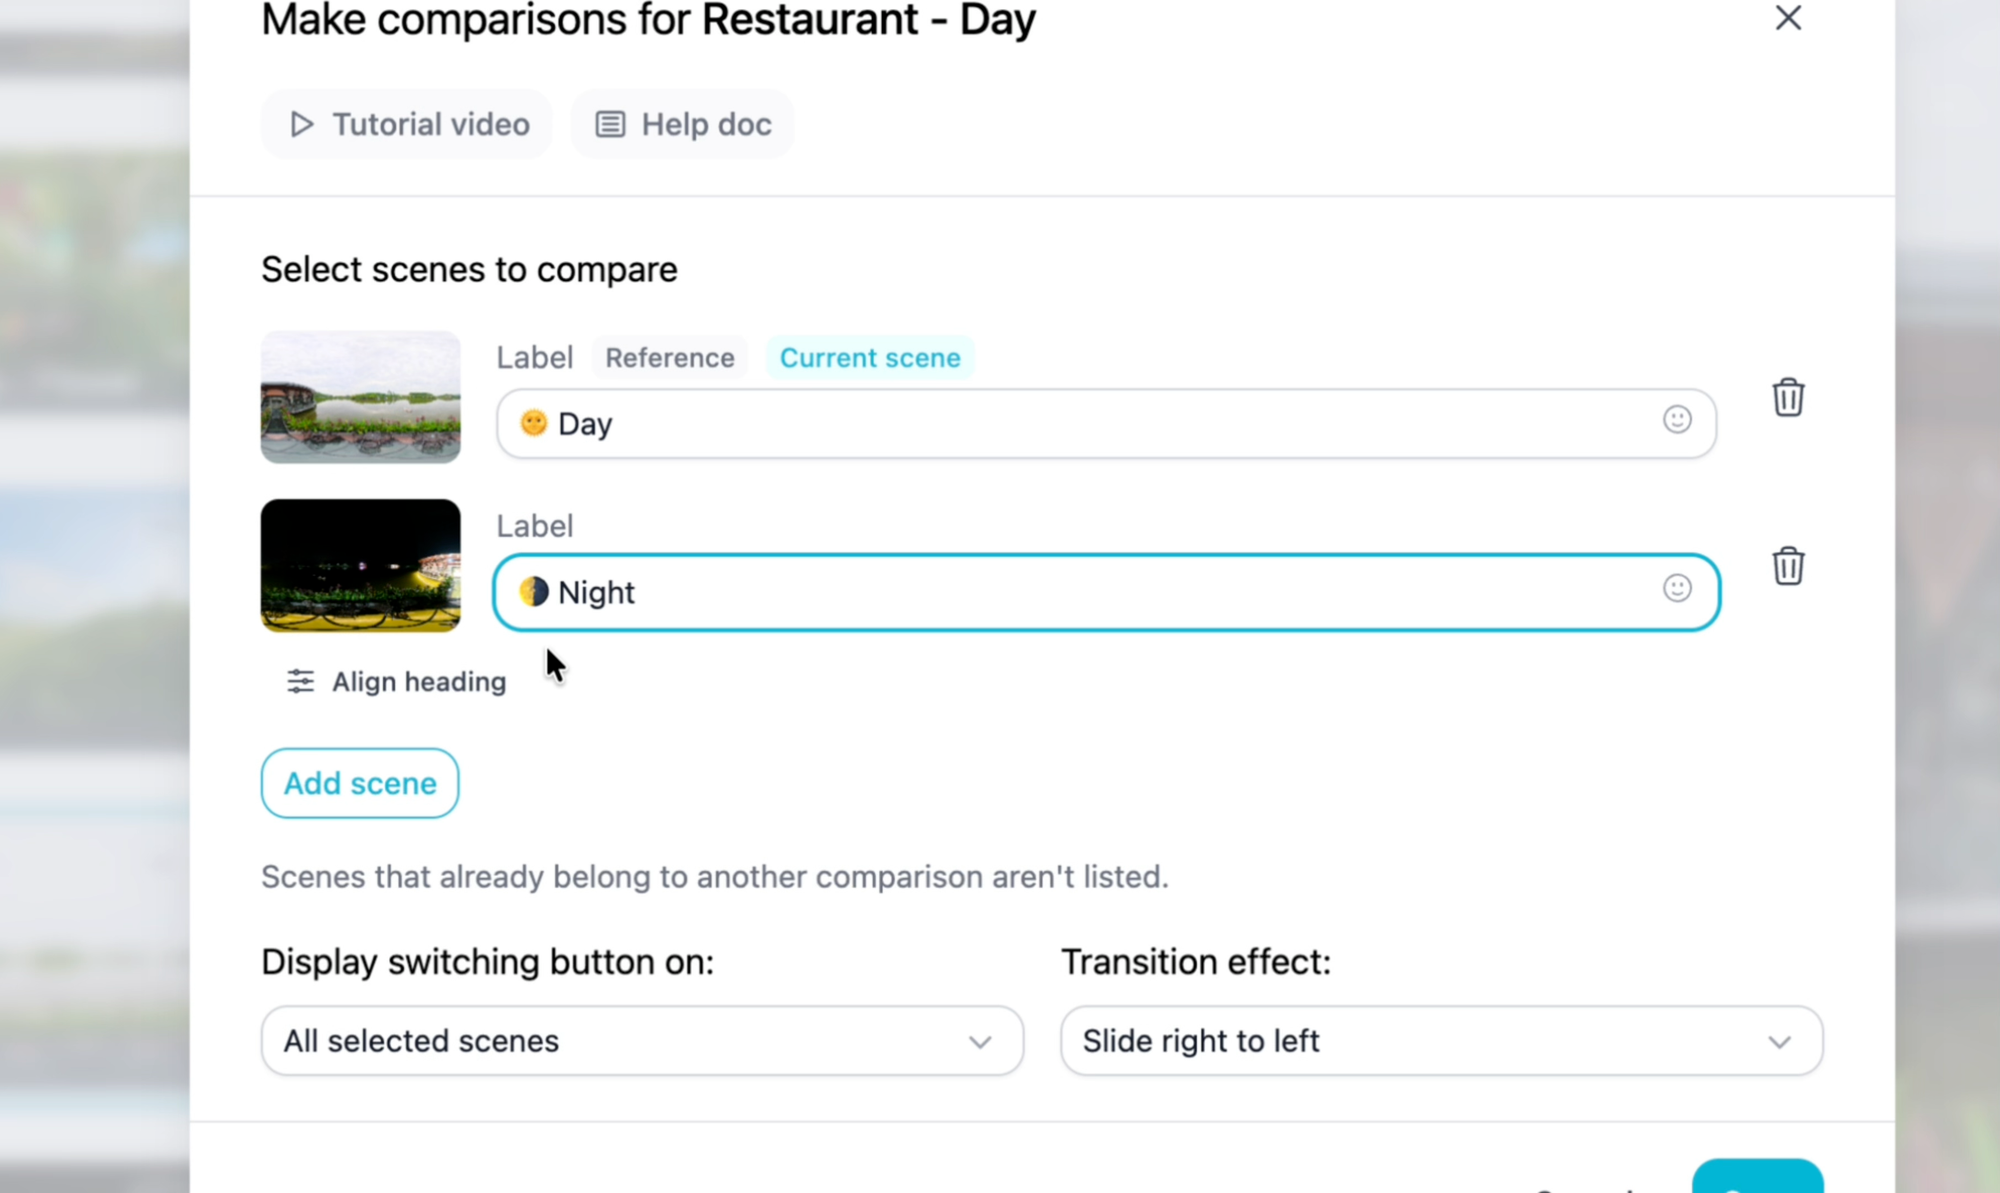
Next, customize the labels that visitors will use to switch between the two scenes.
Instead of using long scene names, simple labels usually work better. For example: Day ☀️ , Night 🌙
You can shorten the labels to Day and Night, then add a sun and moon icon to make the controls easier to understand at a glance. This is especially useful on mobile devices where you want the interface to stay clean and compact.
Step 4: Align the Two 360° Photos
Even when two panoramas are captured from the same position, they may not have exactly the same starting direction.
You may notice this immediately when switching between the images. A building, doorway, table, or another object may suddenly shift sideways.
To fix this, click Align Heading.
You’ll see both panoramas so you can adjust their orientation. Drag the second panorama until important features in the two images line up.
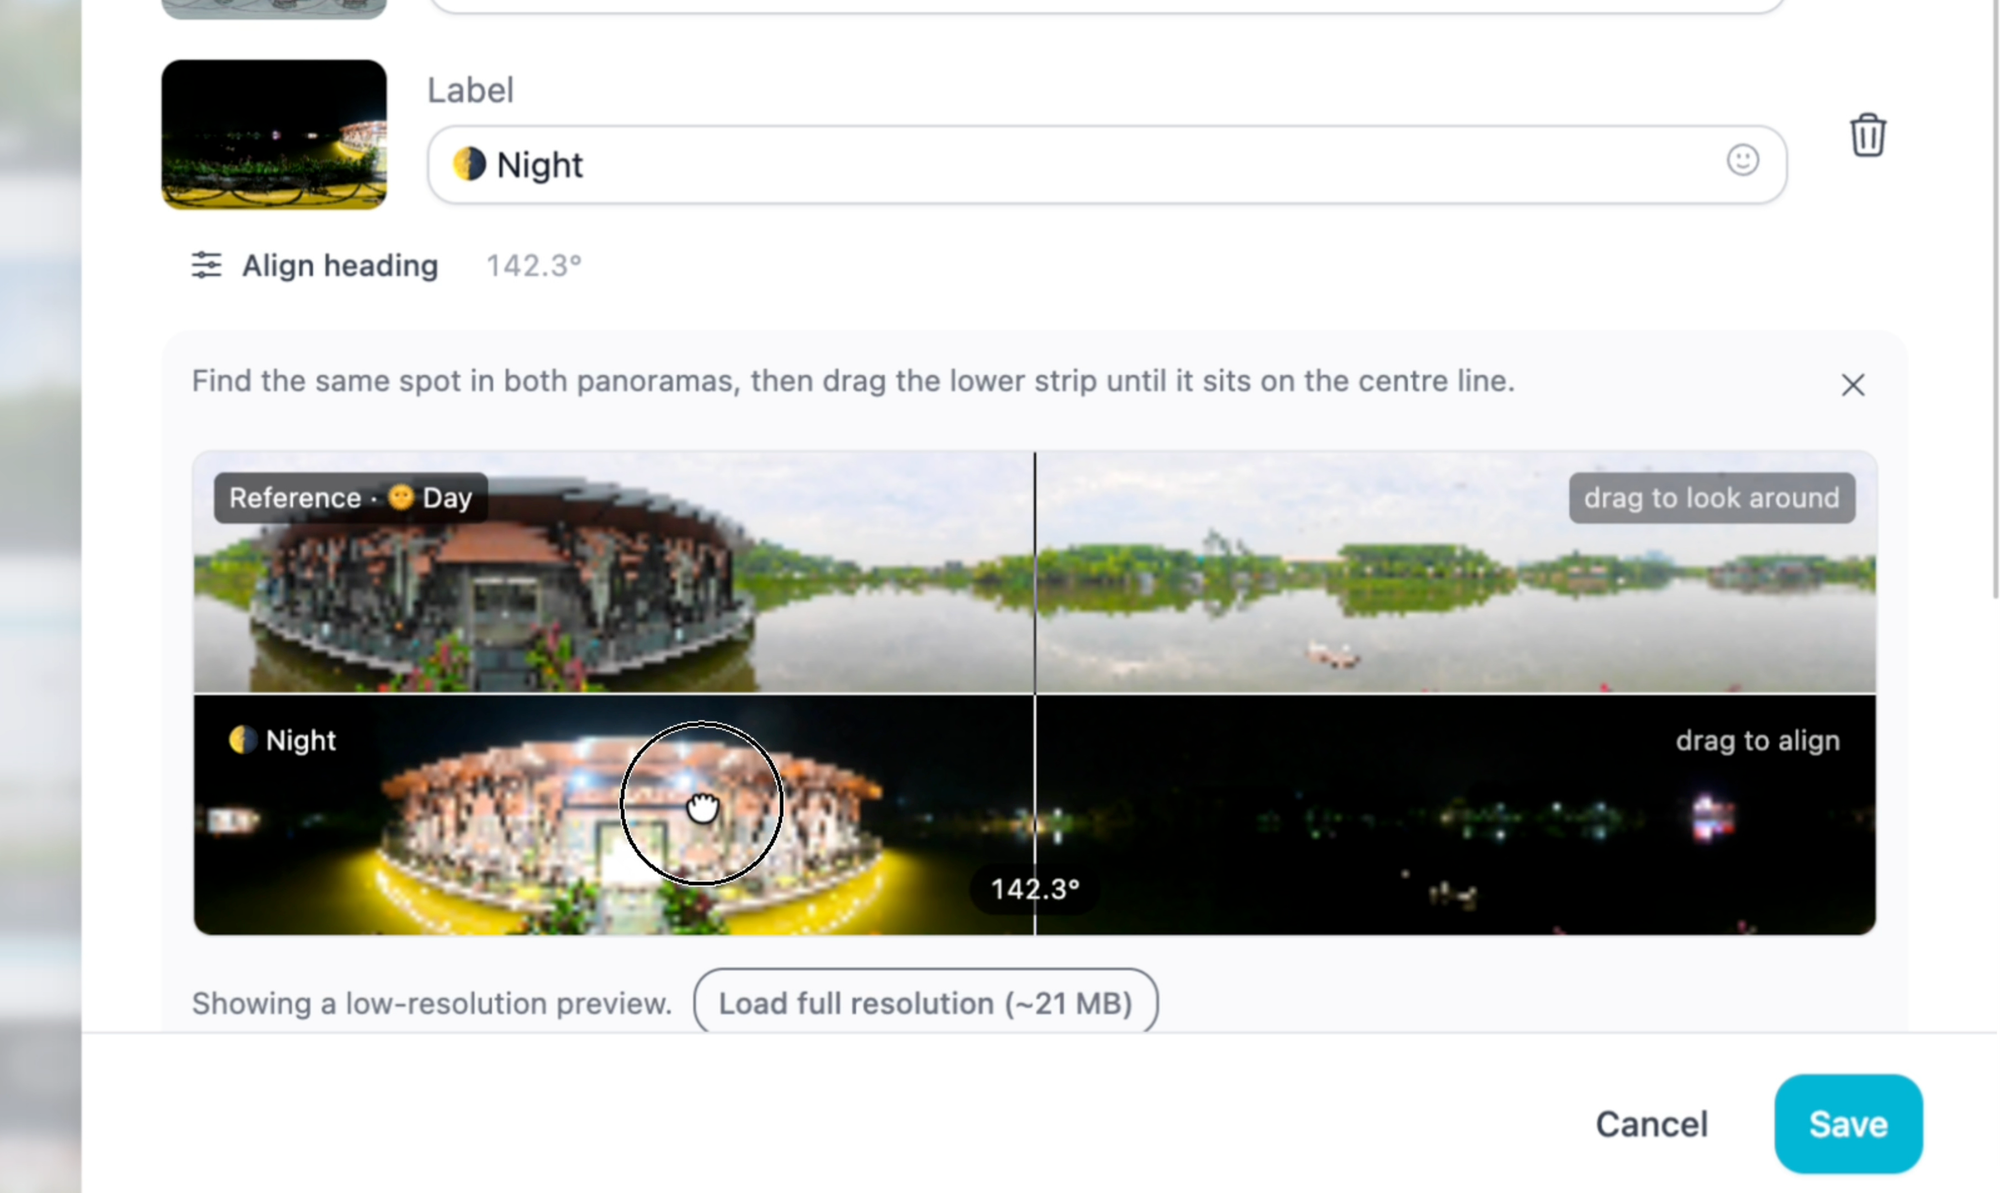
For example, in our restaurant scene, we can use the main entrance and the structure of the building as reference points. Once they match, switching between Day and Night will feel much more natural.
Step 5: Add a Smooth Transition
You can also choose how the change between the two panoramas appears.
For a Day / Night comparison, Fade works particularly well.
Instead of instantly replacing one image with another, the scenes smoothly transition into each other.
This makes the effect feel more polished and helps emphasize how the environment changes between daytime and nighttime.
Step 6: Preview the Result
Click Save, then open Preview.
Try looking in different directions before pressing the Day or Night button.
Because both panoramas are aligned, PanoCool keeps approximately the same viewing direction while switching between them.
Visitors can therefore look at the restaurant, landscape, pool, room, or any other part of the scene and immediately compare how it looks at another time.
More Than Just Day and Night
Although Day / Night is one of the most visually interesting uses of this feature, the same comparison system can be used in many different ways.
For example:
- Before / After — renovations, cleaning, retouching, landscaping, or construction
- Day / Dusk — useful for real estate and architectural photography
- Different Seasons — summer versus winter or dry versus rainy season
- Construction Progress — compare the same location at different stages
- Event Setup — empty venue versus fully prepared event
- Room Configurations — show different furniture layouts or setups
As long as the photos are captured from roughly the same position, they can be aligned to create an interactive comparison.
A Simple Way to Make 360° Tours More Engaging
Day and night photos can tell two very different stories about the same place.
Instead of placing those images in separate scenes and asking visitors to navigate between them, a comparison lets people switch instantly while keeping their current viewing angle.
For hotels, resorts, restaurants, real estate, tourism destinations, and other visual experiences, it is a simple way to make a 360° virtual tour more interactive and help visitors better understand what a place feels like at different times.
You can try it yourself in PanoCool Virtual Tour Studio: https://pano.cool
Watch the Video Tutorial
Prefer to follow along visually?
In the video, we go through the complete process, from adding the Day and Night panoramas to aligning their headings and creating the final smooth transition.