How to Remove a Tripod from 360 Photos Without Ruining the Floor Pattern
Removing a tripod is one of the most common retouching tasks when working with 360 photos. But there's an extra challenge when your tripod is sitting on a patterned floor.
Simply erasing the tripod isn't enough. The missing area needs to be reconstructed so that the lines, shapes, colors, and repeating pattern of the floor continue naturally.
In this tutorial, I'll show you how I removed a tripod from an 360 photo using AI in PanoCool Retouch, while preserving the patterned floor underneath.
Why Tripod Removal Can Be Difficult on Patterned Floors
When capturing a 360° photo with a tripod, the camera sees almost everything around it — including what's directly underneath.
That usually means the tripod appears at the bottom, or nadir, of the panorama.
On a plain floor, removing it can be relatively straightforward. But look at the floor in this example.
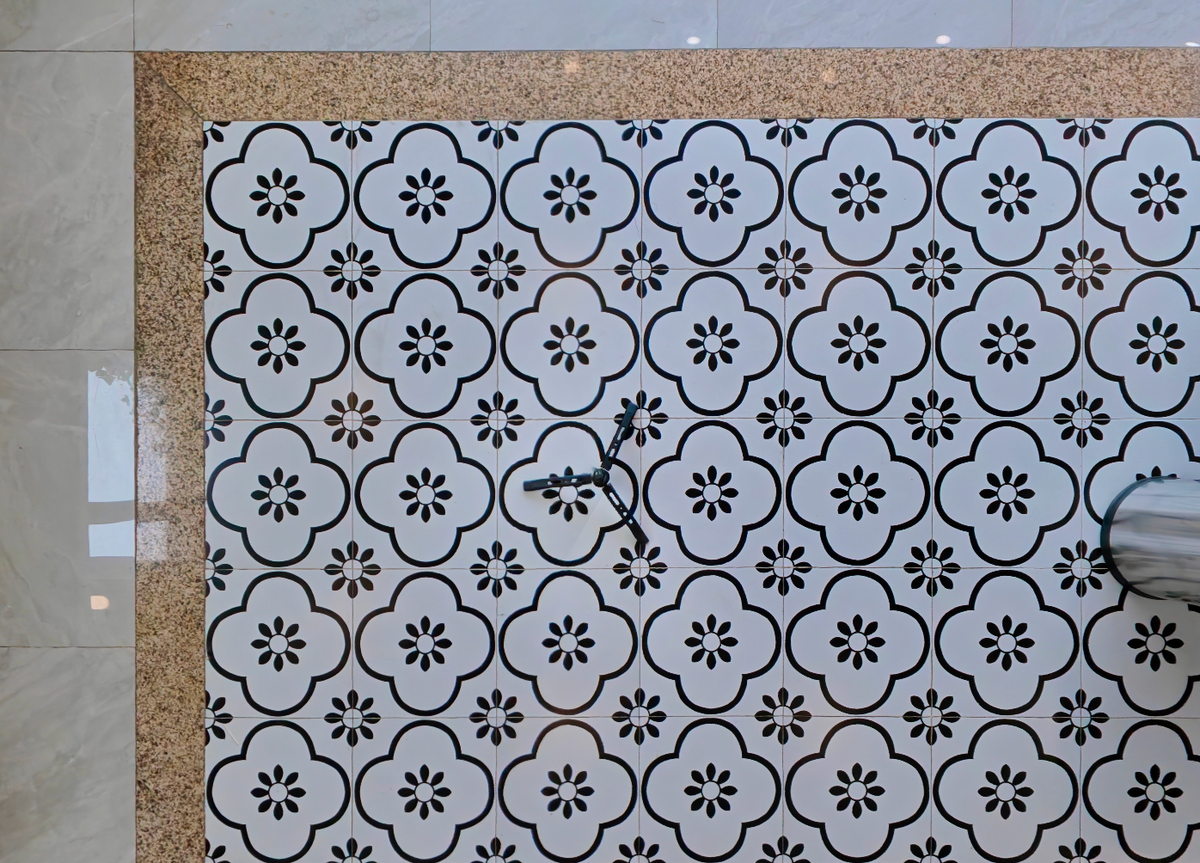
[IMAGE: Original 360 photo showing the tripod on the patterned tile floor]
The tiles contain a repeating floral pattern with dark outlines. The tripod covers several parts of that pattern.
When we remove it, the editor doesn't just need to make the tripod disappear. It also needs to figure out what should have been behind it.
A poor edit could leave blurry areas, broken tile lines, mismatched shapes, or an obvious patch where the tripod used to be.
That's where AI-based reconstruction can be particularly useful.
Step 1: Open the 360 Photo in PanoCool Retouch
Start by opening PanoCool Retouch.
You can drag and drop your 360 photo into the editor.
Because PanoCool Retouch works directly with 360 photos, you can navigate around the panorama and edit the tripod from the normal interactive 360 view.
Rotate the view downward until you can clearly see the tripod.
Step 2: Select the Tripod with AI Edit
Click AI Edit from the editing tools.
Then drag your mouse over the tripod to select the area you want AI to modify.
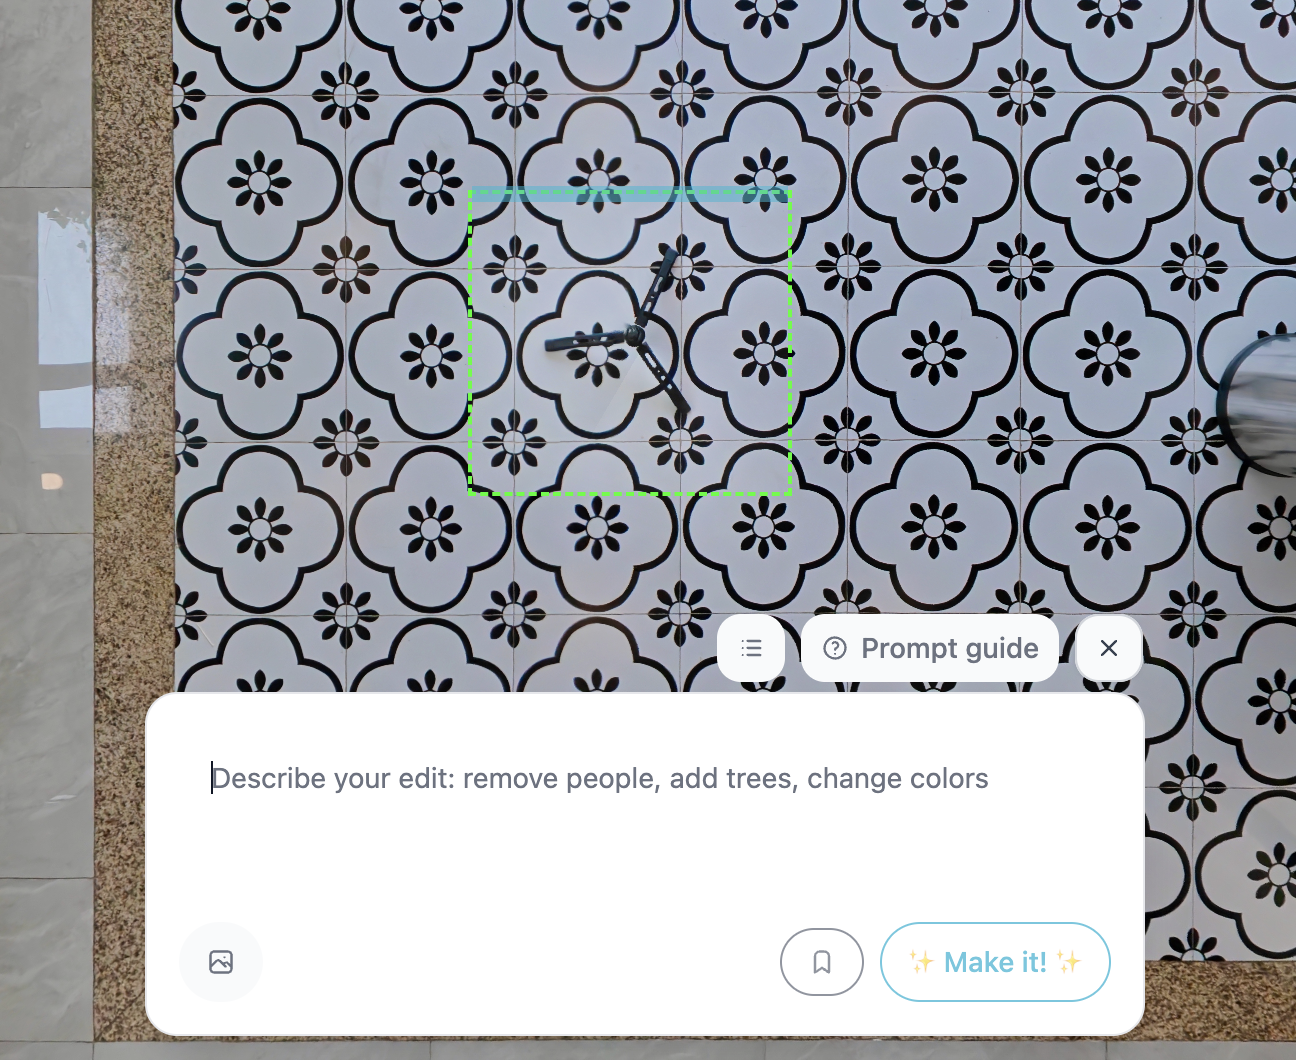
Try to include the complete tripod in your selection while keeping the selected area reasonably tight.
This gives the AI the surrounding floor tiles as visual context, which can help it understand how the missing area should look.
Step 3: Tell AI to Remove the Tripod
Once you've selected the area, enter a simple prompt:
Remove the tripod
Then click Make it.
PanoCool Retouch will process the selected area using AI.
Wait a few seconds for the result.
Step 4: Check the Reconstructed Floor Pattern
Here's the interesting part.
The tripod is gone, but instead of leaving an empty, blurred, or obviously edited area, AI attempts to reconstruct the floor underneath it based on the surrounding tiles.
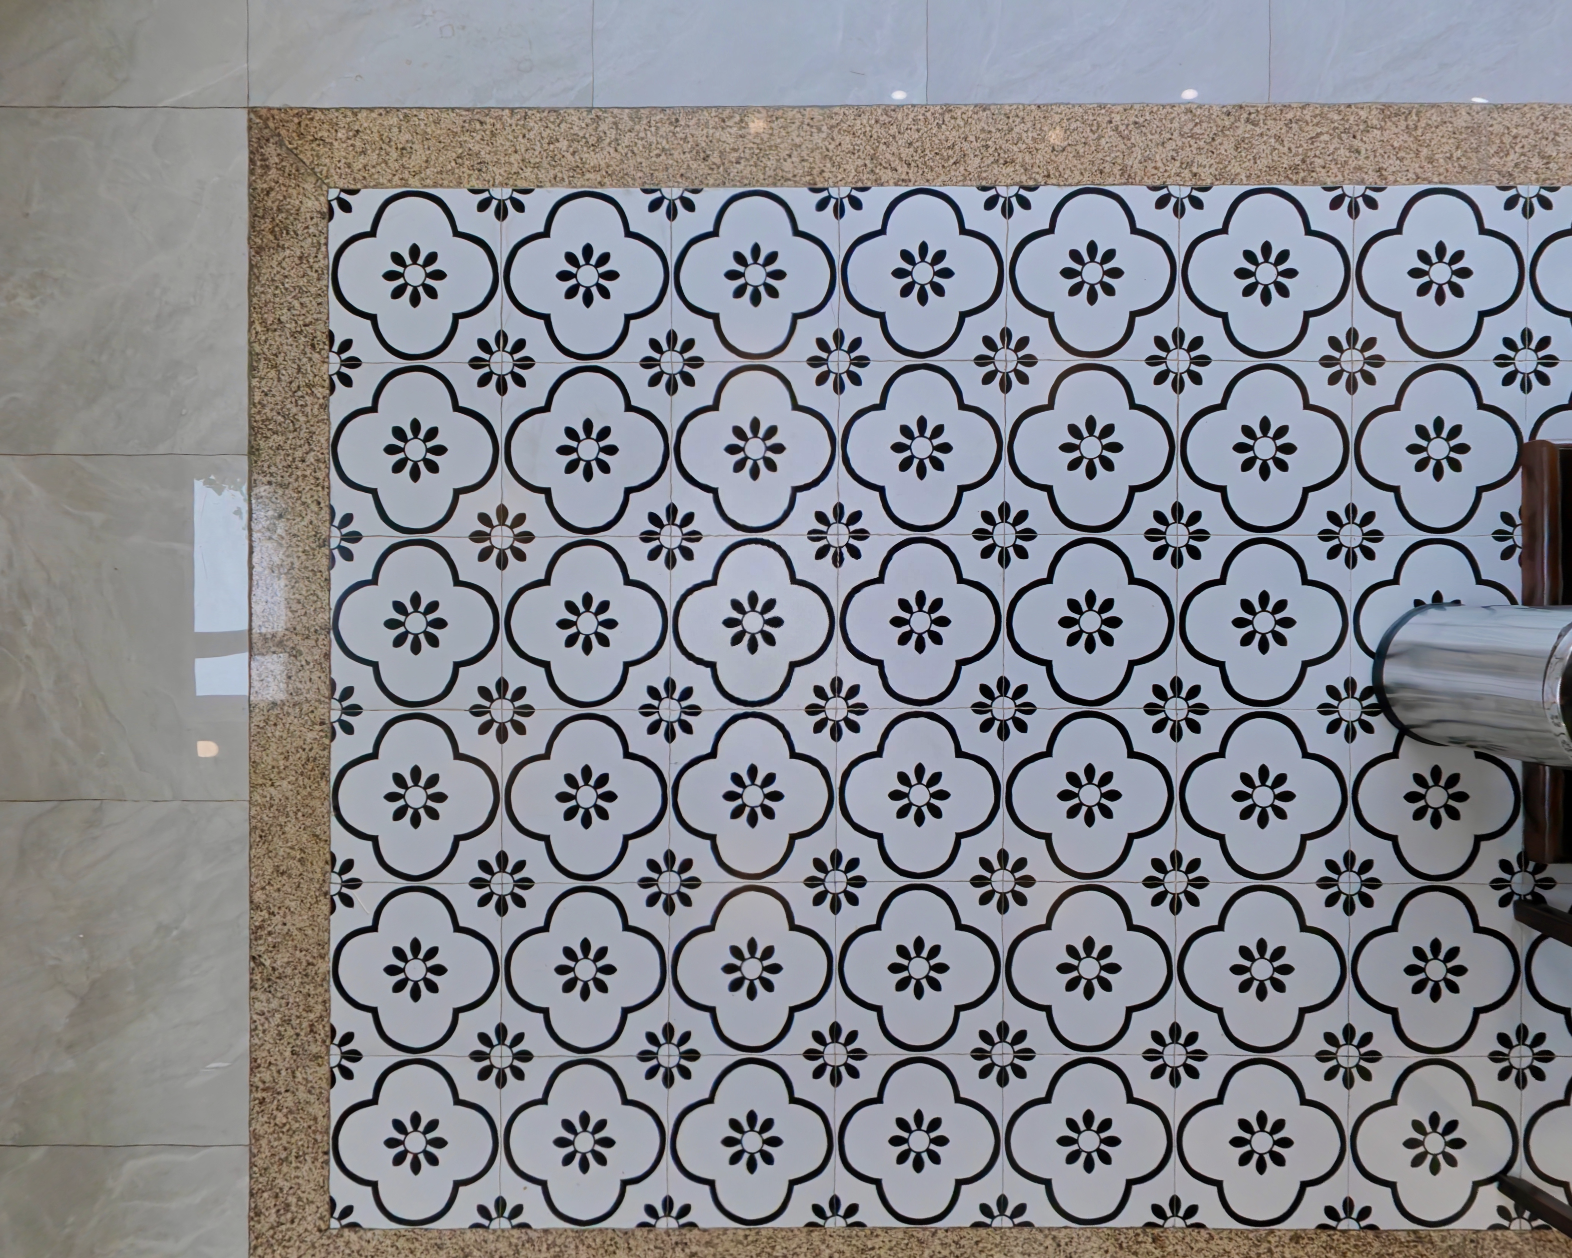
In this example, the repeating tile pattern continues through the area where the tripod was positioned, making the edit blend naturally with the rest of the floor.
When checking your own result, pay particular attention to repeating details such as tile boundaries, geometric lines, flowers or decorative elements, wood grain, carpet patterns, and other textures.
The more complex the surface, the easier it is to notice an incorrect reconstruction.
Step 5: Export the Finished 360 Photo
Once you're happy with the result, click Export.
Wait a few seconds for PanoCool Retouch to process the panorama, and your cleaned-up 360° photo is ready.
You can then use the image in your virtual tour, upload it online, or continue with the rest of your 360 photography workflow.
Why Use AI Instead of a Traditional Tripod Patch?
A common way to hide a tripod is to cover the nadir with a logo or circular patch. That works well in many situations, particularly when you want to add branding.
But sometimes you want the photo to look as though the tripod was never there at all.
Traditionally, that can require manually cloning nearby pixels and carefully reconstructing the floor in an image editor. Repeating patterns can make the process especially time-consuming because small alignment mistakes are easy to notice.
With AI Edit, the workflow becomes much simpler:
Select the tripod → describe what you want removed → generate → check the reconstruction.
For complicated floors, you should still inspect the generated result carefully. AI can produce different results depending on the photo and the amount of visual information available around the tripod.
This Works Beyond Tile Floors
The same technique isn't limited to the patterned tiles in this example.
You can try AI tripod removal on different surfaces, including wooden floors, carpets, grass, pavement, concrete, marble, and other textured or repeating surfaces.
And the same AI Edit workflow can be used for more than tripods. You can select unwanted people, camera reflections, shoes, cables, small objects, or other distractions and tell AI what you want removed.
Final Result
For this 360 photo, the challenge wasn't simply making the tripod disappear. It was removing it without destroying the repeating pattern of the floor underneath.
Using PanoCool Retouch, the process only required a few steps:
Open the 360 photo → AI Edit → select the tripod → “Remove the tripod” → Make it → Export.
The AI handles both the removal and reconstruction of the selected area, which can save a lot of manual retouching—especially when you're working with patterned or textured surfaces.
You can try it with your own Insta360 X6, X5, X4, or other 360° photos using PanoCool Retouch.